On A Quest For The Perfect Numpad

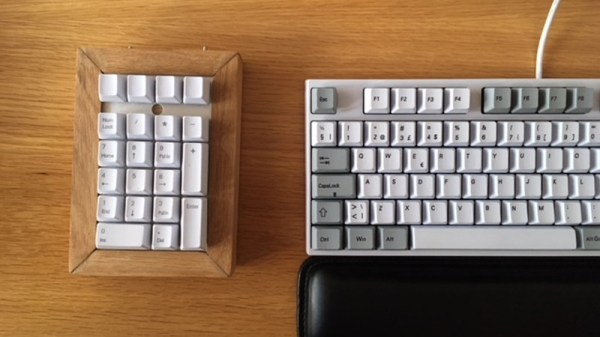
Often times, the only way to get exactly what you want in a device is to just build it yourself. Well, maybe not the only way, but we’ve all certainly told ourselves it was the only way enough that it might as well be true. We don’t know if the DIY imperative felt by [Olav Vatne] to construct his own Bluetooth mechanical number pad was genuine or self-imposed, but in either event, we’re glad he documented the process for our viewing pleasure.

Broken up into three separate posts on his blog, the construction of his custom numpad starts innocently enough with buying a kit from AliExpress. In a rather bizarre twist, the kit arrived assembled, which lead to an arduous period of desoldering to separate all the principle parts [Olav] wanted in the first place. So much for saving time.

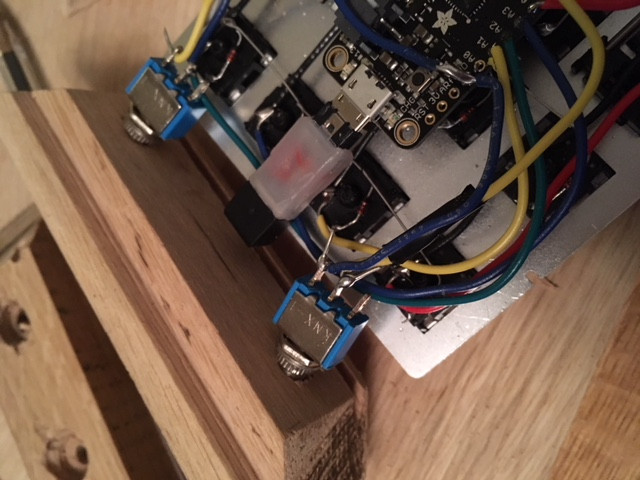
Once he freed all the mechanical keys from the kit’s PCB, he went to town hand-wiring the matrix. After testing to make sure all the keys were wired correctly, the matrix got connected to an Adafruit Feather 32u4 Bluefruit. With the electronics sorted, [Olav] moved on to the software side. Here he was able to accomplish one of his primary goals, having a numpad that works over both USB and Bluetooth.

The last step of the process was creating the wooden enclosure. It basically goes together like a picture frame, with special care given to make sure there are appropriate openings in the case for the switches and USB port to pop through without ruining the overall look of the device.

Thanks to cheap USB-capable microcontrollers, hand-made artisan keyboards are now a thing. This project is a nice way to get started with custom input devices, and it only gets better from here.

The White Rabbit Nixie Clock

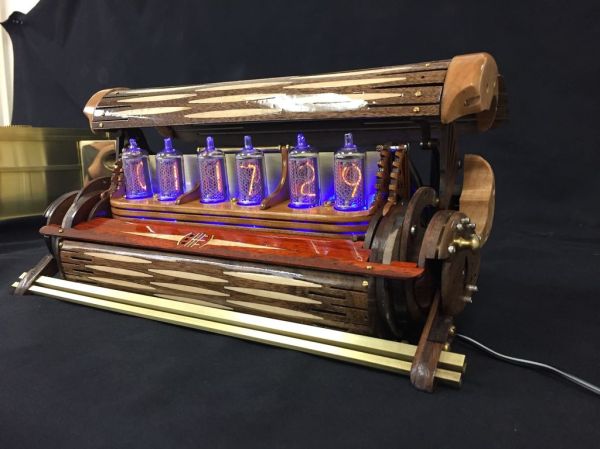
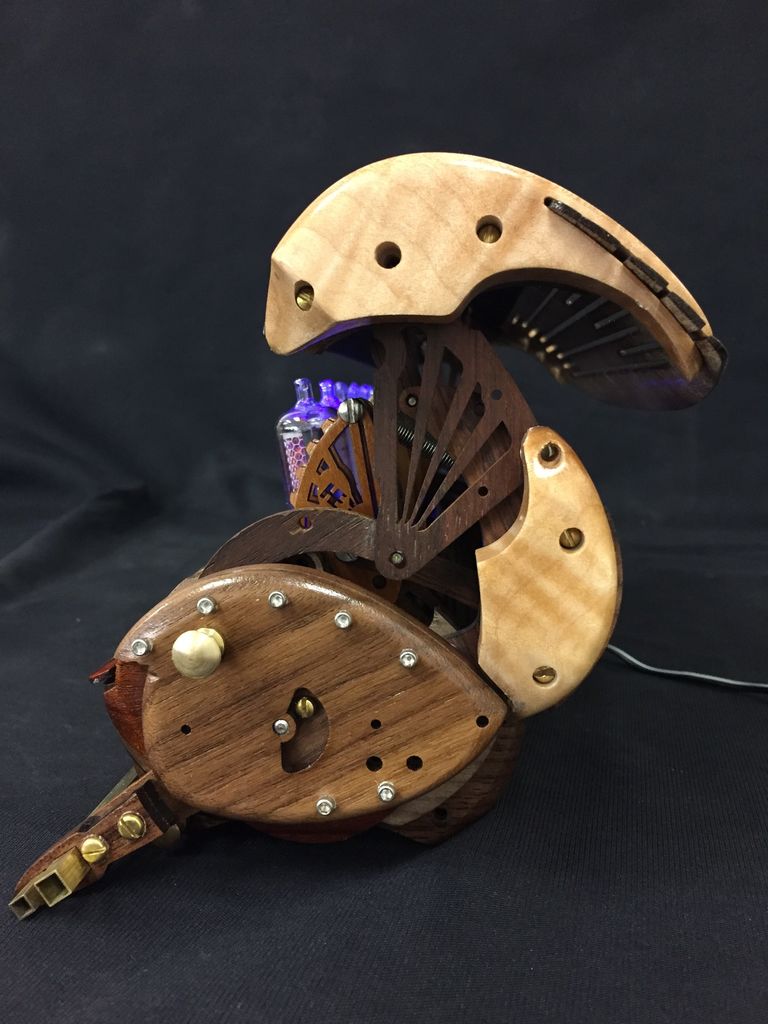
Instructables user [hellboy] — a recent convert to the ways of the laser cutter — is a longtime admirer of Nixie tubes. In melding these two joys, he has been able to design and build this gorgeous work of art: The White Rabbit Nixie Clock.

Going into this build, [hellboy] was concerned over the lifespan of the tubes, and so needed to be able to turn them off when not needed. Discarding their original idea of having the clock open with servos, [hellboy]’s clock opens by pressing down on a bar and is closed by snapping the lid shut — albeit slightly more complicated than your average timepiece. Given the intricacy of the mechanism, he had to run through numerous prototypes — testing, tweaking and scrapping parts along the way.

With the power of steam-bending, [hellboy] lovingly moulded walnut planks and a sundry list of other types of wood to define the ‘rabbit’ appearance of the mechanism, and the other parts of the clock’s case. Once again, designing the clock around a row of six pivoting Nixie tubes was no mean feat — especially, as [hellboy] points out, when twenty or so wires need to rotate with them! After a few attempts, the Nixie tubes, their 3mm blue LEDs and associated wires were properly seated.

Continue reading “The White Rabbit Nixie Clock”

Pulling Music Out Of Thin Air With A Raspberry Pi

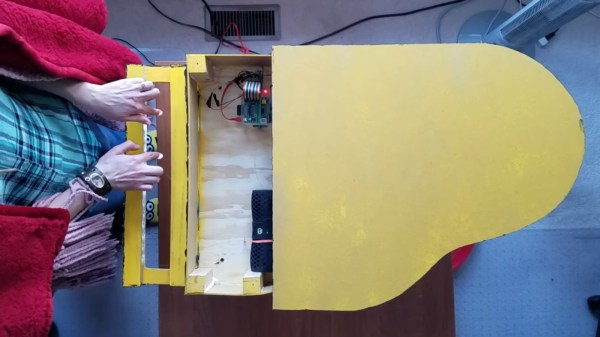
Pianos are great instruments, but being rather heavy and requiring a fair amount of space they are certainly not known for their convenience. Sure, there are more portable varieties available, but they rarely resemble the elegance and classiness of a grand piano. One option is of course to build a downscaled version yourself — and since you’re already customizing the instrument, why stop at the way you play it. [2fishy] didn’t stop there either and ended up with a wooden, space friendly, light controlled piano housing a Raspberry Pi.

Inspired by the concept of a laser harp, [2fishy] followed the same principle but chose a simpler and safer alternative by using LEDs instead. For each playable tone, a LED is mounted opposite a light dependent resistor, creating an array of switches that is then connected to the Raspberry Pi’s GPIO pins. A Python script is handling the rest, polling the GPIO states and — with a little help from pygame, triggering MIDI playback whenever the light stream is interrupted.

There are enough LED/LDR pairs to play one full octave and have some additional control inputs for menu and octave shifting. This concept will naturally require some adjustments to your playing — you can get an idea of it in the demonstration video after the break. And if this design is still not the right size for you, or if you prefer to play in total darkness, this similar MIDI instrument using ultrasonic distance sensors could be of interest.

Continue reading “Pulling Music Out Of Thin Air With A Raspberry Pi”

AT-ST High Chair Elevates Lucky Jedi Youngling

As a new parent, there’s lots you have to do. You have to buy a car seat, get the baby’s room ready, figure out daycare; all the boring but unavoidable minutiae of shepherding a tiny human. But for the more creative types, that list might include warming up the 3D printer or putting a fresh bit in the CNC, as there’s no better way to welcome a little one into the world than giving them some custom gear to get started with.

That’s certainly been the plan for [Matthew Regonini], who’s been showering his son with DIY playthings. He recently wrote in to tell us about his awesome AT-ST high chair build that manages to turn the drudgery of getting a baby to eat into an epic worthy of a John Williams score.

This isn’t the first time [Matthew] has turned dead trees into Imperial hardware. Last year we covered his fantastic AT-AT rocker which utilized the same construction techniques. The parts are cut out of plywood with his CNC, separated, cleaned up on a spindle sander, and finally assembled with wood glue and a few strategic fasteners. The depth and level of detail he’s able to achieve when the individual pieces are stacked up is exceptionally impressive. If builds like these don’t get you thinking about adding a CNC to your workshop, nothing will.

As with the AT-AT, the finish on the high chair is simply a healthy application of polyurethane. This keeps the wood from being porous (important as this build will be seeing its fair share of food and liquids) while retaining a natural look. Some might be tempted to paint it up in appropriate Imperial colors, but that might be a bit imposing considering its intended occupant.

Really, the only downside with this build is how quickly his son will outgrow it. The obvious solution to the problem is a constant supply of fresh babies to pilot it, but that’s one type of creation that we don’t generally detail here on Hackaday. If you have questions, ask your parents.

Incidentally, it’s starting to look like we’ve got a plywood arms-race going on. We’re excited to see somebody take it to the next level. A little scared, but mainly excited.

Continue reading “AT-ST High Chair Elevates Lucky Jedi Youngling”

Interactive LED Table

Some hackers make functional things that you can’t allow to be seen in polite company. Others make beautiful things that could come from a high-end store. [Marija] falls into the second category and her interactive LED coffee table would probably fetch quite a bit on the retail market. You can see a video of the awesome-looking table, below.

It isn’t just the glass, MDF, and pine construction. There’s also a Bluetooth interface to a custom Android application from [Dejan], who collaborated on the project. However, if you aren’t comfortable with the woodworking, [Marija’s] instructions are very detailed with great pictures so this might be a good starter project.

Continue reading “Interactive LED Table”

Getting To Know An 18th Century Hacker

Here at Hackaday we tend to stay pretty close to the bleeding edge in tech, not by any conscious effort, but simply because that’s what most hackers are interested in. Sure we see the occasional vintage computer rebuild, or reverse engineering of some component that was put into service before most of us were born; but on the whole you’re way more likely to see projects involving the latest and greatest microcontroller to hit AliExpress than ones involving the once ubiquitous vacuum tube.

Bill Maddox

But occasionally it’s nice to take a step back from the latest and greatest, to really look at what makes the hacker spirit without the all modern trappings of blinking LEDs and Wi-Fi connectivity. We make and explore because it’s something we are passionate about, and while today most of us are doing that with a soldering iron or a compiler, that hasn’t always been the case. In the video below, historic interpreter and woodworker [Bill Maddox] talks about what draws him to 18th century technology. His tools may look foreign to us, but the passion he shows while talking about his creations will be familiar to anyone who’s ever set foot in a hackerspace.

Even with a vastly different set of interests than the modern hacker, [Bill] runs into some very familiar problems. When the highly specialized tools he needed to work like an 18th century craftsman weren’t available, he decided to make his own. But to make his own tools he needed to learn how to forge, and after he forged his hand tools he moved on to forging chisels for the lathe he decided to build.

Whether or not we ever take a knife to a piece of wood and try to carve out a spoon, it’s impossible to watch [Bill] speak about his creations and not see him as a kindred spirit. Like many of us, he’s honed skills in a niche that the everyday person takes for granted. Makes you wonder what people from 300 years in the future would think of us if they could peer back through the centuries.

Continue reading “Getting To Know An 18th Century Hacker”

Smartphone Controlled Periodic Table Of Elements

It wouldn’t be much of a stretch to say that here at Hackaday, we’re about as geeky as they come. Having said that, even we were surprised to hear that there are people out there who collect elements. Far be it from us to knock how anyone else wishes to fill their days, but telling somebody at a party that you collect chemical elements is like one step up from saying you’ve got a mold and fungus collection at home. Even then, at least a completed mold and fungus collection won’t be radioactive.

But if you’re going to spend your spare time working on a nerdy and potentially deadly collection, you might as well put it into an appropriate display case. You can’t just leave your Polonium sitting around on the kitchen counter. That’s the idea behind the interactive periodic table built by [Maclsk], and we’ve got to admit, if we get to put it in a case this awesome we might have to start our own collection.

A large portion of this project is building the wooden display case itself as, strangely enough, IKEA doesn’t currently stock a shelving unit that’s in the shape of the periodic table. The individual cells and edge molding are made of pine, the back panel is MDF, and the front of the display is faced off with thin strips of balsa to cover up all the joints. Holes were then drilled into the back of each cell for the LED wiring, and finally the entire frame was painted white.

Each cell contains an WS2812B RGB LED, which at maximum brightness draws 60mA. Given the 90 cells of the display case, [Maclsk] calculated a 5.4A power supply would be needed to keep everything lit up. However, he found a 4A power supply that made his budget happier, which he reasons will be fine as long as he doesn’t try to crank every cell up to maximum at the same time. Control for the display is provided by an Arduino Nano and HC05 Bluetooth module.

The final piece of the project was the Android application that allows the user to control the lighting. But it doesn’t just change colors and brightness, it’s actually a way to visualize information about the elements themselves. The user can do things like highlight certain groups of elements (say, only the radioactive ones), or light up individual cells in order of the year each element was discovered. Some of the information visualizations are demonstrated in the video below, and honestly, we’ve seen museum displays that weren’t this well done.

We last caught up with [Maclsk] when he created a very slick robotic wire cutting machine, which we can only assume was put to work for this particular project. Too bad he didn’t have a robot to handle the nearly 540 soldering joints it took to wire up all these LEDs.

[via /r/DIY]

Continue reading “Smartphone Controlled Periodic Table Of Elements”