Keep Track Of Your Google Calendar With This Custom Build

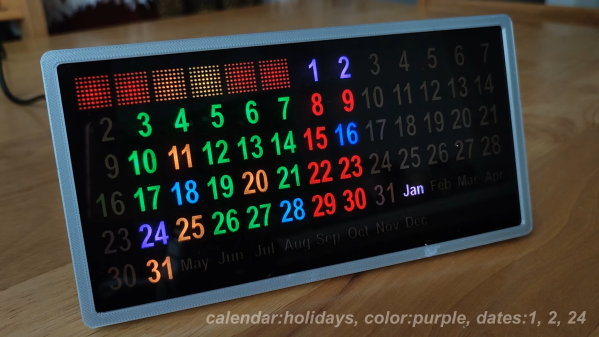
Keeping track of your appointments on Google Calendar is easy enough if you’re holding a phone or sitting at a computer, but sometimes you just want to know what’s going on at a glance. This desktop calendar build from [andrei.erdei] does just that with plenty of helpful LEDs.

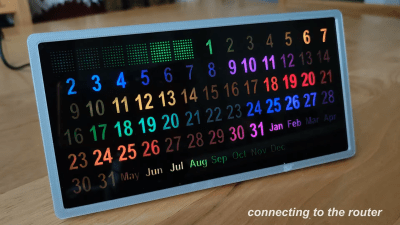
The attract mode is very cool, even if it doesn’t display any actual information.

The design is simple, using WS2812 LEDs to backlight numbers to indicate whether they are weekdays, weekends, anniversaries, holidays, or any other dates of importance. The numerical layout is a nifty perpetual design allowing the display to easily accommodate the structure of any month, even those neat and tidy ones that start on Monday.

The design relies on an ESP-01 to communicate with Google Calendar and display the relevant data. It’s all wrapped up in a 3D printed case, with the printed paper template backlit from behind some smoked acrylic giving a surprisingly professional-looking finish.

If you’re tired of picking up your phone for every last thing, this design could be just what you’re after for keeping track of your appointments. Alternatively, you could always go the hard copy route. Video after the break.

Continue reading “Keep Track Of Your Google Calendar With This Custom Build”

A NeoPixel Punk Console

NeoPixel Punk Console Drives WS2812s Using 555 Timers

NeoPixels, a type of LED strip with individually addressable pixels, are a firm favorite among creators of intricate light effects. They are popular for their versatility and the ease with which you can daisy-chain them. Although the protocol to drive these little LEDs can be rather tricky to implement due to tight signal timing constraints.

However, [Adrian Studer] proved that driving WS2812-based LED strips like the NeoPixel series doesn’t necessarily require hand-optimized assembly code. In fact, it doesn’t require any code at all. He built the NeoPixel Punk Console, a device that creates a light show without even using a microcontroller. Just a handful of 555 timers and some 74HC series logic work together to produce pulses with approximately correct timings.

Operating the device is as easy as tweaking a few potentiometers, just like its namesake the Atari Punk Console. It’s quite a random process though, and it might be impossible to re-create a pattern that you liked. Also, the LEDs mostly light up in primary colors at full power, though [Adrian] plans to make an improved version that drives the red, green, and blue subpixels separately. But the fact that all of this is implemented by just a bunch of 555 timers makes it a rather impressive hack by any standard.

We’ve seen more than a few ways of driving NeoPixels or similar WS2812-based LED strips, though all of them use a microprocessor of some sort; you can fire up a classic 6502, use SPI and DMA on a PIC32, or just plug in a single ARM Cortex M0+.

Continue reading “NeoPixel Punk Console Drives WS2812s Using 555 Timers”

WS2812s On A 6502

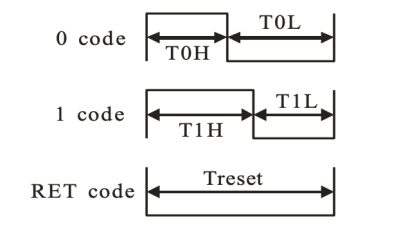
We can still remember when the WS2812 LED first came into our consciousness, way back in the mists of time. The timing diagrams in the datasheet-of-questionable-veracity made it sound quite tricky, with tight timing tolerances and essentially a high-speed two-bit PWM data protocol at 500 kHz. It was a challenge to bit-bang with an ATtiny85 back then, but there’s no way something as old and crusty as an Apple II would be up to snuff, right?

[Anders Nielsen] took up the challenge of getting the venerable 6502 processor to drive Neopixels and won! After all, if the chip is good enough for Bender and the Terminator T-800, it should be able to blink some colored LEDs, right? The secret sauce is shift registers!

Specifically, [Anders] abuses the 74LS165 parallel-in, serial-out shift register for his dirty work. Instead of bit-banging the WS2812’s “long high is a 1, short high is a 0” signal directly, the first few bits of the shift register are hard-wired to VCC and the last few to GND.

The bits in the middle determine if the pulse shifted out is long or short, and they’re set by the 6502, through a 6522 VIA chip, just like the Apple II would have. Clocking the data out of the shift register handles the timing-critical stuff. Very clever!

Video below the break.

Continue reading “WS2812s On A 6502”

FFT display on 16x16 RGB LED grid

Art Project Fast And Fouriously Transforms Audio Into Eye Candy

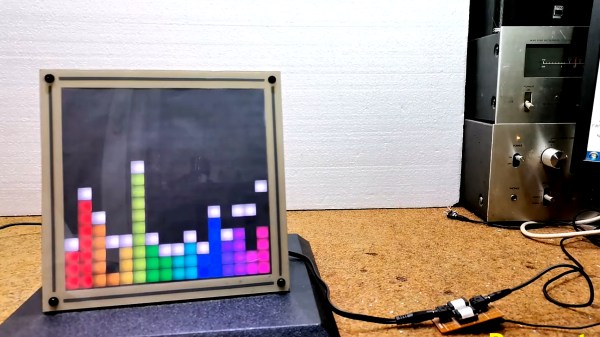
Fast Fourier Transforms. Spectrum Analyzers. Waterfall displays. Not long ago, such terms were reserved for high end test gear. But oh, how things have changed! It’s no surprise to many Hackaday readers that modern microcontrollers have transformed the scene as they become more powerful and as a result are endowed with more and more powerful software libraries. [mircemk] has used such a library along with other open source software combined with mostly off the shelf hardware to create what he calls the DIY FFT Spectrum Analyzer. Rather than being a piece of test gear, this artful project aims to please the eye.

The overall build is relatively simple. Audio is acquired via a line-in jack or a microphone, and then piped into an ESP32. The ESP32 runs the audio through the FFT routine, sampling, slicing, and dicing the audio into 16 individual bands. The visual output is displayed on a 16 x 16 WS2812 Led Matrix. [mircemk] wrote several routines for displaying the incoming audio, with a waterfall, a graph, and other visualizations that are quit aesthetically pleasing. Some of them are downright mesmerizing! You can see the results in the video below the break.

Of course the build doesn’t stop with slapping some hardware and a few passive components together. To really be finished, it needs to be encased in something worth displaying. [mircemk] does not disappoint, as a beautiful 3D-printed enclosure wraps it all up nicely.

We think that the final product is great, and it reminds us of some of the very things that inspired us early on in our hacking careers. We would love to see this project integrated with an Interactive Musical Art Installation of any kind, the more esoteric the better. Perhaps a 555 timer synth could fit the bill? Be sure to share your own hacks with us via the Tip Line!

Continue reading “Art Project Fast And Fouriously Transforms Audio Into Eye Candy”

an image of maketime showing the current time

Unique Clock Doubles As A Development Board

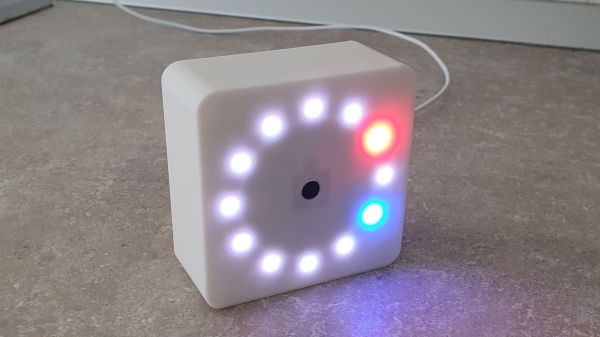
Most clocks these days have ditched the round face and instead prefer to tell time through the medium of 7-segment displays. [mihai.cuciuc] is bringing the round face to digital clocks with his time-keeping piece, MakeTime.

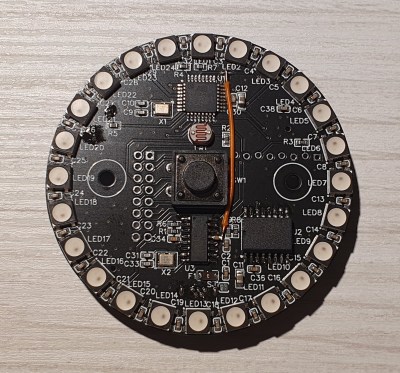
MakeTime's custom PCBMakeTime serves two purposes, the first and most obvious one is as a clock. Rather than displaying the time with digits, MakeTime harkens back to round dial clocks by illuminating RGB LEDs along its perimeter to show the position of the minute and hour “hands”. By using 24 LEDs, MakeTime achieves a timing granularity of 2.5 minutes.

The second purpose is as a development platform. [mihai.cuciuc] designed the clock with hacking in mind, opting to build it with components that many are already familiar with, such as a DS3231 RTC and WS2812 LEDs. To make the entire thing Arduino compatible, the microcontroller is an AtMega 328P, that can be connected to through the micro-USB port and CH340 USB-UART IC. If MakeTime outlives its time as a clock, all of the unused GPIO of the 328P are broken out to a single pin header, allowing it to be repurposed in other projects for years to come.

It seems like everyone is making their own unique timekeeping device these days. Check out the clock made out of ammeters we covered last week.

Virtual Racers Battle It Out On Portable WS2812 Track

Sure modern video games are impressive, but you certainly don’t need a 4K display or high speed Internet connection to have a good time. For a perfect example, take a look at this unique one-dimensional racing game put together by [mircemk]. This variation of [Gerardo Barbarov Rostan]’s Open LED Race project has been scaled down so it can be transported easily, though at least for now, you’ll still need to plug it into an external power supply.

The game is pretty straightforward. By rapidly pressing their respective buttons, players race their virtual vehicles on a linear “track” made of 60 WS2812 RGB LEDs. In the most basic of terms, the faster they press their button, the faster the red or green illuminated LED that represents their car moves.

But in practice, things are made a bit more interesting with the addition of simulated gravity for the “hills” the racers will encounter. The cars also have a bit of inertia, and will coast along even when you aren’t mashing the button. There are even optional engine sounds, though as with the visual representation of the cars, a certain degree of imagination is required for the desired effect.

The hardware requirements for this game are minimal, and can easily be adapted to what you have in the parts bin. Beyond the strip of WS2812 LEDs, all you really need is a microcontroller and two buttons. Here [mircemk] is using an Arduino Nano, but you could press pretty much any MCU into service. To make this version as portable as possible, the buttons are built right into the PVC sheet enclosure, but putting them in some wired remotes would make for a bit more comfortable gameplay.

We’ve covered several projects that have aimed to turn the humble string of RGB LEDs into an interactive electronic game over the years. As long as you’ve got an open mind, you can find a whole world hidden inside some blinking lights.

Continue reading “Virtual Racers Battle It Out On Portable WS2812 Track”

Dedicated LED Animation Framework For ESP32

[Eric Arcana] has been creating animated holiday decorations for several years, which involved a lot of custom code to make things light up the way he wanted, pulling the microcontroller to make changes. Using ESP32s with remote software updates is easier, but [Eric] also wanted to make the code simpler. To achieve this he created Fade, a custom programming language/framework for controlling LED animations from the ESP32.

Fade is written for addressable RGB LEDs like the Neopixel/WS2812. It keeps track of the current color of every LED in the system and allows the user to define what color it should be at a specified time in the future. Time is specified using 10 ms clock cycles. The LEDs will smoothly change from one color to the other in the specified number of clock cycles, without needing to specify what the intermediate colors should be.

Code is written in simple IDE, running on a web server on the ESP32 itself, or on a remote Windows PC. The language is very simple, but still powerful enough to create complex LED animations. A key part of it is the ability to specify multiple concurrent state changes in just a few lines of code. [Eric] also included optioning to take touch button inputs and use them to update the animations. Another nice feature is a simulation window on the desktop IDE. It allows you to create custom LED layouts on PC, and test your code without needing to send it to the ESP32.

Addressable LEDs have made creating large LED installations a lot simpler, like this 6 foot LED ball or a LED Video Wall.

Continue reading “Dedicated LED Animation Framework For ESP32”