The Perfect Tourist Techno-Cap

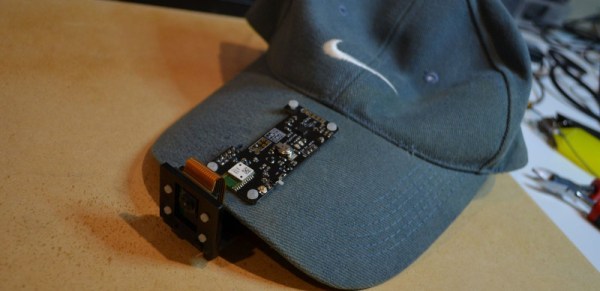
How many times are you out on vacation and neglect to take pictures to document it all for the folks back at home? Or maybe you forgot just exactly where that awesome waterfall was. [Mark Williams] has made a Raspberry Pi Zero enabled cap that can take photos and geotag them with the location as well as the attitude of the camera.

The idea is to enable the reconstruction of a trip photographically. The hardware consists of a Raspberry Pi Zero W coupled with a Raspberry Camera V2 and a BerryGPS-IMU. Once activated, the system starts taking photos every two minutes. Within each photograph, the location of the photographer is recorded like most GPS enabled camera.

An additional set of data including yaw, pitch, and roll along with direction is also captured to understand where the camera is pointing when the image was taken. Even if he’s tilting his head at the time the photo was taken, the metadata allows it to be straightened out in software later.

This information is decoded using GeoSetter which puts the images on a map along with the field of view. Take a peek at the video below for the result of a trip around Sydney Harbour and the system in action. The Raspberry Pi Zero and camera combo are useful for a lot of things including this soldering microscope. Hopefully, we will be seeing some DIY VR gear with stereo cameras in the near future. Continue reading “The Perfect Tourist Techno-Cap”

Brazil Wins The Raspberry Pi Overclocking Olympics

[Alex Rissato] proudly reports that he now holds the record for highest benchmark score on HWBOT (machine translation); something he sees not only as a personal achievement but admirably, of national pride. Overclocking a Raspberry Pi is not as simple as achieving the highest operational clock rate. A record constitutes just the right combination of CPU clock, memory clock, GPU clock and finally the CPU core voltage. If you’ve managed to produce that special sauce, the combination must be satisfactorily cooled and most importantly be stable enough to pass an actual performance benchmark.

More POWAAA to the CPU!

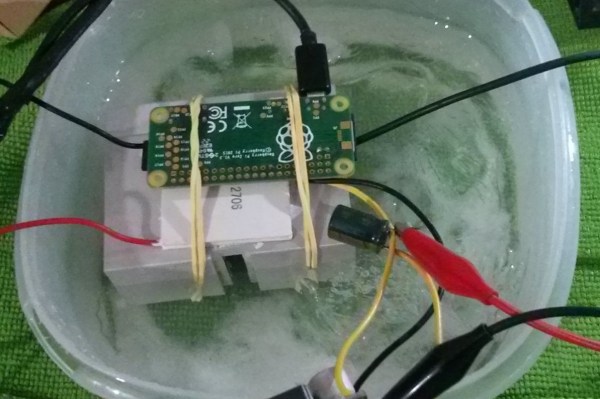
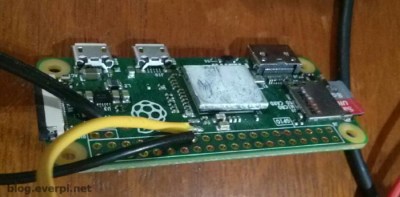
[Alex] realized that the main hurdle to achieving the desired CPU clock was the internally generated and hence restricted, CPU core voltage; This is externally LC filtered and routed back to the CPU on a stock Pi. [Alex] de-soldered the filter on the PCB and provided the CPU with an externally generated core voltage.

Next, the cooling had to be tended to. Air cooling simply wouldn’t cut it, so a Peltier based heatsink interface had to be devised with the hot side immersed in a bucket of salt water. All of this translated to a comfy 16C at a clock speed of 1600 MHz.

Was all the effort justified? We certainly think it was! Despite falling short of the Pi zero CPU clock rate record, currently set at 1620MHz,  [Alex] earned the top spot in the HWBOT Prime overclocking benchmark. Brazil can now certainly add this to its trophy cabinet, arguably overshadowing the 129 Olympic medals.

Pi Keeps Cool At 1.5 GHz

Hackers have a long history of overclocking CPUs ranging from desktop computers to Arduinos. [Jacken] wanted a little more oomph for his Pi Zero-Raspberry Pi-based media center, so he naturally wanted to boost the clock frequency. Like most overclocking though, the biggest limit is how much heat you can dump off the chip.

[Jacken] removed the normal heat sink and built a new one out of inexpensive copper shim, thermal compound, and super glue. The result isn’t very pretty, but it does let him run the Zero Pi at 1.5 GHz reliably. The heat sink is very low profile and doesn’t interfere with plugging other things into the board. Naturally, your results may vary on clock frequency and stability.

Continue reading “Pi Keeps Cool At 1.5 GHz”

Pi Cart: 2,400 Games In One

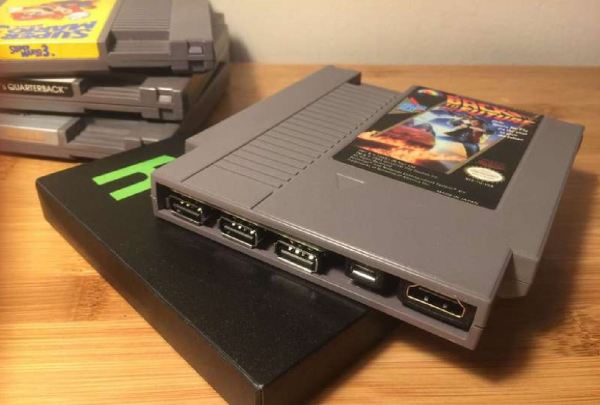
What’s the quickest way to turn one game into 2,400? Cram a Raspberry Pi Zero running RetroPie into an NES cartridge and call it Pi Cart.

This elegant little build requires no soldering — provided you have good cable management skills and the right parts. To this end, [Zach] remarks that finding a USB adapter — the other main component — small enough to fit inside the cartridge required tedious trial and error, so he’s helpfully linked one he assures will work. One could skip this step, but the potential for couch co-op is probably worth the effort.

Another sticking point might be Nintendo’s use of security screws; if you have the appropriate bit or screwdriver, awesome, otherwise you might have to improvise. Cutting back some of the plastic to widen the cartridge opening creates enough room to hot glue in the USB hub, a micro USB port for power, and an HDMI port in the resulting gap. If you opted to shorten the cables, fitting it all inside should be simple, but you may have to play a bit of Tetris with the layout to ensure everything fits.

Continue reading “Pi Cart: 2,400 Games In One”

Raspberry Pi Zero Becomes Mighty Miniature Minecraft Machine

In a clever bit of  miniaturization, [JediJeremy] has nearly completed a gyro-mouse controller for a Raspberry Pi Zero! Ultimately this will be a wearable Linux-watch but along the way he had some fun with the interface.

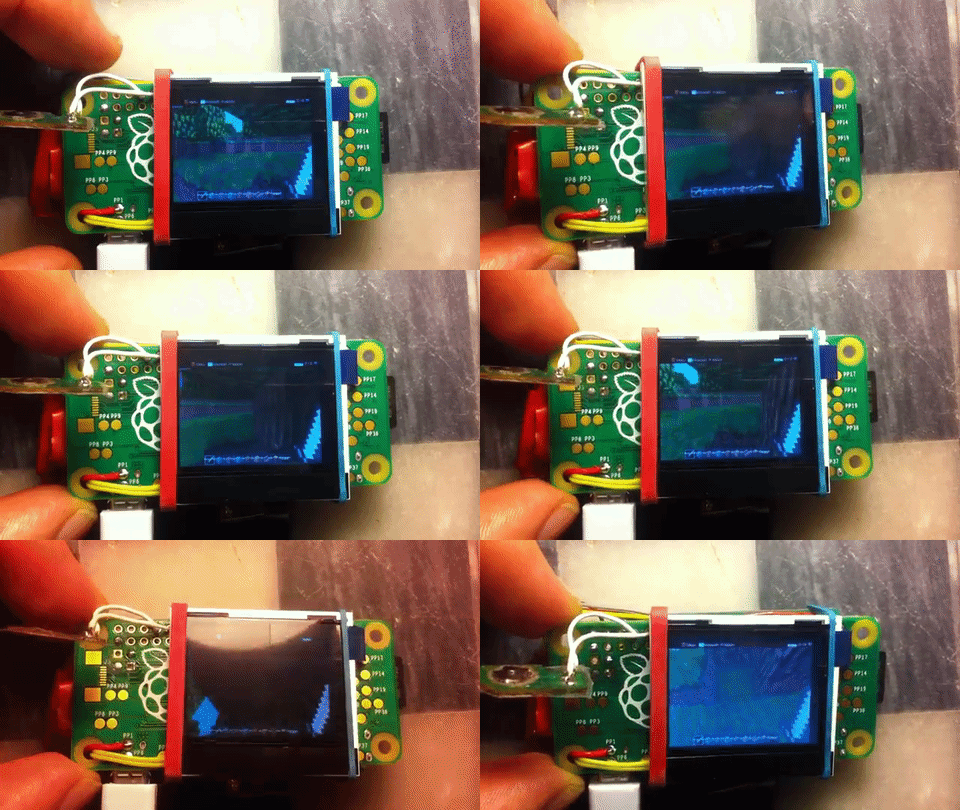
Using the MPU6040 gyroscope/accelerometer card from a quadcopter, [JediJeremy] spent a week writing the driver to allow it to function as a mouse. Strapping an Adafruit 1.5″ PAL/NTSC LCD screen and its driver board to the Zero with rubber bands makes this one of the smallest functional computer and screen combos we’ve seen. Simply tilt the whole thing about to direct the cursor.

It presently lacks any keyboard input, and [JediJeremy] has only added a single button for clicking, but look at this thing! It’s so tiny! In his own words: “I think this is the first computer that I can accidentally spill into my coffee, rather than vice versa.”

Continue reading “Raspberry Pi Zero Becomes Mighty Miniature Minecraft Machine”

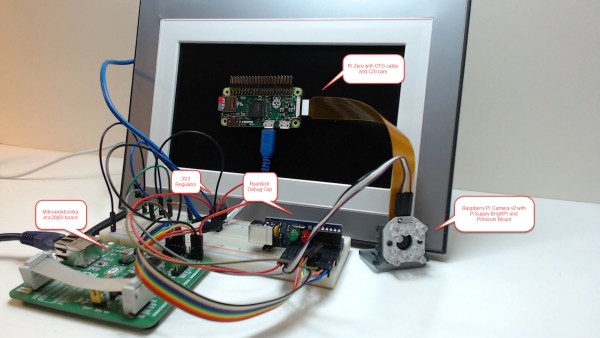
Pi Zero Digital Frame Kiosk Uses OTG Right

USB On-The-Go (OTG) is one of the fun aspects of the USB standard. There are feelings about the other aspects, but that one is alright. Regardless, [Francesco] realized one day that the £3 digital picture frames he purchased at a charity sale really didn’t care if the files on the thumb drive mysteriously changed all the time. It would just keep pulling and displaying the latest file at a blistering 0.2 frames per second. That’s right, the concept [Francesco] went after is to show changing data, even animations, with an update of one frame every five seconds!

raspberry-pi-zero-otg-picture-frame-weatherHis initial tests showed good for the concept — the Pi can easily emulate a mass storage device, feeding in data whenever the picture frame looks for it. In addition to the Pi Zero board he added an Ethernet shield, a voltage regulator, a camera, and even some infrared LEDS. We suppose there are dreams for the future.

He has been developing scripts for this rig by logging in through a VNC. A cron job runs his scripts at regular intervals, grabbing useful data and making it available as an image. For example, one script opens up the weather in Epiphany (a web browser), takes a screenshot, and saves that screenshot to the mass storage being emulated using USB OTG. The digital picture frame blissfully updates, unaware of its strange appendages. Now the real limiting factor is how much you can accomplish with your mad Bash skills.

Microscope Camera For Zeroing CNC Machines

After what we’re sure is several dozen screw-ups or at the very least a lot of wasted hours, [Chris] has gotten around to building a very precise microscope camera mount for zeroing out his CNC machine.

If you need to mill a few bits out of a sheet of metal or plastic, it’s important to know exactly where you’re cutting. A CNC machine can take care of the relative positioning, but if you already have half your holes drilled, you also need absolute positioning. This means placing the work piece exactly where you want to cut, or failing that, zeroing the machine to a predefined point on the piece.

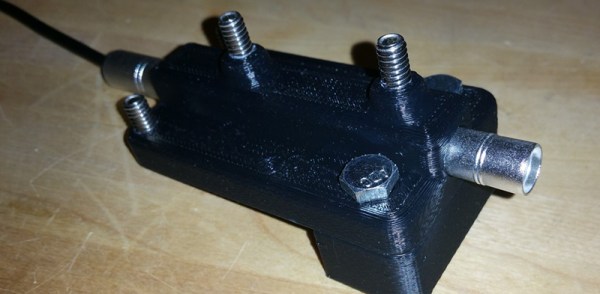
[Chris] is accomplishing this with a pen-shaped USB microscope. With a 3D printed mount and a few magnets, this camera can clip right on to the machine, and with the camera interface in Mach3, it’s pretty easy to zero out the mill to within a thousandth of an inch.

There’s a video demo of the camera in action below, but there’s a lot more CNC mods on [Chris]’ website. There’s custom 3D printed vacuum nozzles, and a lot of work on a small desktop Grizzly mill.

Continue reading “Microscope Camera For Zeroing CNC Machines”