TMS9900 Retro Build

[Robert Baruch] found a TMS9900 CPU from 1983 in a surplus store. If that name doesn’t ring a bell, the TMS9900 was an early 16-bit CPU from Texas Instruments. He found that, unlike modern CPUs, the chip took several voltages and a four-phase twelve-volt clock. He decided to fire it up and — of course — one thing led to another and he wound up with a system on a breadboard. You can see one of the videos he made about the machine below.

This CPU had some odd features, most notably that it stored its registers in off-chip memory and can switch contexts by changing where the registers reside. That was a novel idea when the memory and the CPU were similar in speed. In a modern computer, the memory is much slower than the CPU and this would be a major bottleneck for program execution. The only onboard registers were the program counter, the status register, and a pointer to the general-purpose registers in memory.

Continue reading “TMS9900 Retro Build”

3D-Printed Halbach Motor Part Two: Tuning, Testing

Building your own Halbach-effect brushless DC motor is one thing. Making sure it won’t blow up in your face another matter, and watching how [Christoph Laimer] puts his motor to the test is instructive.

You’ll remember [Christoph]’s giant 3D-printed BLDC motor from a recent post where he gave the motor a quick test spin. That the motor held together under load despite not being balanced is a testament to the quality of his design and the quality of the prints. But not wishing to tempt fate, and having made a few design changes, [Christoph] wisely chose to perform a static balancing of the rotor. He also made some basic but careful measurements of the motor’s parameters, including the velocity constant (Kv) using an electric drill, voltmeter, and tachometer, and the torque using a 3D-printed lever arm and a kitchen scale. All his numbers led him to an overall efficiency of 80%, which is impressive.

[Christoph] is shipping his tested BLDC off to the folks at FliteTest, where he hopes they put it to good use. They probably will — although they might ask for three more for a helicarrier.

Continue reading “3D-Printed Halbach Motor Part Two: Tuning, Testing”

Gateway To Metal Casting

Casting is an exciting and very useful pastime, but it’s not exactly common these days. That’s a problem whether you’re just getting started or have been doing it for years: everyone can use the advice of another. Fear not! The US Department of Energy is here to help with the Industrial Metal’s Program’s Metal Casting cornucopia.

Although not strictly a hack, this is certainly a facilitator of hacks and any experienced user would do themselves some good by perusing the site. Click on the maps to find complex issues presented remarkably well for papers at this level of rigor. Seriously, check them out.

However, since these papers go into such depth, we can’t really say the material is beginner friendly. That’s not to say it would be bad for a newbie to read through, just that it might be a bit discouraging. But, if you need to figure out where to start in the maze of molds and sand and molten metal, we might have some articles that might help you out.

Do y’all know of any good casting resources on the interwebs? If so, leave ’em in the comments!

Thanks [RunnerPack] for sending this in.

How To MIDI Interface Your Toys

There’s a great number toys in the world, many of which make all manner of pleasant or annoying noises for the entertainment of children. If you’re a musician, these toys may be of interest due to their unique or interesting sounds. However, due to their design being aimed at play rather than performance, it may be difficult to actually use the toy as a musical instrument. One way around this is to record the sounds of the toy into a sampler, but it’s not the only way. [little-scale] is here to demonstrate how to MIDI interface your toys. 

[little-scale] starts out by discussing the many ways in which one can interface with a toy. The article discusses how a simple button can be replaced with a relay, or a multiplexer, and be interfaced to all manner of other devices to control the toy. This is demonstrated by using a mobile phone toy which makes sounds when buttons are pressed.

A Teensy 3.6 is used to run the show, acting as a USB-MIDI interface so the toy can be controlled by music software like Abelton. It’s connected to the toy’s buttons through a multiplexer. The toy’s speaker is cut off and used as an audio output instead, allowing the toy to be easily connected to other audio hardware for performance or recording. It’s also fed through a digital pot so MIDI commands can control the volume. A resistor is used to control pitch in the toy, so this too was replaced with a digital pot as well, to allow sample pitch to be controlled.

The project is incredibly well documented, with [little-scale] first tearing down the toy and highlighting the points of interest, before stepping through each stage of interfacing the toy to the digital world. We’ve seen some of [little-scale]’s work before, too – namely, this MIDI DAC for controlling vintage synthesizers. Video after the break. Continue reading “How To MIDI Interface Your Toys”

Hackaday Prize Entry: Gaming Done Tiny With Keymu

The world’s tiniest Game Boy Color, introduced at the 2016 Hackaday SuperConference, is a work of art. This microscopic game console inspired [c.invent] to create how own gaming handheld. His Keymu project on hackaday.io describes an open source, keychain-sized gaming handheld that its builder claims is really the world’s tiniest. How did he make it smaller? It’s a miniature Game Boy Advance SP, and it folds up in a handy clamshell case.

While he’s a Pi fan, [c.invent] felt the Pi Zero was too big and clunky for what he had in mind–a keychain-sized handheld. Only the Intel Edison was compact enough. He began with a custom PCB with a connector for the Edison’s fragile ribbon cable, then added an 1.5″ OLED display and an 11.7mm speaker, all powered by a 220 mAh lithium battery. [c.invent] also created inside a custom folding 3D-printed case that protects the Keymu’s electronics from keys and pocket lint.

Unlike the mini Game Boy Color, [c.invent] aims to create a fully fledged emulation console. The Edison incorporates a Linux distribution that allowing it to install emulators for GameBoy Color, GBA, NES, and SNES.

This Way To The Ingress: Keeping Stuff Dry And Clean With IP And NEMA

When designing a piece of hardware that has even the faintest chance of being exposed to the elements, it’s best to repeat this mantra: water finds a way. No matter how much you try to shield a project from rain, splashing, or even just humid air, if you haven’t taken precautions to seal your enclosure, I’ll bet you find evidence of water when you open it up. Water always wins, and while that might not be a death knell for your project, it’s probably not going to help. And water isn’t the only problem that outdoor or rough-service installations face. Particle intrusion can be a real killer too, especially in an environment where dust can be conductive.

There’s plenty you can do to prevent uninvited liquid or particulate guests to your outdoor party, but it tends to be easier to prevent the problem at design time than to fix it after the hardware is fielded. So to help you with your design, here’s a quick rundown of some standards for protection of enclosures from unwanted ingress.

Continue reading “This Way To The Ingress: Keeping Stuff Dry And Clean With IP And NEMA”

Printrbot Teases Infinite Build Volume Printer

[Brook Drumm] of Printrbot is teasing a new 3D printer. This is no ordinary 3D printer; this is an infinite build volume 3D printer, the Next Big Thing™ in desktop fabrication.

The world was introduced to the infinite build volume 3D printer last March at the Midwest RepRap Festival with a built by [Bill Steele] from Polar 3D. The design of [Bill]’s printer began as simply a middle finger to MakerBot’s Automated Build Platform patent. This was patent engineering — [Bill] noticed the MakerBot patent didn’t cover build plates that weren’t offset to the plane of the print head, and it just so happened a printer with a tilted bed could also build infinitely long plastic parts.

While [Bill Steele]’s unnamed printer introduced the idea of an infinite build volume printer to the community, a few pieces of prior art popped up in the weeks and months after MRRF. Several years ago, [Andreas Bastian] developed the Lum Printer, an unbounded conveyor belt printer. A month after MRRF, Blackbelt 3D introduced their mega-scale tilted bed printer and later started a Kickstarter that has already reached $100,000 in pledges.

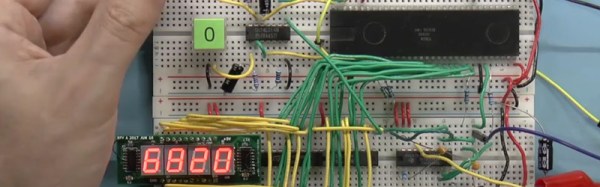
Right now, details are sparse on the Printrbelt, but there are a few educated guesses we can make. The belt of the Printrbelt appears to be Kapton film attached to some sort of substrate. The hotend and extruder are standard Printrbot accouterments, and the conveyor is powered by a geared stepper motor. All in all, pretty much what you would expect.

We do know that [Brook] and [Bill Steele] are working together on this printer, apparently with [Brook] in charge of the hardware and [Bill] taking either his slicing algorithm or firmware modifications (we’re not exactly sure where the ’tilt’ in the Gcode comes from) and getting this printer running.

While the Printrbelt isn’t ready for production quite yet, this is a fantastic advance in the state of consumer, desktop 3D printing. You can check out [Brook]’s teaser videos below.

Continue reading “Printrbot Teases Infinite Build Volume Printer”