Clever Gas Mixer Gets Just The Right Blend For Homebrew Laser Tubes

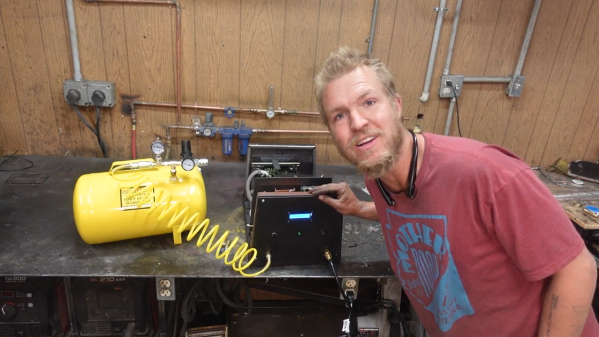
[Lucas] over at Cranktown City on YouTube has been very busy lately, but despite current appearances, his latest project is not a welder. Rather, he built a very clever gas mixer for filling his homemade CO2 laser tubes, which only looks like a welding machine. (Video, embedded below.)

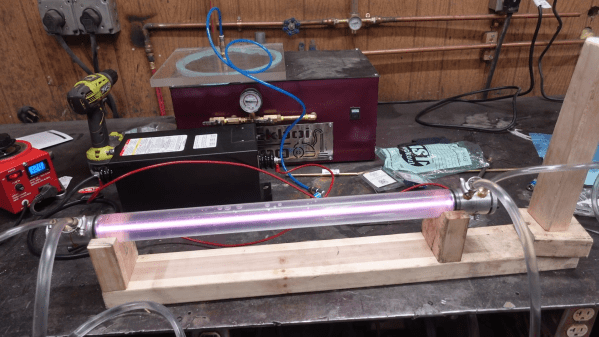
We’ve been following [Lucas] on his journey to build a laser cutter from scratch — really from scratch, as he built his own laser tube rather than rely on something off-the-shelf. Getting the right mix of gas to fill the tube has been a bit of a pain, though, since he was using a party balloon to collect carbon dioxide, helium, and nitrogen at measuring the diameter of the ballon after each addition to determine the volumetric ratio of each. His attempt at automating the process centers around a so-called AirShim, which is basically a flat inflatable bag made of sturdy material that’s used by contractors to pry, wedge, lift, and shim using air pressure.

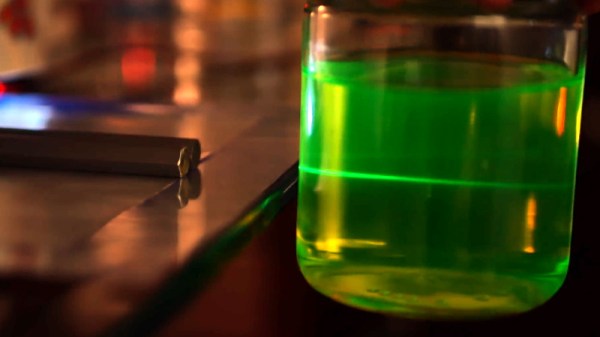
[Lucas]’ first idea was to measure the volume of gas in the bag using displacement of water and some photosensors, but that proved both impractical and unnecessary. It turned out to be far easier to sense when the bag is filled with a simple microswitch; each filling yields a fixed volume of gas, making it easy to figure out how much of each gas has been dispensed. An Arduino controls the pump, which is a reclaimed fridge compressor, monitors the limit switch and controls the solenoid valves, and calculates the volume of gas dispensed.

Judging by the video below, the mixer works pretty well, and we’re impressed by its simplicity. We’d never seriously thought about building our own laser tube before, but seeing [Lucas] have at it makes it seem quite approachable. We’re looking forward to watching his laser project come together.

Continue reading “Clever Gas Mixer Gets Just The Right Blend For Homebrew Laser Tubes”

Hacking An Air Assist For The Ortur Laser

Getting great results from a laser cutter takes a bit of effort to make sure all of the settings are just right. But even then, if the air between the material and the laser source is full of smoke and debris it will interfere with the laser beam and throw off the results. The solution is to add air assist which continuously clears that area.

Earlier this year I bought an Ortur laser engraver/cutter and have been hacking on it to improve the stock capabilities. last month I talked about putting a board under the machine and making the laser move up and down easily. But I still didn’t have an air assist. Since then I found a great way to add it that will work for many laser cutter setups.

I didn’t design any of these modifications, but I did alter them to fit my particular circumstances. You can find my very simple modifications to other designs on Thingiverse. You’ll also find links to the original designs and you’ll need them for extra parts and instructions, too. It is great to be able to start with work from talented people and build on each other’s ideas.

Continue reading “Hacking An Air Assist For The Ortur Laser”

Laser-Cut Solder Masks From Business Cards

There are plenty of ways to make printed circuit boards at home but for some features it’s still best to go to a board shop. Those features continue to decrease in number, but not a lot of people can build things such as a four-layer board at home. Adding a solder mask might be one of those features for some, but if you happen to have a laser cutter and a few business cards sitting around then this process is within reach of the home builder too.

[Jeremy Cook] is lucky enough to have a laser cutter around, and he had an idea to use it to help improve his surface mount soldering process. By cutting the solder mask layer into a business card with the laser cutter, it can be held on top of a PCB and then used as a stencil to add the solder paste more easily than could otherwise be done. It dramatically decreases the amount of time spent on this part of the process, especially when multiple boards are involved since the stencil can be used multiple times.

While a laser cutter certainly isn’t a strict requirement, it certainly does help over something like an X-acto knife. [Jeremy] also notes that this process is sometimes done with transparency film or even Kapton, which we have seen a few times before as well.

Continue reading “Laser-Cut Solder Masks From Business Cards”

Scratch-Built CO2 Laser Tube Kicks Off A Laser Cutter Build

When we see a CO2 laser cutter build around these parts, chances are pretty good that the focus will be on the mechatronics end, and that the actual laser will be purchased. So when we see a laser cutter project that starts with scratch-building the laser tube, we take notice.

[Cranktown City]’s build style is refreshingly informal, but there’s a lot going on with this build that’s worth looking at — although it’s perhaps best to ignore the sourcing of glass tubing by cutting the ends off of an old fluorescent tube; there’s no mention of what became of the mercury vapor or liquid therein, but we’ll just assume it was disposed of safely. We’ll further assume that stealing nitrogen for the lasing gas mix from car tires was just prank, but we did like the rough-and-ready volumetric method for estimating the gas mix.

The video below shows the whole process of building and testing the tube. Initial tests were disappointing, but with a lot of tweaking and the addition of a much bigger neon sign transformer to power the tube, the familiar bluish-purple plasma made an appearance. Further fiddling with the mirrors revealed the least little bit of laser output — nowhere near enough to start cutting, but certainly on the path to the ultimate goal of building a laser cutter.

We appreciate [Cranktown City]’s unique approach to his builds; you may recall his abuse-powered drill bit index that we recently covered. We’re interested to see where this laser build goes, and we’ll be sure to keep you posted.

Continue reading “Scratch-Built CO2 Laser Tube Kicks Off A Laser Cutter Build”

Hacking The Ortur Laser With Spoil Board, Z-Height, And Air Assist

Last month in my hands-on review of the Ortur Laser I hinted that I had done a few things to make it work a little better. I made three significant changes in particular: I anchored the machine to a spoil board with markings, I added a moving Z axis to adjust focus by moving the entire laser head, and I added an air assist.

Turns out, you can find designs for all of these things all over the Internet and I did, in fact, use other people’s designs. The problem is the designs often conflict with one another or don’t exactly work for your setup. So what I’ll tell you about is the combination that worked for me and what I had to do to get it all working together. The air assist is going to take a post all by itself, but some of the attempts at air assist led to some of the other changes I made, so we’ll talk about it some in this post, as well.

One of the modifications — the spoil board mount — I simply downloaded and the link for that is below. However, I modified the moving Z axis and air assist parts and you can find my very simple modifications on Thingiverse. You’ll also find links to the original designs and you’ll need them for extra parts and instructions, too.

Continue reading “Hacking The Ortur Laser With Spoil Board, Z-Height, And Air Assist”

How Laser Headlights Work

When we think about the onward march of automotive technology, headlights aren’t usually the first thing that come to mind. Engines, fuel efficiency, and the switch to electric power are all more front of mind. However, that doesn’t mean there aren’t thousands of engineers around the world working to improve the state of the art in automotive lighting day in, day out.

Sealed beam headlights gave way to more modern designs once regulations loosened up, while bulbs moved from simple halogens to xenon HIDs and, more recently, LEDs. Now, a new technology is on the scene, with lasers!

Continue reading “How Laser Headlights Work”

The Devil Is In The Details For This Open Air Laser

Normally, we think of lasers as pretty complex and fairly intimidating devices: big glass tubes filled with gas, carefully aligned mirrors, cooling water to keep the whole thing from melting itself, that sort of thing. Let’s not even get started on the black magic happening inside of a solid state laser. But as [Jay Bowles] shows in his latest Plasma Channel video, building a laser from scratch isn’t actually as difficult as you might think. Though it’s certainly not easy, either.

The transversely excited atmospheric (TEA) laser in question uses high voltage passed across a a pair of parallel electrodes to excite the nitrogen in the air at standard atmospheric pressure, so there’s no need for a tube and you don’t have to pull a vacuum. The setup shakes so many UV photons out of the nitrogen that it doesn’t even need any mirrors. In fact, you should be able to get almost all the parts for a TEA laser from the hardware store. For example, the hexagonal electrodes [Jay] ends up using are actually 8 mm hex keys with the ends cut off.

Continue reading “The Devil Is In The Details For This Open Air Laser”