Kill The Exhaust, Not Your Lungs With The Fume Coffin

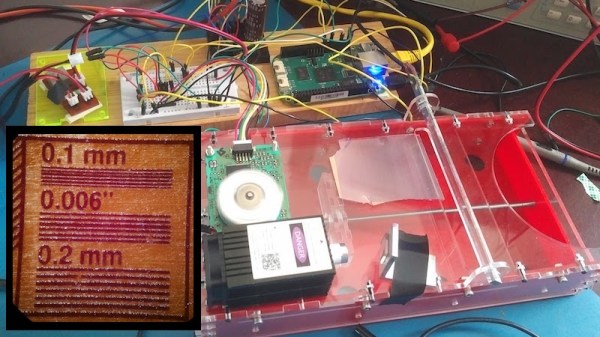
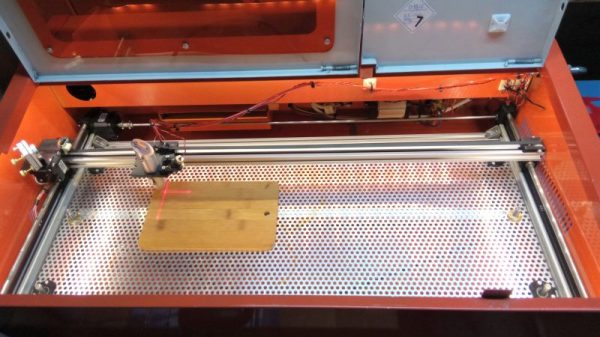
As if slinging around 40 watts of potentially tattoo-removing or retina-singeing laser beams wasn’t anxiety-inducing enough, now comes a new, scary acronym – LCAGs, or “laser-generated airborne contaminants.” With something that scary floating around your shop, it might be a good idea to build a souped-up laser cutter exhaust fan to save your lungs.

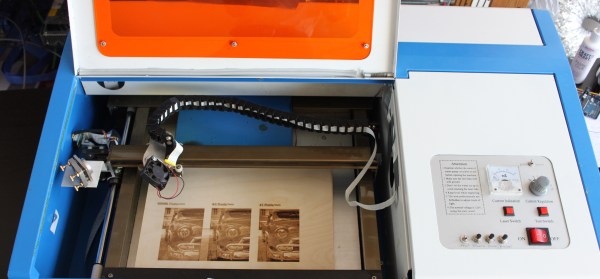
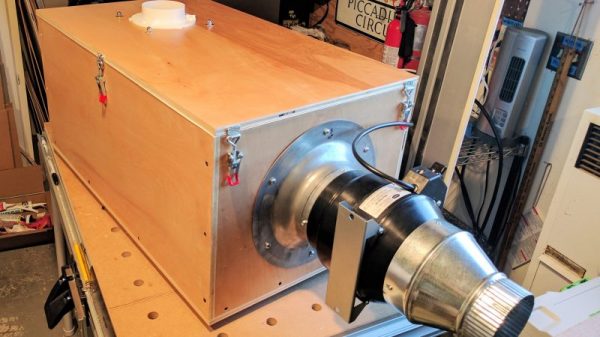
We jest, but taking care of yourself is the responsible way to have a long and fruitful hacking career, and while [patternmusic]’s “Fume Coffin” might seem like overkill, can you go too far to protect your lungs? Plywood and acrylic, the most common materials that come across a laser cutter’s bed, both release quite a witch’s brew of toxins when vaporized by a laser beam. The Fume Coffin clears the air in your shop by venting it to the outdoors after giving it a good scrubbing through an activated charcoal pre-filter and a HEPA polishing element. Both filters are commercially available so replacements won’t be an issue, and the entire thing is housed in a wooden box that gives the device its name.

Since it’s ejecting 200 cubic feet per minute, you’ll have to provide at least that much make-up air, but other than that the Fume Coffin should be a welcome addition to the shop. We’ve seen a few other attempts to handle LCAGs effectively before, including a DIY charcoal and automotive air filter design.

Laser PCBs With LDGraphy

There are many, many ways to get a PCB design onto a board for etching. Even with practice however, the quality of the result varies with the process and equipment used. With QFN parts becoming the norm, the days of etch-resist transfers and a permanent marker are all but gone. Luckily, new and improved methods of Gerber transfer have be devised in recent years thanks to hackers across the world.

One such hacker, [Henner] is working on a project called LDGraphy in an attempt to bring high-resolution etching to the masses. LDGraphy is a laser lithography device that makes use of a laser and a Beaglebone green to etch the layout onto the board. The best part is that the entire BOM is claimed to cost under a $100 which makes it affordable to people on a budget.

The system is designed around a 500 mW laser and a polygon mirror scanner meant for a laser printer. The board with photoresist is linearly actuated in the X-axis using a stepper motor and the laser beam which is bounced off the rotating hexagonal mirror is responsible for the Y-axis. The time critical code for the Programmable Realtime Unit (PRU) of the AM335X processor is written in assembly for the fast laser switching. The enclosure is, naturally, a laser cut acrylic case and is made at [Henner]’s local hackerspace.

[Henner] has been hard at work calibrating his design and compensating for the inaccuracies of the components used. In the demo video below he presents a working version with a resolution of 6 mils which is wonderful considering the cost of the machine. He also shares his code on GitHub if you want to help out and you can track his updates on Google+. Continue reading “Laser PCBs With LDGraphy”

A Mechanical Laser Show With 3D-Printed Cams And Gears

Everyone knows how to make a POV laser display — low-mass, first-surface mirrors for the X- and Y-axes mounted on galvanometers driven rapidly to trace out the pattern. [Evan Stanford] found a simpler way, though: a completely mechanical laser show from 3D-printed parts.

The first 10 seconds of the video below completely explains how [Evan] accomplished this build. A pair of custom cams wiggles the laser pointer through the correct sequences of coordinates to trace the desired pattern out when cranked by hand through a 1:5 ratio gear train. But what’s simple in concept is a bit more complicated to reduce to practice, as [Evan] amply demonstrates by walking us through the math he used to transfer display shapes to cam profiles. If you can’t follow the math, no worries — [Evan] has included all the profiles in his Thingiverse collection, and being a hand model software guy by nature, he’s thoughtfully developed a program to automate the creation of cam profiles for new shapes. It’s all pretty slick.

Looking for more laser POV goodness? Perhaps a nice game of laser Asteroids would suit you.

Continue reading “A Mechanical Laser Show With 3D-Printed Cams And Gears”

Drop-in Controller For EBay K40 Laser Engraver Gets Results

[Paul de Groot] wrote in to let us know about a drop-in controller replacement he designed for those economical K40 laser engravers that are everywhere on eBay. With the replacement controller, greatly improved engraving results are possible along with a simplified toolchain. Trade in the proprietary software and that clunky security dongle for Inkscape and a couple of plugins! [Paul] felt that the work he accomplished was too good to keep to himself, and is considering a small production run.

Laser engravers are in many ways not particularly complex devices; a motion controller moves the head in x and y, and the laser is turned on or off when needed. But of course, the devil is in the details and there can be a surprising amount of stuff between having a design on your screen and getting it cut or engraved in the machine. Designing in Inkscape, exporting to DXF, importing the DXF to proprietary software (which requires a USB security dongle to run), cleaning up any DXF import glitches, then finally cutting the job isn’t unusual. And engraving an image with varying shades and complex dithering? The hardware may be capable, but the stock software and controller? Not so much. It’s easy to see why projects to replace the proprietary controllers and software with open-source solutions have grown.

Cheap laser engravers may come with proprietary controllers and software, but they don’t need to stay that way. Other efforts we have seen in this area include LaserWeb, which provides a browser-based interface to a variety of open-source motion controllers like Grbl or Smoothieware. And if you’re considering a laser engraver, take a few minutes to learn from the mistakes of other people.

Holograms Can’t Be Too Thin

We’ve seen the 3D phone fad come and go, with devices like the Evo 3D, that used a parallax barrier to achieve autostereoscopy (that is, 3D viewing without glasses). These displays aren’t holograms, they are just showing your eyes two different images like a 3D movie or a stereopticon. However, researchers from Australia and China are hoping to change that. They’ve developed a nano-hologram (their term) that is about 1000 times thinner than a human hair. You can see a video about the invention, below.

Conventional holograms modulate the phase of light to give the illusion of three-dimensional depth. But to generate the required phase shifts, those holograms need to be as thick as the optical wavelengths involved. The researchers claim the holograms are “simple” to make, but that depends on what you compare it to. You need some exotic materials, vacuum deposition gear, and a laser that can do femtosecond-long pulses.

The research team has broken this thickness limit with a 25 nanometer hologram. Their technique relies on a topological insulator material a novel quantum material that holds a low refractive index in the surface layer but a much higher refractive index in the bulk of the material. This forms an intrinsic optical resonant cavity which can enhance the phase shifts and makes holography possible.

The next step is to develop a rigid thin film to overlay an LCD screen. The current version has pixels at least ten times too large to be practical for that application, so that’s another hurdle to overcome.

We’ve seen screens that shoot 3D images on movies like Star Wars for years. This isn’t it yet, but it is the next step. Imagine a phone, a wrist watch, or a contact lens that could generate a holographic image. Or a garbage-can-sized robot.

Continue reading “Holograms Can’t Be Too Thin”

Digitize Your Room With LIDAR

What’s the best way to image a room? A picture? Hah — don’t be so old-fashioned! You want a LIDAR rig to scan the space and reconstruct it as a 3D point map in your computer.

Hot on the heels of [Saulius Lukse]’s scanning thermometer, he’s replaced the thermal camera on their pan/tilt setup with a time-of-flight (TOF) camera — a Garmin LIDAR — capable of 500 samples per second and end up scanning their room in a mere fifteen minutes. Position data is combined with the ranging information to produce a point cloud using Python. Open that file in a 3D manipulation program and you’ll be treated to a sight like this:

Continue reading “Digitize Your Room With LIDAR”

Laser Surgery: Expanding The Bed Of A Cheap Chinese Laser Cutter

Don’t you just hate it when you spend less than $400 on a 40-watt laser cutter and it turns out to have a work area the size of a sheet of copy paper? [Kostas Filosofou] sure did, but rather than stick with that limited work envelope, he modified his cheap K40 laser cutter so it has almost five times the original space.

The K40 doesn’t make any pretenses — it’s a cheap laser cutter and engraver from China. But with new units going for $344 on eBay now, it’s almost a no-brainer. Even with its limitations, you’re still getting a 40-watt CO2 laser and decent motion control hardware to play with. [Kostas] began the embiggening by removing the high-voltage power supply from its original space-hogging home to the right of the work area. With that living in a new outboard enclosure, a new X-Y gantry of extruded aluminum rails and 3D-printed parts was built, and a better exhaust fan was installed. Custom mirror assemblies were turned, better fans were added to the radiator, and oh yeah — he added a Z-axis to the bed too.

We’re sure [Kostas] ran the tab up a little on this build, but when you’re spending so little to start with, it’s easy to get carried away. Speaking of which, if you feel the need for an even bigger cutter, an enormous 100-watt unit might be more your style.

Continue reading “Laser Surgery: Expanding The Bed Of A Cheap Chinese Laser Cutter”