Automated System Keeps Camper Van Air Fresh And Warm

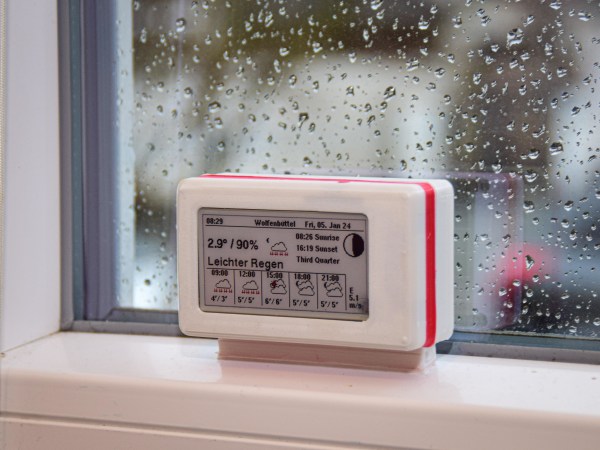
Air quality has become a hot topic in recent years. [Ryan Stout] was interested in improving it in his camper van, and set about doing something about it. His solution was an automated system that provided cleaner air and better comfort to boot.

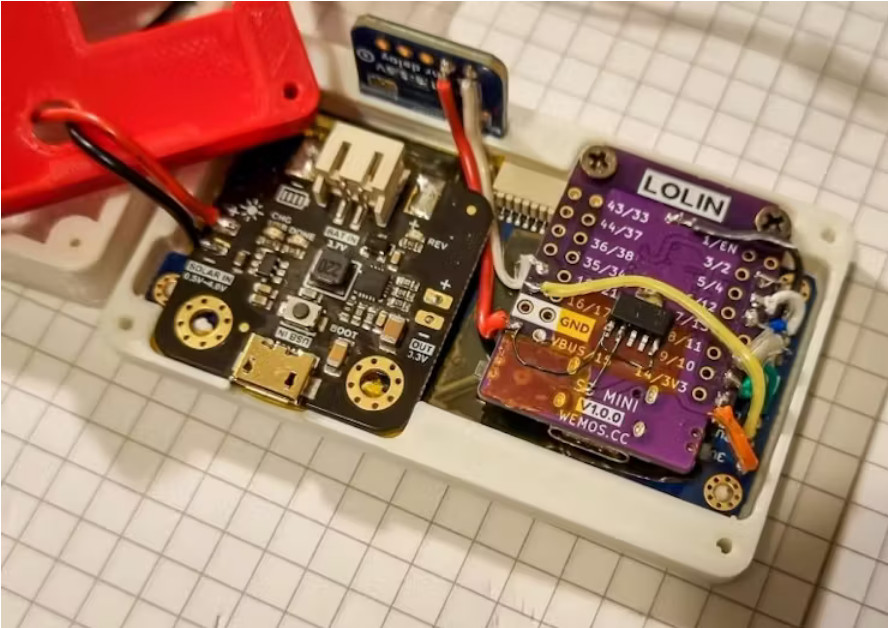
The concept was simple. [Ryan]’s system is based on an Arduino clone, and uses a SparkFun SCD40 as a CO2 sensor, and an MCP9808 for temperature. When the system detects excess carbon dioxide levels, it opens the MaxxAir fan in the camper by triggering it with an infrared signal. Similarly, when it detects excessively low temperatures inside the van, it kicks on a diesel furnace for heating. In a neat addition, to avoid the fan sucking in exhaust fumes, it also closes the fan in order to avoid exhaust fumes entering the camper unnecessarily. All the hardware was then  wrapped up in a simple 3D printed enclosure.

With this setup, [Ryan] has managed to cut the buildup of CO2 in his camper at night, and he credits this with reducing morning headaches when he’s out in the camper. We’d call that a win, to say nothing of the additional comfort created by the automatically-controlled heater! If you’re interested in something similar for your home HVAC system, we’ve got you covered.

a CH32V003 Linux-bearing PCB, single-sided, hand-etched, lovely

Bring Linux To CH32V003 Through, Yes, RISC-V Emulation

Like playing around with Linux on low-power devices? You’d be hard pressed to find a better example than the [tvlad1234]’s linux-ch32v003 project. It’s not just a one-off — it’s something you could build right now, since it requires hardly any extra parts.

With help of a 8 MB PSRAM chip for RAM supplementation purposes and an SD card, plus some careful tailoring of the Linux .config parameters, you get Linux on a chip never meant to even come close to handling this much power. The five minutes it takes to boot up to a prompt is part of the experience.

As usual with [tvlad1234]’s projects, there’s a fun twist to it! Running Linux on this chip is only possible thanks to [chlohr]’s mini-rv32ima project, which, as you might remember, is a RISC-V emulator. Yes, this runs Linux by running a RISC-V emulator on a RISC-V chip. The main reason for that is because the MCU can’t map the PSRAM chip into RAM, but if you use an emulator, memory mapping is only a matter of software. Having applied a fair amount of elbow grease, [tvlad1234] brings us buildroot and mainline Linux kernel configs you can compile to play with this — as well as a single-layer-ready KiCad board project on GitHub. Yep, you could literally etch a PCB for this project from single-sided copper-clad FR4 with a bit of FeCl3.

While the CH32V003 is undoubtedly a more impressive target for Linux, the RP2040 Linux project might be more approachable in terms of having most of the parts in your parts box. At least, up until we start valuing the CH32V003 for all the cool stuff it can do!

Sometimes It’s The Little Things

I had one of those why-didn’t-I-think-of-it moments this week, reading this article about multiplexing I2C on the ESP32 microcontroller. The idea is so good, and so simple, that it’s almost silly that it’s not standard hacker practice. And above all, it actually helps solve a problem that I’ve got. This is why I read Hackaday every day.

I2C is great in that it lets you connect up multiple devices to a pair of wires using a very bus architecture. Every device has its own address, the host calls them out, and hopefully all other devices keep quiet while just the right one responds. But what happens when you want to use a few of the same sensors, where each IC has the same address? The usual solution is to buy a multiplexer chip.

But many modern microcontrollers, like the ESP32, have an internal multiplexer setup that lets you map the pins with the dedicated hardware peripherals, usually at initialization time. Indeed, I’ve been doing it as an “init” task so long, I never thought to do it otherwise. But that’s exactly the idea behind [BastelBaus]’s hack – if you dynamically reassign the pins, you can do the I2C multiplexing with the chip you’ve got. This should probably work for any other chips that have multiple assignable pins for hardware peripherals as well.

Cool idea, but really simple. Why hadn’t I ever thought of it? I think it’s because I’ve always had this init / mainloop schema in my mind, which for instance the Arduino inherited and formalized in its setup() and loop() functions. Pin mappings go in the init section, right?

So what this hack really amounts to, for me, is a rethinking of what’s static and what’s dynamic. It’s always worth questioning your assumptions, especially when you’re facing a problem that requires a creative solution. Sometimes limitations are only in your mind. Have you had your mind opened recently by a tiny little hack?

A breadboard showing a tiny ESP32 board and two HMC5883L sensors connected to it on different pins

Avoid I2C Address Conflicts On ESP32 By Pin Muxing

Using hardware I2C on an ESP32? Do you need to connect multiple I2C devices with the same address? Normally, you wouldn’t be able to do that without extra parts, but on the ESP32, [BastelBaus] has found a nice hack — just connect your devices to different pins and slightly abuse the ESP32 GPIO muxing, no extra hardware required!

Initially, they tried separating SDA and SCL completely, and after a bit of tinkering, that’s worked out wonders! For this method, [BastelBaus] provides example Arduino code you could easily integrate into your project, and shows logic analyzer captures that demonstrate there’s barely any overhead. Later, they’ve also found out that you could multiplex only one of the pins, specifically, SDA, having the SCL line be common! As far as we see, this could also work out with split SCL, but do let us know if that doesn’t sound right.

Typically, such a problem is solved with an I2C multiplexer, and we’ve highlighted projects with them before. However, this simple method could also work on chips like the RP2040 or even the Raspberry Pi 4 — just a bit more limited, since the GPIO muxing for I2C has less available ports! Also, if you’re not using a chip with such a comfortable GPIO mux and you must use devices with overlapping addresses, check out the comment section under our I2C ecosystem article – there’s a fair few other methods you can use. And, if this method ever malfunctions for you, there’s a bunch of very straightforward ways you could debug your bus!

ESP32 Weather Station Looks Great With Color E-Paper Display

[educ8s.tv] has built weather stations before, but his latest is his best yet. It’s all thanks to its low-power design, enabled by its e-paper display.

The build is based around an ESP32 microcontroller, combined with a BMP180 sensor for measuring barometric pressure, and a DHT22 sensor for measuring temperature and humidity. By taking these values and feeding them into the Zambretti algorithm, it’s possible to generate a rudimentary weather forecast.

The weather station looks particularly impressive thanks to its six-color e-paper display. It’s brightly colored and easy to read, and displays graphs of temperature, pressure, and humidity over time. Plus, by virtue of the fact that it only draws power when updating, it allows the project to last a long time running solely on battery power.

As far as DIY weather stations go, this is an attractive and clean design that offers plenty of useful data to the user. We’ve seen some other neat builds in this vein before, too.

Continue reading “ESP32 Weather Station Looks Great With Color E-Paper Display”

Tiny Motion Detection Alarm Does The Trick

If you have mischievous children or forgetful elderly in your life, you might want to build a couple of these tiny motion detection alarms to help keep them out of harm’s way. Maybe you want to keep yourself out of the cookie jar. We say good for you.

But you could always put one of these alarms on a window, a drawer, or anything else you don’t want opened or moved. The MPU6050 3-axis IMU makes sure that any way the chosen item gets jostled, that alarm is going off.

As you may have guessed, there isn’t much more to this build — the brain is a Seeed Xiao ESP32-C3, and there’s a buzzer, a battery, a switch, and a push button to program it.

The cool thing about using an ESP32-C3 is that [gokux] can use these for other things, like performing a task when motion is detected. If you do want to build yourself a couple of these, here are step-by-step instructions.

If you’d rather detect motion in the vicinity, here’s a PIR-based solution.

Solar E-Ink Weather Station Works On Dark Days, Too

One way to get through the winter doldrums is to take notice of the minuscule positive changes in weather as spring approaches. Although much of the US is experiencing a particularly warm month, that’s not the case in Germany where [rsappiawf] resides. Even so, they are having a good time charting the weather on their new solar-powered E-ink weather station.

And in spite of the dark winter days, the device has been delivering weather updates for over a week on solar power alone. The brains of this operation is an ESP32 S3 Mini, which [rsappiawf] operated on a little bit. For starters, they removed the integrated RGB LED in order to save precious milliamps. Then they upgraded the voltage regulator to a TPS73733DCQR.

[rsappiawf] also has a TPL5110 power timer breakout module in the mix, which saves even more power by only turning on every once in a while according to the potentiometer setting, and only then turning on the project’s power. Check out the brief demo after the break, including the cool sliding action into the 3D-printed holder.

There’s a lot you can do to lower power consumption in a project like this. Here’s one that will go 60 days on a charge.

Continue reading “Solar E-Ink Weather Station Works On Dark Days, Too”