Mindblowing Graphics From An ATtiny85

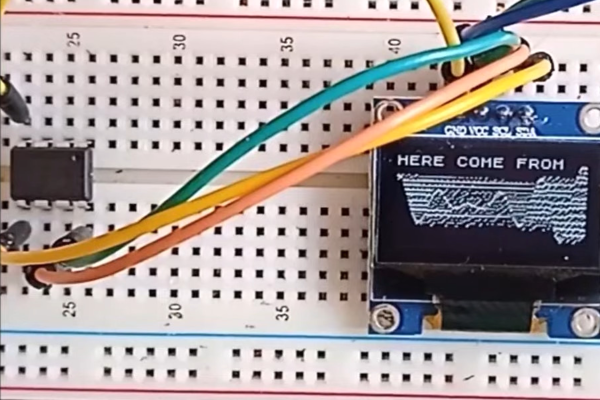
[Görg Pflug] wrote in with his really nice graphics library. It’s got multiple layers, two text consoles, greyscale, internal halftoning, and sprites. It can pull off a number of classic graphics tricks and demos. Oh yeah, and did we mention it runs on a freaking ATtiny85 and an I2C OLED screen?!

This is an amazing piece of work — if you’d asked us if this was possible, we would have probably said “no”. And now it’s yours to use in your own projects. The GitHub repo is full of demos showing off everything from switching between multiple layers, extremely rapid text scrolls, animations, boing balls, and even a Wolfenstein-style raycaster. On an ATtiny85.

There’s a demo video, embedded below, that shows it all off, but honestly you have to think about what’s going to to be suitably wowed. The first demo just seems to have a graphic wave over static text, for instance. No big deal? It’s blending the greyscale layers together and dithering them out to black and white for the OLED in real time! On an ATtiny85.

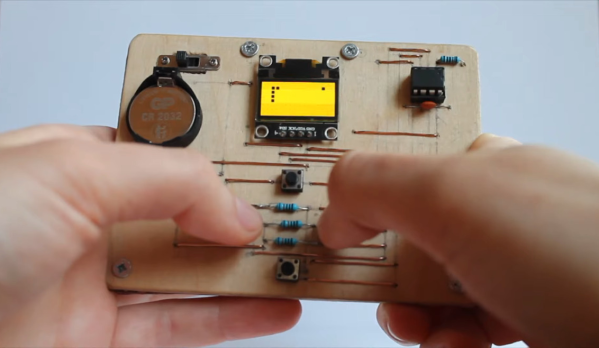
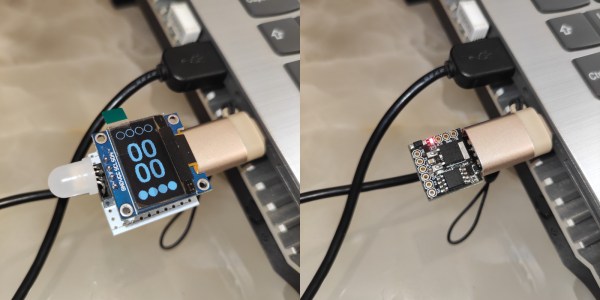
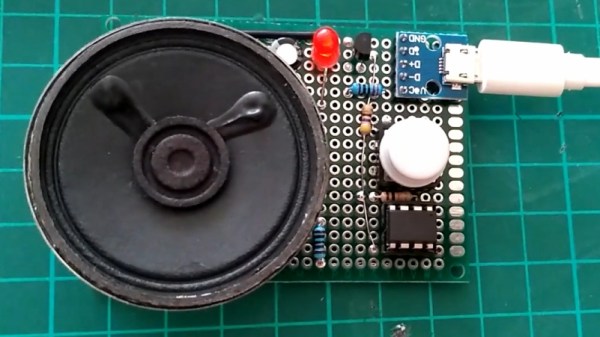
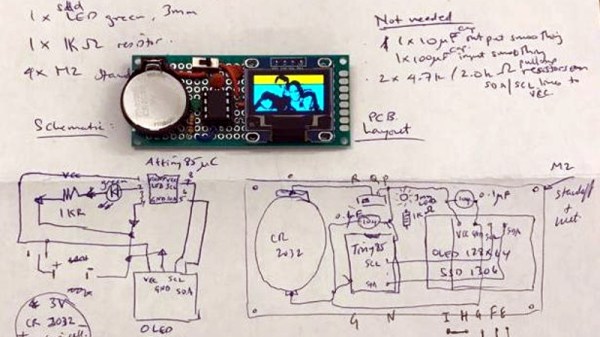
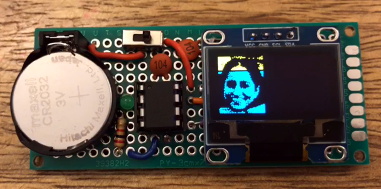
While the library is written in straight C++, there are even a couple examples of how you’d integrate this with Arduino’s Wire library if you so wished. We don’t know about you, but this makes us want to whip together an ATtiny85 and SSD1306 OLED demo board just to start playing around. This isn’t just an amazing hack, but it would also be a useful way to add graphics and a nice console to any project you’re working on.

Did we mention it’s all done on an ATtiny85?  Over I2C? Kudos!

Continue reading “Mindblowing Graphics From An ATtiny85”

ATtiny85 Snake Game Is A Circuit Sandwich

If there’s any looming, unwritten rule of learning a programming language, it states that one must break in the syntax by printing Hello, World! in some form or another. If any such rule exists for game programming on a new microcontroller, then it is certainly that thou shalt implement Snake.

This is [__cultsauce__]’s first foray away from Arduinoville, and although they did use one to program the ATtiny85, they learned a lot along the way.

It doesn’t take much to conjure Snake with an ’85 — mostly you need a screen to play it on (an OLED in this case), some buttons to direct the snake toward the food dot, a handful of passives, and a power source.

[__cultsauce__] started by programming the microcontroller and then tested everything on a breadboard, both of which are admirable actions. Then it was time to make this plywood and cork sandwich, which gives the point-to-point solder joints some breathing room and keeps them from getting crushed. Be sure to check it out in action after the break, and grab the files from GitHub if you want to charm your own ‘tiny Snake.

There’s a ton you can do with this miniature microcontroller, and that includes machine learning.

Continue reading “ATtiny85 Snake Game Is A Circuit Sandwich”

I2C To The Max With ATtiny

The Arduino is a powerful platform for interfacing with the real world, but it isn’t without limits. One of those hard limits, even for the Arduino MEGA, is a finite number of pins that the microcontroller can use to interface with the real world. If you’re looking to extend the platform’s reach in one of your own projects, though, there are a couple of options available. This project from [Bill] shows us one of those options by using the ATtiny85 to offload some of an Arduino’s tasks using I2C.

I2C has been around since the early 80s as a way for microcontrollers to communicate with each other using a minimum of hardware. All that is needed is to connect the I2C pins of the microcontrollers and provide each with power. This project uses an Arduino as the controller and an arbitrary number of smaller ATtiny85 microcontrollers as targets. Communicating with the smaller device allows the Arduino to focus on more processor-intensive tasks while giving the simpler tasks to the ATtiny. It also greatly simplifies wiring for projects that may be distributed across a distance. [Bill] also standardizes the build with a custom development board for the ATtiny that can also double as a shield for the Arduino, allowing him to easily expand and modify his projects without too much extra soldering.

Using I2C might not be the most novel of innovations, but making it easy to use is certainly a valuable tool to add to the toolbox when limited on GPIO or by other physical constraints. To that end, [Bill] also includes code for an example project that simplifies the setup of one of these devices on the software end as well. If you’re looking for some examples for what to do with I2C, take a look at this thermometer that communicates with I2C or this project which uses multiple sensors daisy-chained together.

Continue reading “I2C To The Max With ATtiny”

Tiny pomodoro timer starts as soon as you plug it in.

Cherry Pomodoro Timer Forces You To Follow

If you have trouble staying focused and getting work done, the Pomodoro Technique of working in 25-minute intervals with 5-minute breaks is pretty hard to beat. The only problem is that it requires a lot of input from the user, and all that timer-setting can get in the way of actually getting down to business. The absolute worst is when you find yourself working hard, but see that forgot to set the damn timer (ask us how we know). In essence, the tomato itself can only do so much — you have to actually use it and honor the timer, put in the work, and believe in the system.

A tiny Pomodor Timer that starts automatically when plugged into a USB port.But what if you didn’t have to do as much? With [Erfan Sn]’s design, all you have to do is plug it in to a USB port and the countdown starts automatically. Not only does this Pomodoro timer force you to get with the program, it also makes you take breaks from the screen by putting the computer into sleep mode when the 25 minutes (or whatever time you set in the software) are up. This thing even keeps track of your Pomodoro count.

At the heart of this build is the Digispark ATtiny85 dev board, which has a handy onboard USB plug. It can be built with or without the OLED screen, which is good if you are easily distracted by the timer itself. This cherry tomato only costs about $10 to make, it’s tiny, and you can take it anywhere.

As you will see in the gifs on GitHub, [Erfan Sn] has it plugged into a female USB-A to male USB-C, which is probably better for the computer long-term, what with all the plugging and unplugging. When we make ours, we’ll probably plug it into a hub that has power switches for each port.

If all of this sounds like too much work, check out this build that senses whether or not you’re in the chair.

ATtiny85 on circuit board with 2n2222, pushbutton, usb-c power connector, LED, and speaker.

Custom Compression Squeezes Classic Computer Choruses Into A Tiny Controller

Geeks of a certain vintage will have fond memories of games that were simplistic by today’s standards, but drew one in all the same. Their low fidelity graphics were often complimented by equally low fidelity music being forced through the afterthought of a speaker that inhabited most computers. Despite the technical constraints of the era, these games didn’t just offer gameplay. They told stories, and they were immersive in a way that some would think wouldn’t be relatable to a younger generation.

That didn’t stop [Thanassis Tsiodras] from sharing the classic “The Secret of Monkey Island” with his niece and nephew when they were young. Excited to see his family after a year of separation due to COVID-19, [Thanassis] wanted to give them a handmade gift: The music from “The Secret of Monkey Island” on a custom player. What an uncle!

[Thanassis] could have just recorded the music and played it back using any number of chips made for the purpose, but being a long time software engineer, he decided to take the scenic route to his destination. First, DOSBox was hacked to dump the speaker output into a file. Python, C, and 30 years of experience were leveraged to squeeze everything into the 8 KB storage of an ATtiny85. Doing so was no small feat, as it required that he create a custom implementation of Huffman compression to get the data small enough to fit on chip. And when it fit, but didn’t work, even more optimization was needed.

The end result was worth it however, with the music from “The Secret of Monkey Island” playing in its original form from a speaker driven by the ever so humble but useful 2n2222. [Thanassis]’ site is replete with details too intricate to post here, but too neat to miss. Watch the video below the break for a demonstration.

Continue reading “Custom Compression Squeezes Classic Computer Choruses Into A Tiny Controller”

An OLED Photo Frame Powered By The ATtiny85

Rolling your own digital picture frame that loads images from an SD card and displays them on an LCD with a modern microcontroller like the ESP32 is an afternoon project, even less if you pull in somebody else’s code. But what if you don’t have the latest and greatest hardware to work with?

Whether you look at it as a practical application or an interesting experiment in wringing more performance out of low-end hardware, [Assad Ebrahim]’s demonstration of displaying digital photographs on an OLED using the ATtiny85 is well worth a look. The whole thing can put put together on a scrap of perfboard with a handful of common components, and can cycle through the five images stored on the chip’s flash memory for up to 20 hours on a CR2032 coin cell.

As you might expect, the biggest challenge in this project is getting all the code and data to fit onto the ATtiny85. To that end [Assad] wrote his own minimal driver for the SSD1306 OLED display, as the traditional Adafruit code took up too much space. The driver is a pretty bare bones implementation, but it’s enough to initialize the screen and get it ready for incoming data. His code also handles emulating I2C over Atmel’s Universal Serial Interface (USI) at an acceptable clip, so long as you bump the chip up to 8 MHz.

For the images, [Assad] details the workflow he uses to take the high-resolution color files and turn them into an array of bytes for the display. Part of that it just scaling down and converting to 1-bit color, but there’s also a bit of custom Forth code in the mix that converts the resulting data into the format his code expects.

This isn’t the first time we’ve seen somebody use one of these common OLED displays in conjunction with the ATtiny85, and it’s interesting to see how their techniques compare. It’s not a combination we’d necessarily chose willingly, but sometimes you’ve got to work with whats available.

Spectrum Display Uses Tiny CPU And Many LEDs

You would think the hard part about creating a spectrum analyzer using a pint-sized ATTiny85 would be the software. But for [tuenhidiy], we suspect the hard part was fabricating an array of 320 LEDs that the little processor can drive. The design does work though, as you can see in the video below.

The key is to use a TPIC6B595N which is an 8-bit shift register made to drive non-logic outputs. With all outputs on, the driving FETs can supply 150 mA per channel and the device can handle 500 mA per channel peak. At room temperature, the part can go over 1W of total power dissipation, although that goes down with temperature, of course. If you need higher power, there’s a DW-variant of the part that can handle a few hundred milliwatts more.

Continue reading “Spectrum Display Uses Tiny CPU And Many LEDs”