An exploded view render of a red 3D printed case with a green PCB is inside with visible USB-A connectors with a mouse and keyboard graphic above each and "A" and "B" labels above USB-C connectors on the other side.

Building A Better Keyboard And Mouse Switch

Switching inputs between desktops seems like something that should be simple but can prove to be a pain in reality. [Hrvoje Cavrak] decided to take matters into his own hands and build a better keyboard and mouse switch.

DeskHop is built from two Raspberry Pi Pico boards connected via UART and separated by an Analog Devices ADuM1201 dual-channel digital isolator. Through the magic of Pico-PIO-USB these RP2040s can be both host and device. To keep things simple, the PCB is single-sided, and the BOM only has five distinct components.

Once hooked up to your Windows, Mac, or Linux device, your mouse pointer “magically” goes from one screen to the other when dragged across the screen edge. Keyboard LEDs can be reprogrammed to indicate which device is active, and the real beauty of the device is that since it’s a hardware solution, you don’t have to install any software on a computer you might not have admin access to.

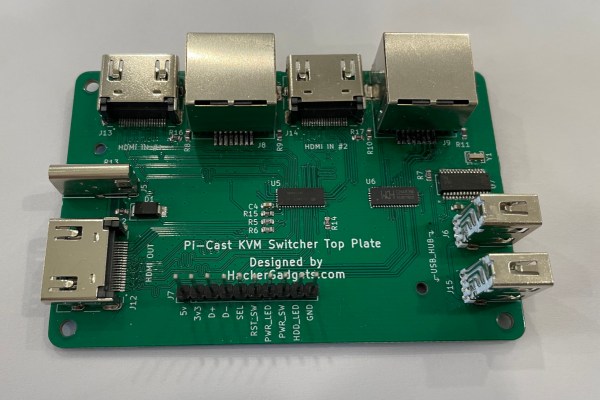
If you want to see some more ideas for keyboard and mouse switching, check out this Pi KVM with ATX signaling, this USB triplexer, or this Pi KVM on a PCIe card.

Home Network Organization Gets Out Of Hand

[SpookyGhost] has a big home network, and has taken cable management and server organization to the extreme. He has written about individual components before, but this blog post brings it all together and reviews the entire system. The networking gear is installed in a closet and mounted in a 25U tall 19-inch rack. From top to bottom, here is a brief list of the gear:

Full View of Network Equipment Rack
  • Keystone patch panels
  • pfSense Firewall / Router
  • Two Cisco Ethernet switches
  • Redundant internet connections
  • Shelf of numerous servers
  • RAID-Z2, 12 each 8 TB SCSI, media storage
  • NAS RAID, 6 ea 4 TB SAS, 2 ea 800 GB SSD
  • Video Management System, 48 TB storage
  • UPS and power distribution units

Most of the Ethernet uses 10GBASE-T and Cat6 cabling and connectors, with some interconnects use fiber optical cable and LC connectors. Unsurprisingly, as this setup grew and grew, [spooky] had to pipe in air-conditioning to the closet.

This is a serious installation, but there are plenty of good ideas for folks with less ambitious networking goals and/or requirements. We liked the swappable Keystone jacks in the patch panels, and the cable pass-through panel with a dense curtain of rubber fringe to keep things looking tidy. If you have any ideas to share on network equipment and cable management, let us know in the comments.

DIYson Lamp Hides Cables Between The Seams

[Steven Bennett] is so fond of Dyson’s new Lightcycle lamp that he’s decided to clone his own version in the spirit of the original. Dyson, however, knows what makes their lamp so special — so much that they patented their technique for tucking away the power wiring. Undaunted, [Steven]’s latest challenge has been to create a cable management solution that captures the elegance of the original without making a flat-out duplicate.

[Steven]’s latest update starts with the details of the original model’s patent. In a nutshell, Dyson’s elegance comes from both a flat cable (a flex PCB, perhaps?) and a magnetic interface that transfers power between the two primary structural beams. The latter half discusses [Steven]’s alternate solution: a miniature drag chain that can be 3D printed to arbitrary lengths. Like the flat flexible cable, this cable rides in the groove of the lamp’s two structural beams; but unlike the original, it spools outwards into a hoop on one end of its travel length. Overall [Steven] is quite happy with this result, and we think this solution gives the lamp a charm that’s distinctly original.

Capturing the design essence doesn’t just stop at wire management though. Have a look at some previous video logs in the series to get a sense of some of the other challenges faced in both heat dissipation and mechanical feel.

Wire management, when done well, scratches a design itch somewhere in the back of our heads. If you’re curious for more cable management solutions, have a look at some of these other tricks that use tape measure or involve a DIY coiling method.

Continue reading “DIYson Lamp Hides Cables Between The Seams”

Pi-Cast Adds ATX Signalling To KVM

A KVM is a great tool for administering a number of different computers without cluttering one’s desk with extra peripherals, or for having to re-connect the keyboard, video, and mouse to each new machine as needed. For local administration this can save a ton of time and headache. For remote administration, though, a virtual KVM is needed, and although these solutions are pricey it’s possible to build one around a Raspberry Pi for a fraction of the cost. This one adds even more functionality by also switching the ATX signals from the motherboard and simplifying cable management to boot. Continue reading “Pi-Cast Adds ATX Signalling To KVM”

DIY Laptop Stand: Why Stop At One When You Can Slot Three?

We make the tools we need, and that’s definitely the case with [Marco Schulte]’s laptop stand. It slots not one, not two, but three laptops at once.

For all their portability, multiple laptops can be a bit clunky to manage on a desk, so [Marco]’s solution definitely saves space while keeping things accessible. The laptop in the front can be open for use and easy access, while the two in the back are held vertically and can be attached to external monitors or other peripherals.

Not only does it save space, but the stand provides ample spots to anchor cable ties for securing the inevitable mess of wires and cables that dealing with three laptops brings. It makes for a tidier desk, that’s for sure.

The stand was designed in Fusion 360 and was cut from plywood with a CNC router. Does this design give you any ideas, or would you like to make one for yourself? The design files are here.

No access to a CNC router? No problem if you have glue and some spare boxes laying around! You might be surprised at how sturdy a few layers of cardboard and glue can be.

Cables Too Long? Try Cable Management Via DIY Coiling

Annoyed by excessively-long cables? Tired of the dull drudgery and ugly results of bunching up the slack and wrapping it with a twist-tie? Suffer no longer, because the solution is to make your own coiled cables!

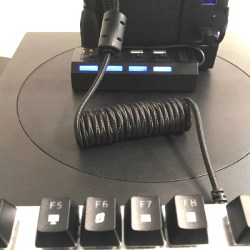
[Dmitry] is annoyed with long, unruly cables and shared a solution he learned from the DIY keyboards community: coil them yourself with a piece of dowel, a hair dryer, and about 10 minutes of your time. However, it’s just a wee bit more complicated than it may seem at first glance.

The process begins with wrapping a cable around a mandrel, then heating it as uniformly as possible to thermoform the jacket, but the instructional video (embedded below) says that all by itself that isn’t quite enough to yield lasting results. After heating the cable and letting it cool, the coils will be formed but it will not hold the new shape very well. The finishing touch is to “reverse” the direction of the coils, by re-wrapping it backward around the mandrel, inverting the coils upon themselves. This process is awkward to explain, but much simpler to demonstrate. This video by [DailySetupTech] explains this process around the 2:30 mark. That final step is what yields a tightly-wound, springy coil.

The nice part about using this process as a cable management technique is that it is possible to coil only a portion of a cable, leaving the exact amount of uncoiled slack required for a given application. Keep it in mind the next time some cables need managing. And if you don’t want to coil a cable but still need it out of the way, you might find this design for a DIY cable chain made from a tape measure useful.

Continue reading “Cables Too Long? Try Cable Management Via DIY Coiling”

IWings For The New Apple Power Adaptor

You might remember the old Apple MagSafe adaptor with the cute little fold out “wings” that served not only as a pragmatic cable management tool, but in our experience also expedited the inevitable and frayed end of your charger. Apple seems to have remedied the latter by opting for removable USB-C cables in latest designs, but the complete omission of a pop-out cable spooling contraption is problematic.

[Eric], an industrial designer, took it upon himself to design a 3D printed add on for the new generation of chargers. His video is certainty one of those satisfying accounts, where the whole process from conceptional sketch to a working Hack is neatly self-contained in a single video.  The design is largely based off the original version, implemented in PLA together with piano wire serving as the hinge pin. We think this is a very good example of how 3D printers can be used to personalise and tweak commercial products to suite particular needs.

If you are looking for a more general 3D printed cable management tool, check out this geared cable winder we featured earlier.