Harbor Freight And LEGO PCB Vise Is Cheap And Effective

It doesn’t take much chasing things around the bench with a soldering iron to appreciate the value of good work holding. And don’t get us started on those cheap “helping hands” alligator clip thingies; they’re somehow worse than no work holding. Isn’t there a better way?

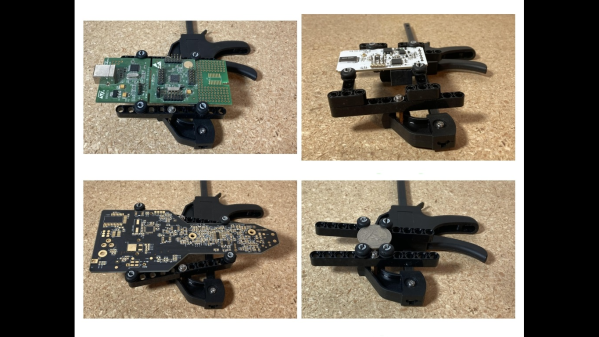
Maybe, judging by [Paul Bryson]’s idea for a dirt cheap PCB vise. It’s a pretty clever design that’ll have you heading to Harbor Freight, or whatever the moral equivalent is in your location, where you’ll pick up a small ratcheting bar clamp. [Paul] used a 4″ (10 cm) clamp; that which looks fine for a wide range of boards, but we suppose you could go bigger if you like. You could also stop there and just clamp your PCBs in the plastic jaws, but [Paul] adorned the jaws with swiveling arms made from LEGO Technic pieces, of all things. Rubber grommets slipped onto Technic pegs go into the holes on the beam to hold the PCB edges firmly, while the swiveling action adapts to odd-shaped boards.

To our mind, the biggest advantage to this design other than cost is how low it holds the PCB — a decided advantage while working under the microscope. Don’t have any Technics parts close to hand? No worries, 3D printed parts could easily stand in, and maybe even improve the design. [Paul] also shows off a substitute for the Technics beam rendered in PCB material, which would reduce the height of the workpiece over the bench even more.

We’ve seen a lot of PCB vises come and go, using everything from scrap wood to 3D printed compliant mechanisms. But we doubt you’ll find anything more cost-effective than [Paul]’s design.

Getting Geared Up For Home Powder Coating

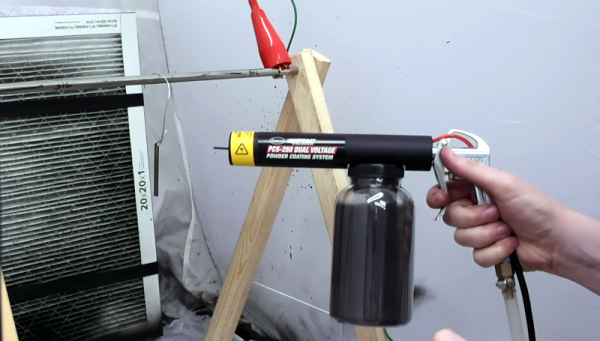
[Blondihacks] wanted to do powder coating for a model train without a lot of special equipment. She started with an Eastwood kit that runs about $230. Depending on the options, you can get the gun by itself for between $110 – $170. However, you will need more than just this kit. You can see how [Blondihacks] used the kit in the video below.

The idea behind powder coating is simple: an electrostatic charge attracts a powder — usually some polymer — and makes it stick to an item. Then heat or UV light turns the powder into a hard finish much tougher than paint. Powder coating can be thicker than paint and doesn’t run, either.

The gun requires a small air compressor, and you need an electric oven, which could be a toaster oven. It probably shouldn’t be an oven you plan to use for food. It should also be in a well-ventilated area, plus you’ll want a respirator or dust mask. [Blondhacks] used a portable paint booth so as not to spew powder everywhere, which looked nice, although you could just use a big cardboard box. A custom jig to hang the parts while spraying, and she was ready to go.

If you are on a budget, by the way, you can get a kit from Harbor Freight for a bit less. It probably has fewer accessories, and we don’t know how it compares, but it is an option for much less money. Either way, you need a small air pressure regulator, and you also need a dryer and a filter for the air because you need dry and clean air so as not to contaminate the powder.

The part is grounded, and the gun charges the powder as it sprays. Once coated, you stick the part in the oven for about 20 minutes. The results look good and, compared to a painted part, the coating was super tough. For intricate parts, you can heat the part and then dip it in fluid-like powder. If you prefer to stick to regular powder coating, we have some tips.

Continue reading “Getting Geared Up For Home Powder Coating”

Ask Hackaday: What’s Your “Tactical Tool” Threshold?

With few exceptions, every field has a pretty modest set of tools that would be considered the minimum for getting most jobs done. A carpenter can make do with tools that would fit in a smallish bag, while a mechanic can handle quite a few repairs with a simple set of socket wrenches and other tools. Even in electronics, a lot of repairs and projects can be tackled with little more than a couple of pairs of pliers, some cutters, and a cheap soldering iron.

But while the basic kit of tools for any job may be enough, there will always be those jobs that need more tools. Oh sure, sometimes you can — and should — make do with what you’ve got; I can’t count the number of times I’ve used an elastic band wrapped around the handles of a pair of needlenose pliers as an impromptu circuit board vise. But eventually, you’re going to come upon a situation where only the “real” tool will do, and substitutes need not apply.

As I look around my shop and my garage, I realize that I may have a problem with these “tactical tool” purchases. I’ve bought so many tools that I’ve used far fewer times than I thought I would, or perhaps even never used, that I’m beginning to wonder if I tackle projects just as an excuse to buy tools. Then again, some of my tactical purchases have ended up being far more useful than I ever intended, which has only reinforced my tendency toward tool collecting. So I thought I’d share a few of my experiences with tactical tools, and see how the community justifies tactical tool acquisitions.

Continue reading “Ask Hackaday: What’s Your “Tactical Tool” Threshold?”

More Drill Press Mods: Adding A VFD Means No More Belt Changes

A decent drill press is an essential machine tool for almost any kind of shop, and marks a significant step up in precision compared to a hand drill. The ability to drill square, true holes is one thing, but the added power over what’s possible with a portable tool is the real game changer. If only you didn’t have to switch around those damn belts to change speeds, though.

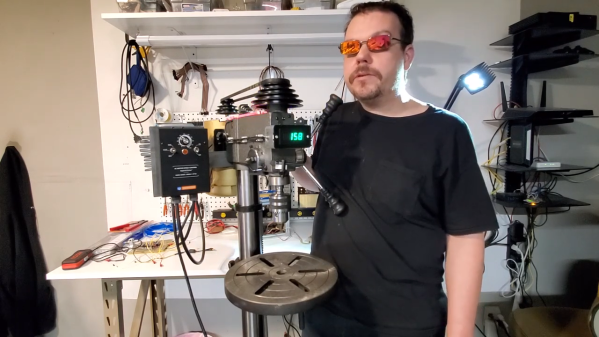
You don’t, of course, if you go through the effort to add a variable frequency drive to your drill press like [Midwest Cyberpunk] did, along with some other cool mods. The donor tool for these mods came from — where else? — Harbor Freight. Some will quibble with that choice, but the tool was pretty cheap, and really all [Midwest] was interested in here was some decent castings and a quill with acceptable runout, since the entire power train of the tool was slated for replacement. The original motor gave way to a beefy Baldor 3-phase/240-volt motor controlled by a VFD mounted on a bracket to the left of the drill press head, allowing the stock belt and step pulley transmission to be greatly simplified. Continue reading “More Drill Press Mods: Adding A VFD Means No More Belt Changes”

Small Engine Failure Leads To Impromptu Teardown

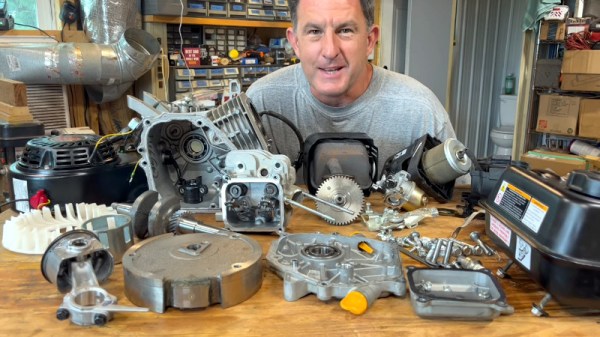
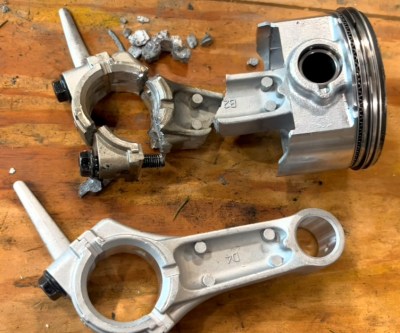
When the 6.5 HP (212 cc) Harbor Freight Predator engine in his kid’s go-kart gave up the ghost after some particularly hard driving, [HowToLou] figured it would be a good time to poke around inside the low-cost powerplant for our viewing pleasure. As a bonus, he even got it up and running again.

The shattered rod, and its replacement.

For an engine that has a retail price of just $160 USD, we’ve got to admit, the inside of the Predator doesn’t look too shabby. Admittedly, [HowToLou] determined that the cause of the failure was a blown connecting rod, but he also mentions that somebody had previously removed the engine’s governor, allowing it to rev up far beyond the nominal maximum of 3,600 RPM. No word on who snuck in there and yanked the governor out, but we’re betting it wasn’t the 7-year old driver…

Replacing the connecting rod meant taking most of the engine apart, but for our education, [HowToLou]  decided to take it a bit further and remove everything from the engine. After stripping it down to the block, he re-installs each piece while explaining its function. If you’ve ever wanted to see what makes one of these little engines tick, or perhaps you’ve got a Predator 212 cc in need of a repair or rebuild, the presentation is a fantastic resource.

Incidentally, this isn’t the first time we’ve seen the go-kart in question — back in June, we covered the unique electric reverse that [HowToLou] came up with for it.

DIY Prony Dyno Properly Displays Power Production

When hackers in the US think of a retailer called Harbor Freight, we usually think of cheap tools, workable but terrible DVM’s, zip ties, and tarps. [Jimbo] over at [Robot Cantina] looked at the 212cc “Predator” engine that they sell and thought “I bet I could power my Honda Insight with that.” And he did, successfully! How much power did the heavily modified engine make? In the video below the break, [Jimbo] takes us through the process of measuring its output using a home built dyno.

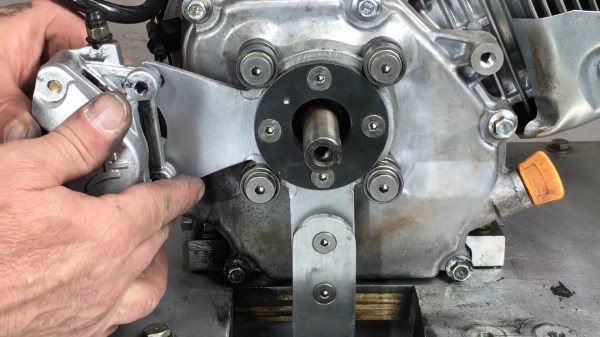
The dyno that [Jimbo] has built is a Prony Dyno, and it’s among the oldest and simplest designs available. A torque arm is extended from a disk brake caliper and connects to a force gauge. The engine is ran up to its highest speed, and then he brake is applied to the crankshaft until the engine almost stalls. A tachometer keep track of the RPM, and the force gauge measures the force on the torque arm. Torque is multiplied by RPM and the result is divided by a constant of 5252, and voilà: Horsepower. A computer plots the results across the entire range, and the dyno test is complete.

That only tells part of the story, and the real hack comes when you realize that the dyno stand, the force gauge setup and pretty much everything that can be built at home has been built at home. You’ll also enjoy seeing the results of some driving tests between the 212cc engine and its bigger 420cc brother, how even minor changes to the engine affect the horsepower and torque curves, and how that affects the Honda that he calls his “Street legal go cart.”

Speaking of unusual power plants, how about plant some hobby sized jet turbines on the back of your Tesla for fun?

Continue reading “DIY Prony Dyno Properly Displays Power Production”

World’s Cheapest And Possibly Worst IR Camera

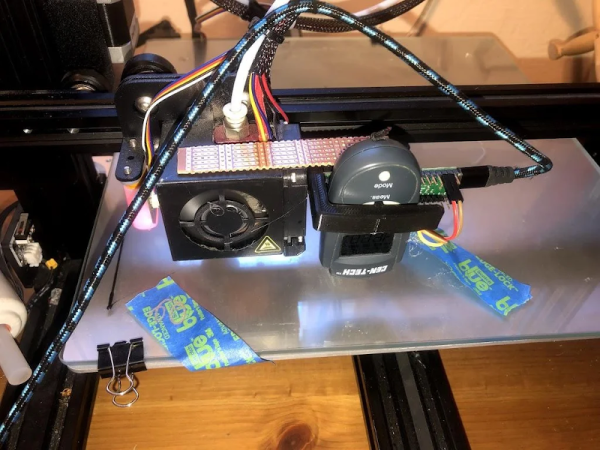
Don’t blame us for the title. [CCrome] admits it may well be the cheapest and worst IR camera available. The concept is surprisingly simple. Mount a cheap Harbor Freight non-contact thermometer on a 3D printer carriage and use it to scan the target. The design files are available on GitHub.

There is, of course, an Arduino to grab the data and send it to the PC. Some Python code takes care of converting it into an image.

Perhaps you don’t need a camera, but having a way to communicate with an $11 IR temperature sensor might come in handy someday. You do have to mash the measurement button down, so [CCrome] used the 3D printer to make a clamp for the button that also holds the POGO pins to the PCB. We would have been tempted to solder across the switch and also solder the wires to the pad. But, then again, you need a 3D printer for the project anyway.

Don’t expect the results you would get from a real thermal sensor. If you want that, you may have to build it yourself or open your wallet wide. If you need some inspiration for a use case, look at the thermal camera contest from a few years back.