Ethernet For Hackers: Equipment Exploration

Last time, we talked about the surface-level details of Ethernet. They are fundamental to know for Ethernet hacking, but they’re also easy to pick up from bits and pieces online, or just from wiring up a few computers in your home network. Now, there’s also a bunch of equipment and standards that you will want to use with Ethernet – easy to find whether used or new, and typically as easy to work with. Let’s give you a few beacons!

Routers And Switches

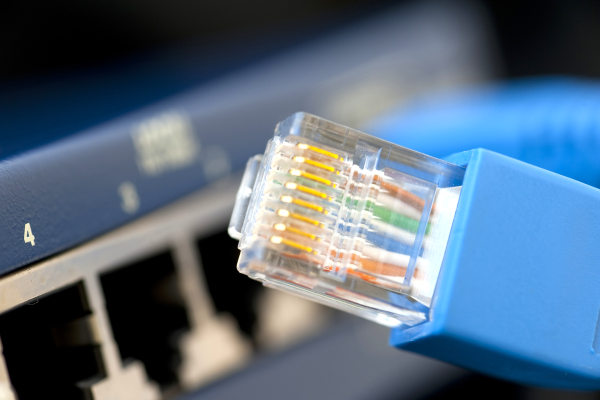
Whenever you see a box with a few Ethernet ports, it’s either referred to as a router, or a switch, sometimes people will even use the word “hub”! Fortunately, it’s simpler than it may seem. A router is a smart device, typically with an OS, that ties two or more networks together – routing packers from one network to another, and typically taking care of things like handing out local IP addresses via DHCP. A switch merely helps Ethernet devices exchange packets between each other on the same level – it’s typically nowhere near as smart as a router gets. Oftentimes, a home router will contain a switch inside, so that you can plug in multiple of your home devices at once. That’s the main difference – a switch merely transmits packets between Ethernet-connected devices, while a router is a small computer taking care of packet forwarding between networks and possibly including an Ethernet switch on the side.
Continue reading “Ethernet For Hackers: Equipment Exploration”

Ethernet For Hackers: The Very Basics

Ethernet is ubiquitous, fast, and simple. You only need two diffpairs (four wires) to establish a 100Mbit link, the hardware is everywhere, you can do Ethernet over long distances easily, and tons of the microcontrollers and SoCs support it, too. Overall, it’s a technology you will be glad to know about, and there’s hundreds of scenarios where you could use it.

If you need to establish a high-bandwidth connection between two Linux boards in your project, or maybe a Linux board and a powerful MCU, maybe make a network between microcontrollers, Ethernet’s your friend. It also scales wonderfully – there’s so much tech around Ethernet, that finding cables, connectors or ICs tends to be dead easy. Plus, the world of Ethernet is huge beyond belief. Ethernet as most of us know it is actually just the consumer-facing versions of Ethernet, and there’s a quite a few fascinating industrial and automotive Ethernet standards that flip many of our Ethernet assumptions upside down.

Now, you might be missing out on some benefits of Ethernet, or perhaps misunderstanding how Ethernet works at all. What does it mean when a microcontroller datasheet says “has Ethernet interface”? If you see five pins on an SBC and the manufacturer refers to them as “Ethernet”, what do you even do with them? Why does the Raspberry Pi 4 SoC support Ethernet but still requires an extra chip, and what even is GMII? Continue reading “Ethernet For Hackers: The Very Basics”

Blinkenlights To Bootloader: A Guide To STM32 Development

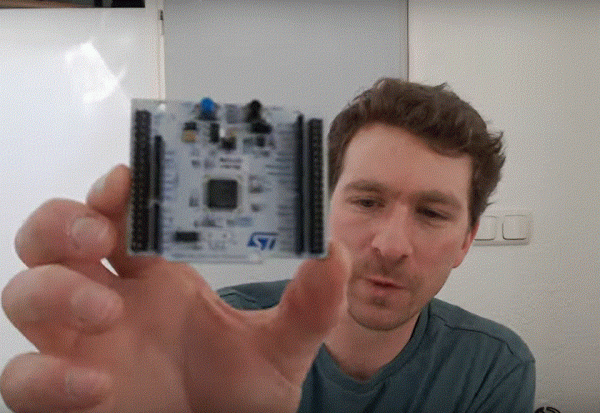
While things like the Arduino platform certainly opened up the gates of microcontroller programming to a much wider audience, it can also be limiting in some ways. The Arduino IDE, for example, abstracts away plenty of the underlying machinations of the hardware, and the vast amount of libraries can contribute to this effect as well. It’s not a problem if you just need a project to get up and running, in fact, that’s one of its greatest strengths. But for understanding the underlying hardware we’d recommend taking a look at something like this video series on the STM32 platform.

The series comes to us from [Francis Stokes] of Low Byte Productions who has produced eighteen videos for working with the STM32 Cortex-M4 microcontroller. The videos start by getting a developer environment up and blinking LEDs, and then move on to using peripherals for more complex tasks. The project then moves on to more advanced topics and divides into two parts, the development of an application and also a bootloader. The bootloader begins relatively simply, and then goes on to get more and more features built into it. It eventually can validate and update firmware, and includes cryptographic signing (although [Francis] notes that you probably shouldn’t use this feature for production).

One of the primary goals for [Francis], apart from the actual coding and development, was to liven up a subject matter that is often seen as dry, which we think was accomplished quite well. A number of future videos are planned as well. But, if you’re not convinced that the STM32 platform is the correct choice for you, we did publish a feature a while back outlining a few other choices that might provide some other options to consider.

Continue reading “Blinkenlights To Bootloader: A Guide To STM32 Development”

Importing EAGLE Projects Into KiCad 7, And How To Fix Them

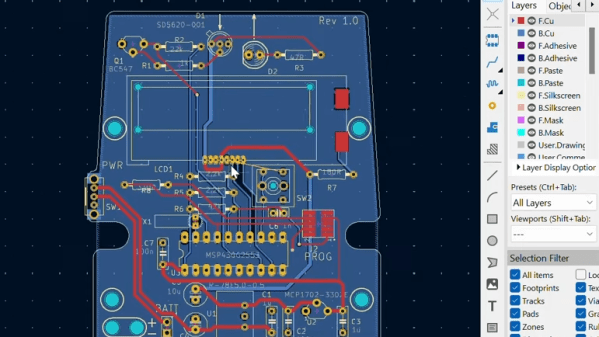
Migrating a PCB design from one CAD software package to another is no one’s favorite task. It almost never works cleanly. Often there are missing schematic symbols, scrambled PCB footprints, and plenty of other problems. Thankfully [shabaz] shows how to import EAGLE projects into KiCad 7 and fix the most common problems one is likely to encounter in the process. Frankly, the information couldn’t come at a better time.

This is very timely now that EAGLE has gone the way of the dodo. CadSoft EAGLE used to be a big shot when it came to PCB design for small organizations or individual designers, but six years after being purchased by Autodesk they are no more. KiCad 7 is a staggeringly capable open-source software package containing some fantastic features for beginner and advanced designers alike.

Of course, these kinds of tutorials tend to be perishable because software changes over time. So if you’re staring down a migration from EAGLE to KiCad and could use some guidance, there’s no better time than the present. [shabaz]’s video showing the process is embedded below.

Thanks to [problemchild68] for the tip!

Continue reading “Importing EAGLE Projects Into KiCad 7, And How To Fix Them”

A Handy Guide To The Humble BBS

Some of us who’ve been online since the early days fondly remember the web of yore — with its flashing banners, wildly distracting backgrounds, and automatic side-scrolling text. But there was a time before the worldwide web and the Internet as we recognize it today, and the way of communicating in this before-time was through Bulletin Board Systems, or BBS. There are still some who can cite this deep magic today, and this page is perhaps the definitive guide to this style of retrocomputing.

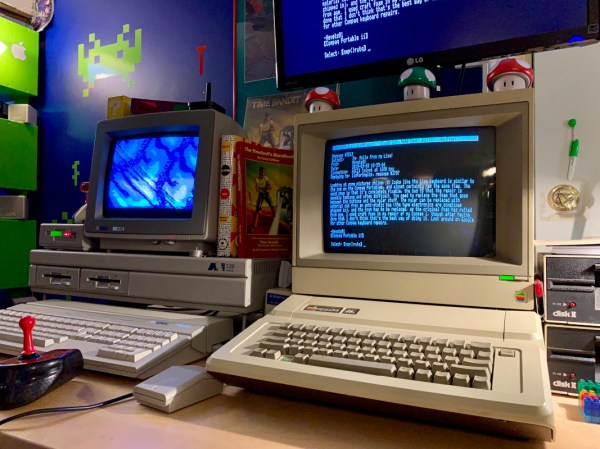
This how-to is managed by [Blake.Patterson] who is using a wide variety of antique machines and some modern hardware in order to access the BBSes still in service. He notes in this guide that it’s possible to use telnet and a modern computer to access them, but using something like an Amiga or Atari will give you the full experience. There are some tools that convert the telephone modem signals from that original hardware to something that modern networking equipment can understand, and while the experience might be slightly faster as a result, it does seem to preserve the nostalgia factor quite well.

For those looking for more specific guides, we’ve featured [Blake]’s work a few times in the past, once with an antique Epson PX-8 laptop and again with a modern ESP8266. It doesn’t take much computing power to get connected to these old services, so grab whatever you can and start BBSing!

Lithium-Ion Battery Circuitry Is Simple

By now, we’ve gone through LiIon handling basics and mechanics. When it comes to designing your circuit around a LiIon battery, I believe you could benefit from a cookbook with direct suggestions, too. Here, I’d like to give you a collection of LiIon recipes that worked well for me over the years.

I will be talking about single-series (1sXp) cell configurations, for a simple reason – multiple-series configurations are not something I consider myself as having worked extensively with. The single-series configurations alone will result in a fairly extensive writeup, but for those savvy in LiIon handling, I invite you to share your tips, tricks and observations in the comment section – last time, we had a fair few interesting points brought up!

The Friendly Neighborhood Charger

There’s a whole bunch of ways to charge the cells you’ve just added to your device – a wide variety of charger ICs and other solutions are at your disposal. I’d like to focus on one specific module that I believe it’s important you know more about.

You likely have seen the blue TP4056 boards around – they’re cheap and you’re one Aliexpress order away from owning a bunch, with a dozen boards going for only a few bucks. The TP4056 is a LiIon charger IC able to top up your cells at rate of up to 1 A. Many TP4056 boards have a protection circuit built in, which means that such a board can protect your LiIon cell from the external world, too. This board itself can be treated as a module; for over half a decade now, the PCB footprint has stayed the same, to the point where you can add a TP4056 board footprint onto your own PCBs if you need LiIon charging and protection. I do that a lot – it’s way easier, and even cheaper, than soldering the TP4056 and all its support components. Here’s a KiCad footprint if you’d like to do that too.

Continue reading “Lithium-Ion Battery Circuitry Is Simple”

Lithium-Ion Batteries Are Easy To Find

In the first article, I’ve given you an overview of Lithium-Ion batteries and cells as building blocks for our projects, and described how hackers should treat their Lithium-Ion cells. But what if you don’t have any LiIon cells yet? Where do you get LiIon cells for your project?

Taking laptop batteries apart,  whether the regular 18650 or the modern pouch cell-based ones, remains a good avenue – many hackers take this road and the topic is extensively covered by a number of people. However, a 18650 cell might not fit your project size-wise, and thin batteries haven’t quite flooded the market yet. Let’s see what your options are beyond laptops. Continue reading “Lithium-Ion Batteries Are Easy To Find”