DIY Heat-Set Insert Press Says Complicated = Comfort

Heat-set inserts are a great way to embed mechanically-strong, threaded parts into a 3D print. For installation, all that is required is an economical soldering iron; something most of us already have.

The carriage and counterweight use a v-wheel gantry, GT2 belt, and other common hardware.

That’s fine for a handful of occasional inserts, but when a large number need to be inserted reliably and cleanly, something a little more refined is called for. That’s where [virchow]’s threaded insert press design comes in. It adds 3D-printed parts to an aluminum extrusion frame to create a press that smoothly lowers a soldering iron directly up and down, with minimal effort by the user.

The holder for the soldering iron is mounted to a small v-wheel gantry that rides along the vertical extrusion. The gantry features a counterweight to take care of resetting the position of the iron. [Virchow] admits that the design could be considered unnecessarily complicated (hence the “UC” in the name) but on the other hand, there’s nothing like doing a hundred or so inserts to make one appreciate every bit of comfort and stability.

Heat-set inserts aren’t difficult to use, but a little technique goes a long way. Spend a few minutes reading Joshua Vasquez’s guide on the optimal way to use them in 3D-printed parts to make sure yours not only go in straight but end up looking great as well.

A Homebrew AC Upgrade For The Fluke 8840A

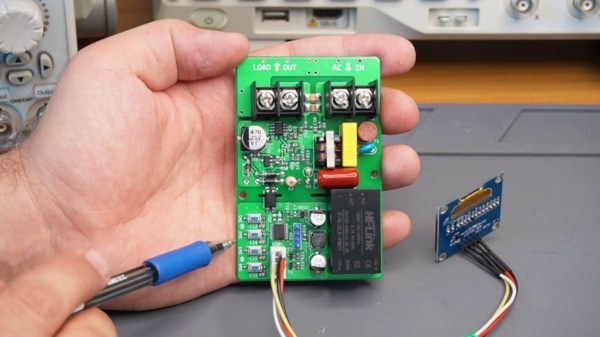
[William Dudley] picked up a Fluke 8840A bench multimeter at an auction, but was sad to find out that it was reading resistances inaccurately. It was also missing the optional board to enable AC measurements. Desiring to use the otherwise lovely meter, he set about repairing and upgrading the device.

Thankfully, the 8840A was from a time when Fluke used to openly publish schematics in its manuals. Thus, combined with taking a look at some photos online, it was straightforward for [William] to recreate the original AC “Option 09” board to enable the desired functionality. As is usually the way, his efforts didn’t work first time, but after some bodge wires were installed, all was well. [William] reports the measurements are “reasonable, maybe even sufficient” with no calibration undertaken.

Repairing the resistance issue was easy. It turned out to be corrosion on the selector switches, revealed when high-resistance measurements were accurate, but low-resistance measurements weren’t. A bit of flick-flacker with some contact cleaner sprayed into the switches got things working again nicely.

It’s nice to see old hardware restored to full functionality, particularly when it’s as attractive and well-built as an old Fluke meter. Bringing back old tools from the dead? You know we wanna hear about it!

A 3D Printed Ratchet That Can Really Take The Torque

Printed tools aren’t exactly known for their durability, but [Gladius] shows us that with some thoughtful design, it’s possible to print a ratcheting wrench that can handle surprising amounts of torque.

Look closely, and you can see that the parts are almost entirely made up of perimeters (click to enlarge).

This particular wrench is inspired by NASA’s 3D printed ratcheting wrench, and also from an early 1900s design. It sports a 1/2 inch square socket into which modern adapters can be fitted, allowing those steel parts to do their job while the wrench itself delivers the muscle.

[Gladius] found that the strongest results came from slicing parts — especially the handle — so that they come out consisting almost entirely of perimeters, with virtually no traditional infill. Want to know more? There’s a discussion on reddit where [Gladius] goes into added detail about measurements and performance.

Over the years, we’ve seen our share of powerful prints. For example, what the Crimson Axlef*cker can do looks downright intimidating. Speaking of printing things that move, we want to remind you about this handy tip for easily and reliably joining motor shafts to printed parts by (mis)using jaw couplings.

Printed Axial Generator Is Turned By Hand

While desktop 3D printing is an incredible technology, it’s got some pretty clear limitations. Plastic parts can be produced quickly in a 3D printer but can be more expensive or take longer to make than parts from materials like wood. Plastic parts can also be weaker than materials like metal. If a 3D printer is all you have on hand, though, you can often make some design choices that improve the performance of a plastic part over other materials. That’s what [1970sWizard] did to make this axial hand-cranked generator.

Besides a few pieces of off-the-shelf hardware and the wire and magnets, the entire generator is printed. The actual generator is made from coils of wire with exposed leads which snap into a plastic disc which acts as the generator’s stator. The magnets also snap into a separate disc which is the rotor of the generator and is attached to the drivetrain, with no glue or fasteners required. A series of gears on two other axes convert the torque from the hand crank into the high speed necessary to get usable electricity out of the generator.

The separate gear shafts were necessary to keep from needing a drillpress, which would have allowed fewer axes to be used. This entire machine can be built almost entirely with a desktop 3D printer, though, which was one of the design goals. While it’s largely a proof-of-concept, the machine does generate about 100 mW of power which is enough to slowly charge USB devices, power lights, or provide other sources of very small amounts of energy. If you do have access to some metalworking tools, though, take a look at this hand-cranked emergency generator.

Continue reading “Printed Axial Generator Is Turned By Hand”

Peer-Reviewed Continuity Tester

One of the core features of the scientific community is the concept of “peer review” where any claims made by a scientist are open to be analyzed and reproduced by others in the community for independent verification. This leads to either rejection of ideas which can’t be reproduced, or strengthening of those ideas when they are. In this community we typically only feature the first step of this process, the original projects from various builders, but we don’t often see someone taking those instructions and “peer reviewing” someone’s build. This is one of those rare cases.

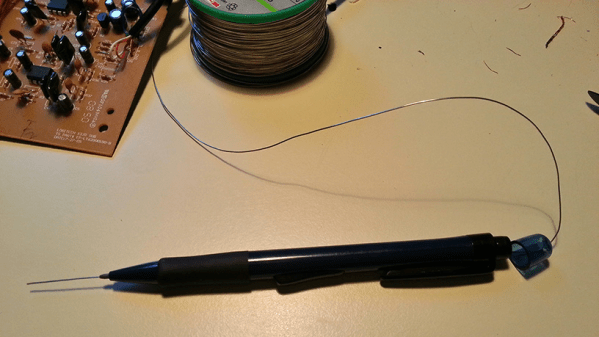
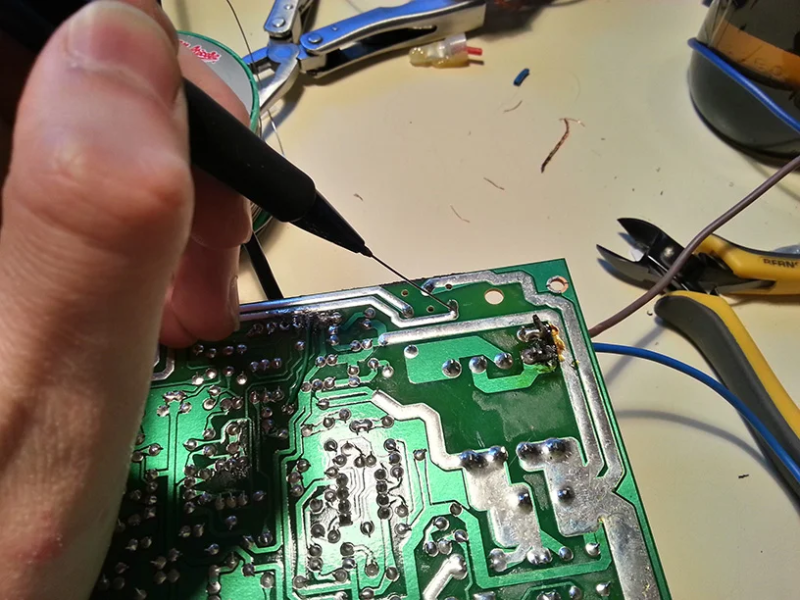
[oxullo] came across [Leo]’s original build for the ultimate continuity tester. This design is much more sensitive than the function which is built in to most multi-meters, and when building this tool specifically some other refinements can be built in as well. [oxullo] began by starting with the original designs, but made several small modifications. Most of these were changing to surface-mount parts, and switching some components for ones already available. Even then, there was still a mistake in the PCB which was eventually corrected. The case for this build is also 3D printed instead of being made out of metal, and with the original video to work from the rest fell into place easily.

[oxullo] is getting comparable results with this continuity tester, so we can officially say that this design is peer reviewed and tested to the highest of standards. If you’re in need of a more sensitive continuity sensor, or just don’t want to shell out for a Fluke meter when you don’t need the rest of its capabilities, this is the way to go. And don’t forget to check out our original write-up for this tester if you missed it the first time around.

Printable One-Way Driver Skips Ratchet For A Clutch

Ratcheting screwdrivers can help you work faster, even if their bulk means they’re not the best option for working in tight spaces. [ukman] decided to build a similar device of his own, relying on a slightly different mechanism — an overrunning clutch.

The design is similar to a freewheel used on a bicycle, allowing free movement in one direction while resisting it in the other. As the screwdriver is turned in one direction, the shaft is wedged by a series of cylinders that lock it in place. However, the geometric shape of the clutch allows the shaft to turn in the other direction without getting wedged in place. The result is a screwdriver that can be turned, rolled back, and turned further. Thus, screws can be tightened without loosening one’s grip on the tool.

With its 3D printed construction, it’s probably not the best tool for heavy-duty, high-torque jobs, but it looks more than capable of handling simple assembly tasks. We’ve seen some other nifty screwdrivers around these parts, too.

Continue reading “Printable One-Way Driver Skips Ratchet For A Clutch”

Angled Drill Guide Helps You With Those Tricky Holes

If you’ve ever tried to drill a hole on an angle with a power drill, you’ve probably drilled some pretty shocking holes. To do it right, you really need some mechanical assistance, and this jig from [Kartik_Nandrui] should do the trick.

The device uses a guide that sits on the surface to be drilled, with a pair of angled connectors that fit two wooden dowels. These connect the guide to a corresponding sleeve that fits around the drill body. The sleeve then slides up and down the dowels, allowing the drill to move in a straight line towards the targeted area.

It’s a useful hack, but we can see room for some improvements that would take it to the next level. Having a way to lock the angle of the guide base would be great for accuracy. As it’s 3D printed, it would also be simple to create a version with a curved guide base that could fit over pipes, or other designs to fit complex geometries like roof sheeting or other corrugated materials.

Sometimes the most interesting hacks are the ones that get us thinking about our own potential projects. If you’ve got any creative tool hacks you’ve been brewing up in the lab, be sure to let us know!