Hackaday Prize Entry: A Go-Kart For A Special Child

ScottCar is a go-kart for a special Kid and is [Alain]’s entry in this years Hackaday Prize. Will it race to victory?

The concept behind ScottCar is simple: There isn’t much out there for disabled kids when it comes to go-karts. [Alain Mauer] has an autistic son who isn’t quite capable of driving a Go-Kart as he would have trouble using pedals and brakes. He didn’t let that stand in his way, so he built a go-kart for his 11-year-old son. It incorporates an automatic braking system. In situations where the kart speeds up going down, brakes are automatically applied, slowing it down to a normal pace. It also features a remote emergency brake which would avoid crashes while supervising playtime. The braking system uses bike disc brakes controlled by an Arduino Nano. A Siemens Motor with a screw drive is what propels the vehicle, powered by a 12V Battery with a healthy 7.5Ah capacity.

The project is being released under GNU General Public License version 3, Will we be seeing ScottCar racing towards the Hackaday prize?

Panelizing Boards The Easy Way

For reasons that will remain undisclosed until some time in the future, I recently had a need to panelize a few PCBs. Panelization is the art of taking PCB designs you already have, whether they’re KiCad board files, Eagle board files, or just Gerbers, and turning them into a single collection of PCBs that can be sent off to a fab house.

Now this is panel racing

If you’re still wondering what this means, take a look at the last board you got from OSH Park, Seeed, Itead, or Dirty PCBs. Around the perimeter of your board, you’ll find some rough spots. These are ‘mouse bites’ and tabs, places where the boards are strung together to form a gigantic rectangular panel sent off to a manufacturer. You can check out this great interview with [Laen] from OSH Park to get an idea of how this works, but the basic process is to take a bunch of Gerbers, add tabs and mouse bites, solve the knapsack problem, and send the completed panel off to a board house.

Panelizing boards is something most of us won’t have to do often. Really, you only want a panel of boards when you’re manufacturing something. For small-scale production and prototypes, bare boards will do just fine. Simply by virtue of the fact that panelizing boards is far less common than throwing some Gerbers at OSH Park or Seeed, there aren’t many (good) tutorials, and even fewer (good) tools to do so. This is how you panelize boards quickly and easily using Open Source tools.

Continue reading “Panelizing Boards The Easy Way”

Friday Hack Chat: Perfect Purple PCBs

Every Friday, we gather ’round the hot air gun over on Hackaday.io, invite some cool people over, and get them to talk about what they do. This is the Hack Chat. It’s become a tradition, and already we’ve had a ton of awesome people walk through our doors.

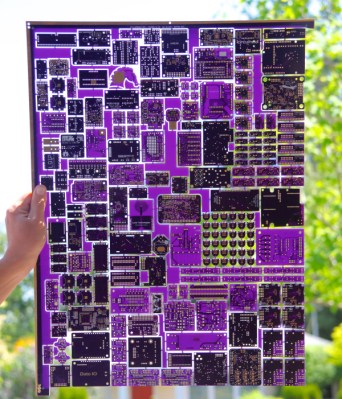
This Friday, we’re going to sit down with the purveyors of perfect purple PCBs. Over the last decade or so, a lot has changed in the space of small-run PCB production. Ten years ago, PCBs were expensive, and it wouldn’t be abnormal to spend hundreds of dollars on a small run of tiny boards. Now, The DEF CON 24 badge, in a panel are cheaper than ever, giving industrious hardware creators access to professional quality manufacturing at a fraction of the price seen just a few years ago.

For the last few years, OSH Park has been a mainstay of low-volume PCB fabrication. Their website is as simple as it gets: Upload some Gerbers, an Eagle board file, or a KiCad PCB, press a few buttons, and in a week or so you’ll have a perfect purple PCB in your mailbox.

This week, we’re inviting [Drew Fustini] and [Dan Sheadel] to talk about what OSH Park does, how they became the first place that comes to mind when you need a PCB. They’ll explain why the boards are purple, environmental regulations for PCB manufacturing in the US, shared projects and tips and tricks for creating the perfect board.

What would you like to see from a PCB supplier? Would you like to see OSH Park expand further into their burgeoning Pog business? How about a sticker club? Who would win in a fight, a blue robot dog or a purple robot shark? All these questions and more will be answered; if you have a question for the OSH Park team, drop it in this spreadsheet.

Here’s How To Take Part:

join-hack-chatOur Hack Chats are live community events on the Hackaday.io Hack Chat group messaging. This hack chat will take place at noon Pacific time on Friday, June 23rd. Confused about where and when ‘noon’ is? Here’s a time and date converter!

Log into Hackaday.io, visit that page, and look for the ‘Join this Project’ Button. Once you’re part of the project, the button will change to ‘Team Messaging’, which takes you directly to the Hack Chat.

You don’t have to wait until Friday; join whenever you want and you can see what the community is talking about

3D Printed Jet Engine

In specific applications, jet engines are often the most efficient internal combustion engines available. Not just for airplanes, but for anything that needs to run on a wide variety of fuels, operate at a consistent high RPM, or run for an extended amount of time. Of course, most people don’t have an extra $4,000 lying around to buy a small hobby engine, but now there’s a 3D-printed axial compressor available from [noob_sauce].

As an aero propulsion engineer, [noob_sauce] is anything but a novice in the world of jet engines. This design is on its fourth iteration with a working model set to be tested by the end of the month. Additionally, [noob_sauce] created his own software that was necessary for the design of such a small, efficient jet engine which has all been made available on Git. So far the only part that has been completed has been the compressor stage of the engine, but it’s still a very impressive build that we don’t see too often due to the complexity and cost of axial compressor jet engines.

Of course, there are some less-complex jet engines that are available to anyone with access to a hardware store and a welder which don’t require hardly any precision at all. While they’re fun and noisy and relatively easy to build, though, they don’t have near the efficiency of a jet engine like this one. The build is impressive on its own, and also great that [noob_sauce] plans to release all the plans so that anyone can build one of these as well.

You’re The Only One Not Playing With Unity

It wasn’t too long ago that one could conjecture that most hackers are not avid video game players. We spend most of our free time taking things apart, tinkering with microcontrollers and reading the latest [Jenny List] article on Hackaday.com. When we do think of video games, our neurons generally fire in the direction of emulating a console on a single board computer, such as a Raspberry Pi or a Beaglebone. Or even emulating the actual console processor on an FPGA. Rarely do we venture off into 3D programs meant to make modern video games. If we can’t export an .STL with it, we’re not interested. It’s just not our bag.

Oculus Rift changed this. The VR headset was originally invented for 3D video games, but quickly became a darling to hackers the world over. Virtual Reality technology is far bigger than just video games, and brings opportunity to many fields such as real estate, construction, product visualization, education, social interaction… the list goes on and on.

The Oculus team got together with the folks over at Unity in the early days to make it easy for video game makers to make content for the Rift. Unity is a game engine designed with a shallow learning curve and is available for free for non-commercial use. The Oculus Rift can be integrated into a Unity environment with the check of a setting and importing a small package, available on the Oculus site. This makes it easy for anyone interested in VR technology to get a Rift and start pumping out content.

Hackers have taken things a step further and have written scripts that allow Unity to communicate with an Arduino. VR is fun. But VR plus physical reality is just down right exciting! In this article, we’re going to walk you through setting up your Oculus Rift and Unity game engine to communicate with the outside world via an Arduino.

Continue reading “You’re The Only One Not Playing With Unity”

VIM Normalization

Linux users–including the ones at the Hackaday underground bunker–tend to fall into two groups: those that use vi and those that use emacs. We aren’t going to open that debate up again, but we couldn’t help but notice a new item on GitHub that potentially negates one of the biggest complaints non-vi users have, at least for vim which is the most common variant of vi in use on most modern systems. The vim keybinding makes vim behave like a “normal” editor (and to forestall flames, that’s a quote from the project page).

Normally vi starts out in a command mode that it calls normal mode. Pressing a key will execute an editing command, unlike most other modern editors which just insert characters into the open file. For example, pressing x will delete a character. This surprises most people who aren’t familiar with vi. In all fairness, there are other older editors that work this way, but they usually were not screen-oriented.

Continue reading “VIM Normalization”

Codebender Rises From The Ashes

If you were sad that Codebender had bit the dust, cheer up. A site called codeanywhere has acquired the online Arduino development environment and brought it back to life. In addition to the main Codebender site, the edu and blocks sites are also back on the air.

Not only is this great news, but it also makes sense. The codeanywhere site is a development IDE in the cloud for many different programming languages. The downside? Well, all the people who said they’d be glad to pay to keep Codebender alive will get a chance to put their money where their mouth is.

Continue reading “Codebender Rises From The Ashes”