Knowing What’s Below: Buried Utility Location

We humans have put an awful lot of effort into our infrastructure for the last few centuries, and even more effort into burying most of it. And with good reason — not only are above ground cables and pipes unsightly, they’re also vulnerable to damage from exposure to the elements. Some utilities, like natural gas and sanitary sewer lines, are also dangerous, or at least perceived to be so, and so end up buried. Out of sight, out of mind.

But humans love to dig, too, and it seems like no sooner is a paving project completed than some joker with a jackhammer is out there wrecking the pristine roadway. Before the construction starts, though, cryptic markings will appear on the pavement courtesy of your local buried utility locating service, who apply their rainbow markings to the ground so that nothing bad happens to the often fragile infrastructure below our feet.

Continue reading “Knowing What’s Below: Buried Utility Location”

Me Casa Es Techno Casa

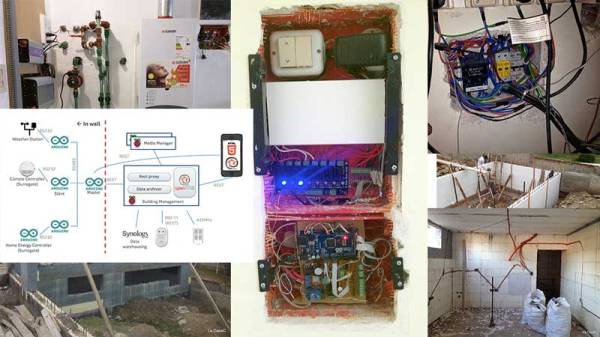
“Jarvis, make me a sandwich” is not a reality yet. Though there exist a lot of home automation products out there today, commercial solutions just don’t make the cut for the self-respecting geek. So [Matias] took the DIY route with his La CasaC Home Automation project and achieved the functionality he was after.

[Matias’] project is one of the most elaborate and large-scale DIY home automation projects we have seen in recent years. With over 200 nodes, this project took a number of years of planning and execution. The core of the design is the ever popular Raspberry Pi running OpenHAB to ease the pain of customization and integration with various protocols. To further simplify the ginormous task, the design uses RS485 to communicate between master and slave devices.

Each wall node is managed by a nearby Arduino which in turn talks to a central Arduino Mega. OpenHab takes care of the higher functions such as UI, integration with existing hardware such as the solar heater, media center control,  and RFID and keypad control. Sensor data aggregation and building management is done centrally with data funneled to a separate NAS system as long-term storage.

What makes this project awesome is that [Matias] did not integrate a Raspberry Pi into his house, no! He actually integrated his entire house around the system because this build includes the construction of the house as well. Take a look at this Google Photos Gallery to see the photographic progress of the build. That is amazing!

The code and snippets are available on GitHub for your viewing pleasure though that seems the easy part. If this inspired you, then also take a look at the Raspberry Pi Home Automation of a Gingerbread House if you’d like to try it out before fully committing.

Bringing Back The IPhone7 Headphone Jack

Plenty of people bemoaned Apple’s choice to drop the 1/8″ headphone jack from the iPhone 7. [Scotty Allen] wasn’t happy about it either, but he decided to do something about it: he designed a custom flex circuit and brought the jack back. If you don’t recognize [Scotty], he’s the same guy who built an iPhone 6 from parts obtained in Shenzhen markets. Those same markets were now used to design, and prototype an entirely new circuit.

The iPhone 7 features a barometric vent, which sits exactly where the headphone jack lived in the iPhone 6. The vent helps the barometric pressure sensor obtain an accurate reading while keeping the phone water proof. [Scotty] wasn’t worried about waterproofing, as he was cutting a hole through the case. The vent was out, replaced with a carefully modified headphone jack.

The next step was convincing the phone to play analog signals. For this, [Scotty] used parts from Apple’s own headphone adapter. The hard part was making all of this work and keeping the lightning port available. The key was a digital switch chip. Here’s how the circuit works:

When no headphone is plugged in, data is routed from the iPhone’s main board to the lightning port. When headphones are plugged in, the data lines are switched to the headphone adapter. Unfortunately, this means the phone can’t play music and charge at the same time — that is something for version 2.0.

The real journey in this video is watching [Scotty] work to fit all these parts inside an iPhone case. The design moved from a breadboard through several iterations of prototype printed circuit boards. The final product is built using a flexible PCB – the amber-colored Kapton and copper sandwiches that can be found in every mobile device these days.

Making everything fit wasn’t easy. Two iPhone screens perished in the process. But ultimately, [Scotty] was successful. He’s open sourced his design so the world can build and improve on it.

Want to read more about the iPhone 7 and headphone jacks? Check out this point and counterpoint.  we published on the topic.

Continue reading “Bringing Back The IPhone7 Headphone Jack”

Pac Man On The Colour Computer 3

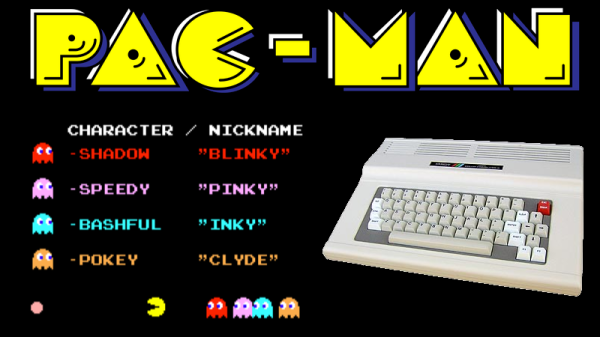
The 1980s were the heyday of the venerable Z80, a processor that found its way into innumerable home computers, industrial systems, and yes — arcade machines. However, not everyone had a Z80 based machine at home, and so sometimes porting is required. [Glen] is tackling this with a port of Pac Man to the Radio Shack Colour Computer 3.

The key to any good arcade port is authenticity – the game should feel as identical to the real thing as possible. The Atari 2600 port got this famously wrong. Porting to the Colour Computer 3 is easier in theory – with more RAM, a Motorola 6809 CPU running at a higher clock rate, and a more powerful graphics subsystem, fewer compromises need to be made to get the game to run at a playable speed.

The way [Glen] tackled the port is quite handy. [Glen] built a utility that would scrape a disassembled version of the original Pac Man Z80 code, look up the equivalent 6809 CPU instruction, and replace it, while placing the original Z80 code to the side as a comment. Having the original code sitting next to the ported instructions makes debugging much easier.

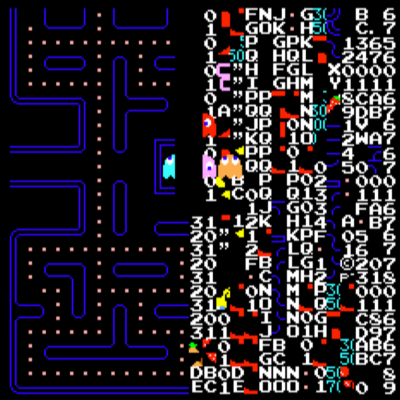
Level 256 as seen in [Glen]’s port.
There was plenty of hand tweaking to be done, and special effort was made to make sure all the data the original code was looking for was accessible at the same addresses as before. There was also a lot of work involved in creating a sprite engine that would reliably display the game video at a playable frame rate.

Overall, the port is highly faithful to the original, with the game code being identical at the CPU level. [Glen] reports that the same patterns used on the arcade machine can be used to complete the mazes on the Colour Computer 3 version, and it faithfully recreates the Level 256 bug as well. It’s an impressive piece of work to create such an authentic port on a home computer from 1986.

For another classic port, but with the temporal vectors flipped, check out Portal 2 on the Apple II.


Raspberry Pi AI Plays Piano

[Zack] watched a video of [Dan Tepfer] using a computer with a MIDI keyboard to do some automatic fills when playing. He decided he wanted to do better and set out to create an AI that would learn–in real time–how to insert style-appropriate tunes in the gap between the human performance.

If you want the code, you can find it on GitHub. However, the really interesting part is the log of his experiences, successes, and failures. If you want to see the result, check out the video below where he riffs for about 30 seconds and the AI starts taking over for the melody when the performer stops.

Continue reading “Raspberry Pi AI Plays Piano”

The ESP32… On A Chip

The new hotness in microcontrollers is the ESP32. This chip, developed by Espressif, is the follow-on to the very popular ESP8266, the cheap, low-power, very capable WiFi-enabled microcontroller that came on the scene a few years ago. The ESP32 is another beast entirely with two powerful cores, WiFi and Bluetooth, and peripherals galore. You can even put an NES emulator in there.

While the ESP32 is significantly more powerful, it has for now been contained in modules. What would really be cool is a single chip loaded up with integrated flash, filter caps, a clock, all on a 7x7mm QFN package. Meet the ESP32-Pico-D4 (PDF). It is, effectively, an ESP32 on a chip. It’s just the ticket if you’re trying to cram wireless, fast microcontroller wizardry into a small package.

At its heart, the ESP32-Pico is your normal ESP32 module with a Tensilica dual-core LX6 microcoprocessor, 448 kB of ROM, 520 kB of SRAM,  4 MB of Flash (it can support up to 16 MB), Wireless with 802.11 b/g/n and Bluetooth 4.2, and a cornucopia of peripherals that include an SD card, UART, SPI, SDIO, LED and motor PWM, I2S, I2C, cap touch sensors, and a Hall effect sensor. It’s quite literally everything you could ever want in a microcontroller.

Disregarding the just barely hand-solderable package and the need for a PCB antenna, the ESP32-Pico requires very few support components. Really, the only thing going on in the reference schematic is a bunch of bypass caps. This is, by far, the easiest and smallest method to put WiFi, Bluetooth, and a powerful microcontroller in a project. It will surely be a very, very popular chip for hobbyist electronics for years to come. Of course, it will be even more popular if Espressif also manages to put this chip in a QFP package in addition to the QFN.

Unfortunately, apart from the PDF released by Espressif, the details on the EPS32-on-a-chip are sparse. We don’t know when we’ll be able to get our grubby hands on a tray, tube, or reel of these chips. That said, there’s enough information here to start designing a breakout board. Have at it — we’d love to see what the community comes up with.

Shout out to [Dave] for the tip.

Hackaday Prize Entry: SNAP Is Almost Geordi La Forge’s Visor

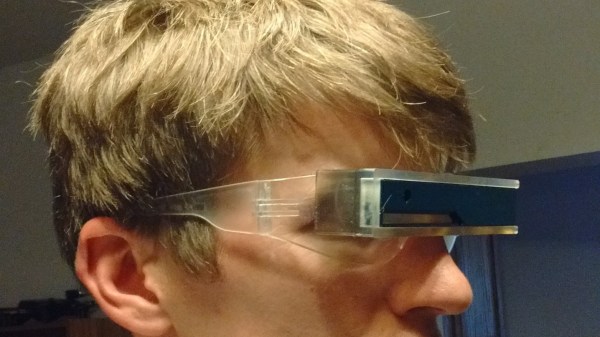
Echolocation projects typically rely on inexpensive distance sensors and the human brain to do most of the processing. The team creating SNAP: Augmented Echolocation are using much stronger computational power to translate robotic vision into a 3D soundscape.

The SNAP team starts with an Intel RealSense R200. The first part of the processing happens here because it outputs a depth map which takes the heavy lifting out of robotic vision. From here, an AAEON Up board, packaged with the RealSense, takes the depth map and associates sound with the objects in the field of view.

Binaural sound generation is a feat in itself and works on the principle that our brains process incoming sound from both ears to understand where a sound originates. Our eyes do the same thing. We are bilateral creatures so using two ears or two eyes to understand our environment is already part of the human operating system.

In the video after the break, we see a demonstration where the wearer doesn’t need to move his head to realize what is happening in front of him. Instead of a single distance reading, where the wearer must systematically scan the area, the wearer simply has to be pointed the right way.

Another Assistive Technology entry used the traditional ultrasonic distance sensor instead of robotic vision. There is even a version out there for augmented humans with magnet implants covered in Cyberpunk Yourself called Bottlenose.

Continue reading “Hackaday Prize Entry: SNAP Is Almost Geordi La Forge’s Visor”