How To Put The ‘Pro’ In Prototype

It’s easy to get professional-quality finishes on your prints and prototypes if you take the right steps. In the final installment of his series about building with Bondo, product designer [Eric Strebel] shows us how it’s done no matter what the substrate.

How does he get such a smooth surface? A few key steps make all the difference. First, he always uses a sanding block of some kind, even if he’s just wrapping sandpaper around a tongue depressor. For instance, his phone holder has a round indent on each side. We love that [Eric] made a custom sanding block by making a negative of the indent with—you guessed it—more Bondo and a piece of PVC. The other key is spraying light coats of both primer and paint in focused, sweeping motions to allow the layers to build up.

If you need to get the kind of surface that rivals a baby’s behind, don’t expect to prime once, paint once, and be done with it. You must seek and destroy all imperfections. [Eric] likes to smooth them over with spot putty and then wet sand the piece back to smooth before applying more primer. Then it’s just rinse and repeat with higher grits until satisfied.

There’s more than one way to smooth a print, of course. Just a few weeks ago, our own [Donald Papp] went in-depth on the use of UV resin.

Continue reading “How To Put The ‘Pro’ In Prototype”

Auction Finds Combined For A Unique Desoldering Station

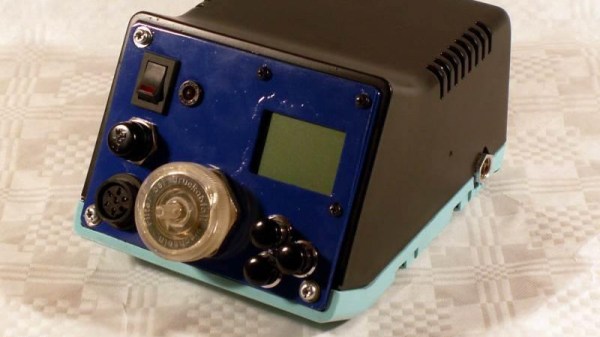
If you are in the market for a high-quality soldering iron, a rewarding pursuit can be attending dispersal auctions. It is not unusual to see boxes of irons, as anything remotely iron-like is bundled up together by the auctioneer into a lot with little consideration for what combination has been gathered. [Stynus] found himself in this position, the proud owner of a Weller DSX80 desoldering iron from an auction, but without its accompanying solder station required for it to work. Fortunately, he had another Weller solder station, not suitable for the DSX80 as it stood, but which provided a perfect platform for a home-made Weller DSX set-up.

The old station had a side-mounted valve and a 24V input, so he had to install a toroidal mains transformer and move the valve frontwards. Fortunately, this style of Weller station case was frequently available with just such a transformer installed, so there was plenty of space in the enclosure. A custom board was then created for a temperature controller centered upon a PIC microcontroller, and a new front panel was crafted to accommodate a Nokia 5110-style LCD display.

The resulting unit with its upper half repainted, is a pleasing and professional-looking project. Heated desoldering irons are an extremely useful tool that anyone should consider for their arsenal, but not all of them are as good as this Weller-based one. We recently reviewed a much cheaper example, with comedic results.

Open-source Circuit Simulation

For simple circuits, it’s easy enough to grab a breadboard and start putting it together. Breadboards make it easy to check your circuit for mistakes before soldering together a finished product. But if you have a more complicated circuit, or if you need to do response modeling or other math on your design before you start building, you’ll need circuit simulation software.

While it’s easy to get a trial version of something like OrCAD PSpice, this software doesn’t have all of the features available unless you’re willing to pony up some cash. Luckily, there’s a fully featured free and open source circuit simulation software called Qucs (Quite Universal Circuit Simulator), released under the GPL, that offers a decent alternative to other paid circuit simulators. Qucs runs its own software separate from SPICE since SPICE isn’t licensed for reuse.

Qucs has most of the components that you’ll need for professional-level circuit simulation as well as many different transistor models. For more details, the Qucs Wikipedia page lists all of the features available, as does the project’s FAQ page. If you’re new to the world of circuit simulation, we went over the basics of using SPICE in a recent Hack Chat.

Thanks to [Clovis] for the tip!

Core Memory Upgrade For Arduino

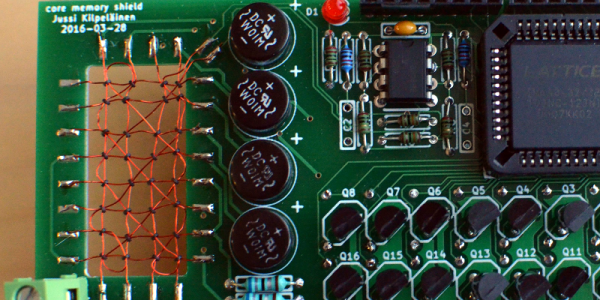
Linux programs, when they misbehave, produce core dumps. The reason they have that name is that magnetic core memory was the primary storage for computers back in the old days and many of us still refer to a computer’s main memory as “core.” If you ever wanted to have a computer with real core memory you can get a board that plugs into an Arduino and provides it with a 32-bit core storage. Of course, the Arduino can’t directly run programs out of the memory and as designer [Jussi Kilpeläinen] mentions, it is “hilariously impractical.” The board has been around a little while, but a recent video shined a spotlight on this retro design.

Impractical or not, there’s something charming about having real magnetic core memory on a modern CPU. The core plane isn’t as dense as the old commercial offerings that could fit 32 kilobits (not bytes) into only a cubic foot. We’ll leave the math about how much your 8-gigabyte laptop would have to grow to use core memory to you.

Continue reading “Core Memory Upgrade For Arduino”

The Interesting Fate Of Kenya’s First Computers

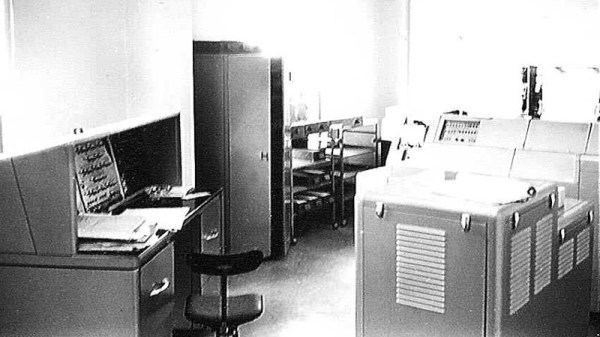
If you are an enthusiast for 1950s computer hardware, you are probably out of luck when it comes to owning a machine of your own. Your best chance will be to join the staff of one of the various museums that preserve and operate these machines, at which you can indulge your passion to your heart’s content. But what if we told you that there is a 1950s computer available for pick-up at any time, to whoever is prepared to go and get it and has suitable transport? You’d be making plans straight away, wouldn’t you? The computer in question is real, but there’s a snag. It’s at the bottom of the Indian Ocean, just at the start of international waters off the coast of Kenya. The story of Kenya’s early computing and how the machine met its fate is the subject of a fascinating article from a year or two ago on owaahh.com that had us riveted from start to finish.

Like large state-owned enterprises worldwide, the Kenyan railway and power monopolies were among the first commercial customers for computing. In the final years of the British Empire, those were ordered from a company in London, International Computers & Tabulators, and it was their ICT1202 that served the railway company. The article goes into detail about the history of the company’s East African operation, the problems of running a tube-based computer in an African climate without air-conditioners, and the 1202’s demise and replacement. We’ll not spill the beans here on how the computer ended up on the seabed and how its replacement ended up being spirited away to China, for that you’ll have to read it all. It’s worth saying, the author also has a personal website in which he goes into much more detail about his experience with computers in the 1950s and ’60s.

Not had enough ancient computer tech? A couple of years ago we toured the primordial electronic computer, Colossus, and also took a look at the National Museum Of Computing that houses it.

The Cake Robot Is No Lie

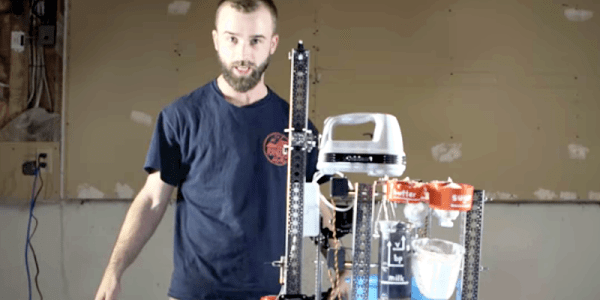
[52 Skillz] didn’t know anything about building robots. So he decided to not just read about it or make a simple robot. He jumped right in and wanted to build a robot that could make a cake. It took about a year and a half but it now — mostly — works, as you can see in the video below.

Granted it isn’t perfect and it isn’t really all that practical. But as a learning exercise, it was certainly ambitious and successful. Apparently, you still have to scrape the bowl a little by hand to get some of the flour off the bowl walls. Also, loading the ingredients might be more work than just making it by hand, but that really isn’t the point.

Continue reading “The Cake Robot Is No Lie”

Vastly Improving The Battery Life On Cheap Action Cams

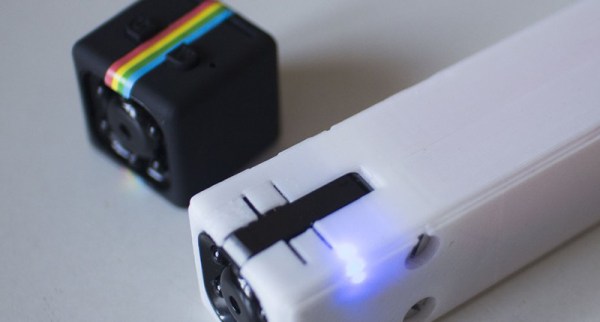
At one time, GoPro was valued at over eleven Billion dollars. It’s now on the verge of being a penny stock, because if surfers can make action cams and video editing software, anyone can. Action cams are everywhere, and one of the cheapest is the SQ11. It’s a rip-off of the Polaroid Cube, has a non-standard USB socket, a tiny battery, and the video isn’t that great. It only costs eight dollars, though, so [pixelk] decided to vastly expand the abilities of this cheap camera for a Hackaday Prize entry.

The major shortcoming of the SQ11 action cam is the tiny battery. Reportedly, it’s a 200 mAh battery, but the stated 1-2 hours of runtime bears no resemblance to reality. The solution to this problem, as with most things in life, is to throw some lithium cells at the problem.

[pixelk] disassembled the SQ11 action cam and 3D printed a much longer enclosure meant to fit a single 18650 battery. There’s a protection circuit, so that’s fine, but there’s still a problem: the charging circuit in the camera is tailored for a 200 mAh battery — charging an 18650 cell would probably take a day. That’s no problem, because this enclosure leaves the battery removable, for easy recharging in an external device.

Does this make the SQ11 a good camera? Marginally, yes. If you need to record video for hours and hours, you won’t be able to do better than an eight dollar camera and four dollars in parts.