If you keep up with the field of web development, you may have heard of WebAssembly. A relatively new kid on the block, it was announced in 2015, and managed to garner standardised support from all major browsers by 2017 – an impressive feat. However, it’s only more recently that the developer community has started to catch up with adoption and support.
So, what is it? What use case is so compelling that causes such quick browser adoption? This post aims to explain the need for WebAssembly, a conceptual overview of the technical side, as well as a small hands-on example for context.
Graphing calculators are an interesting niche market these days. They’re relatively underpowered, and usually come with cheap, low resolution screens to boot. They remain viable almost solely due to their use in education and the fact that their limited connectivity makes them suitable for use in exams. The market is starting to hot up, though – and TI have recently been doing some interesting work with Python on their TI-83.
Rumor has it that TI have been unable to get Python to run viably directly on the TI-83 Premium CE. This led to the development of the TI-Python peripheral, which plugs into the calculator’s expansion port. This allows users to program in Python, with the TI-Python doing the work and the calculator essentially acting as a thin client. The chip inside is an Atmel SAMD21E18A-U, and is apparently running Adafruit’s CircuitPython platform.
This discovery led to further digging, of course. With some hacking, the TI-Python can instead be replaced with other boards based on Atmel SAMD21 chips. For those of you that aren’t in Atmel’s sales team, that means it’s possible to use things like the Adafruit Trinket M0 and the Arduino Zero instead, when flashed with the appropriate CircuitPython firmware. It’s a tricky business, involving USB IDs and some other hacks, but it’s nothing that can’t be achieved in a few hours or so.
This is a hack in its early days, so it’s currently more about building a platform at this stage rather then building fully-fledged projects just yet. We’re fully expecting to see Twitter clients and multiplayer games hit the TI-83 platform before long, of course. When you’ve done it, chuck us a link on the tip line.
We’ve seen a lot of arcade machine builds here on Hackaday. Seriously, a lot. Even more so since the Raspberry Pi took over the world and made it so you didn’t have to cannibalize an old laptop to build one anymore. It’s one of those projects with huge appeal: either you’re somebody who’s built their own arcade, or you’re somebody who wishes they had. But even after seeing all these builds, we occasionally come across a specimen that deserves special recognition.
LED display controller
[Al Linke] recently wrote in to tell us about his arcade build, which we think you’ll agree is worth a closer look. The core build is actually a modification of a previously published design, but what makes this one unique is the addition of a programmable LED matrix in the top that actually shows the logo and artwork for whatever game you’re currently playing. This display really helps sell the overall look, and instantly makes the experience that much more authentic. Sure you don’t need the marquee of your home arcade machine to show era-appropriate artwork…but we know you want it to.
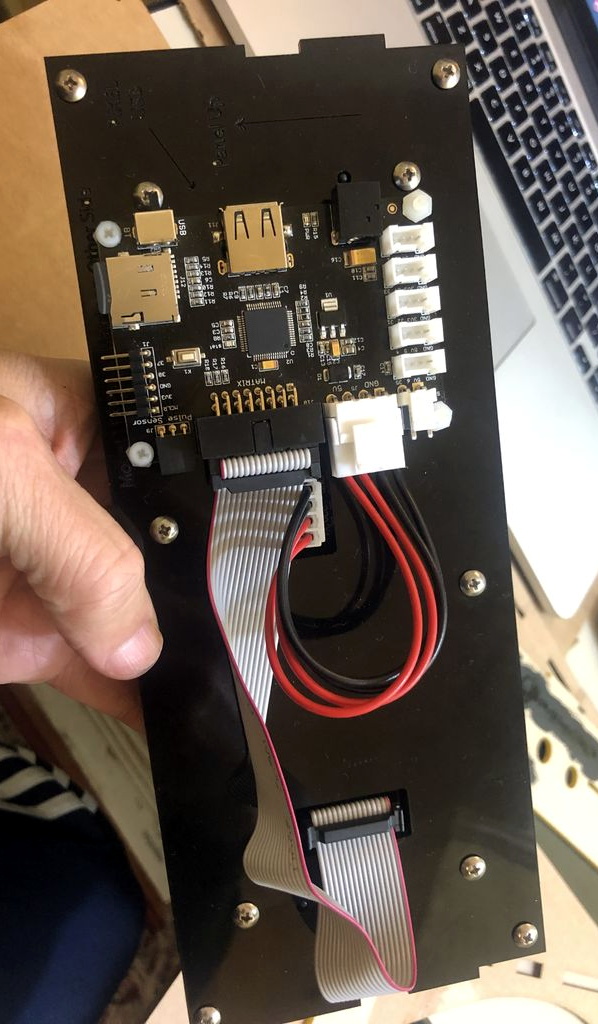
So how does one interface their Raspberry Pi with this beautiful 64×32 LED marquee display? Well it just so happens that [Al] is in the business of making cool LED displays, and even has a couple successful Kickstarter campaigns under his belt to prove it. He’s developed a board that lets you easily connect up to low-cost HUB75 LED panels such as the one used in the arcade. It’s been a few years since we’ve last seen a project that tackled these specific LED displays, and it’s encouraging to see how far things have come since then.
Even if you’re somehow not in love with the LED marquee, this build really does stand on its own as a fantastic example of a desktop arcade machine. [Al] went to great length to document his build, including putting together several videos during different phases of construction. If you’re curious about the start of the art for home arcade builds, this project would be a pretty good one to use as a barometer.
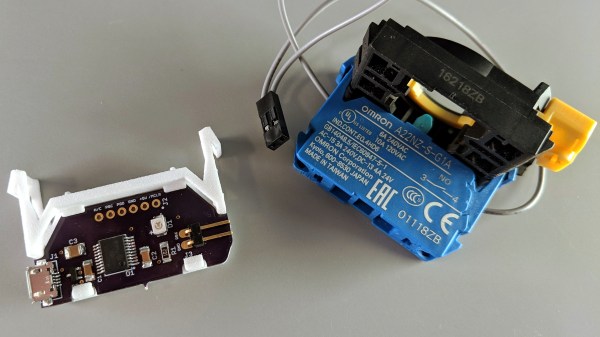
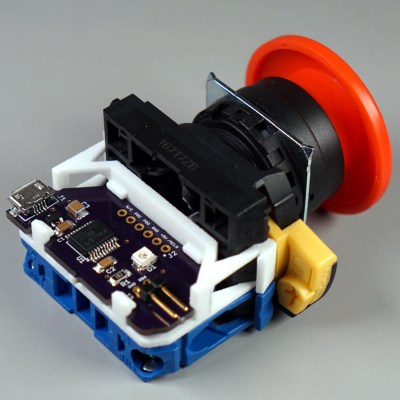
[Glen]’s project sounds perfectly straightforward: have a big industrial-style push button act as a one-key USB keyboard. He could have hacked something together in any number of ways, but instead he decided to create a truly elegant solution. His custom PCB mates to the factory parts perfectly, and the USB cable between the button and the computer even fits through the button enclosure’s lead hole.
It turns out that industrial push buttons have standardized components which can be assembled in an almost LEGO-like manner, with components mixed and matched to provide different switch actions, light indicators, and things of that nature. [Glen] decided to leverage this feature to make his custom PCB (the same design used in his one-key keyboard project) fit just like a factory component. With a 3D printed adapter, the PCB locks in just like any other component, and even lines up with the lead hole in the button’s enclosure for easy connecting of the USB cable.
What does [Glen] use the big button for? Currently he has two applications: one provides a simple, one-button screen lock on a Linux box running a virtual machine at his place of work. It first disengages the keyboard capture of the virtual machine, then engages the screen lock on the host. The other inserts a poop emoji into Microsoft documents. Code and PCB design files for [Glen]’s small keyboards are available on GitHub.
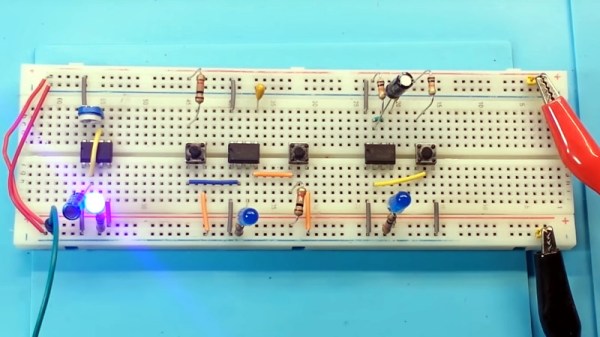
In these days of cheap microcontrollers, it is hard to remember there was a time when timing things took real circuitry. Even today, for some applications it is hard to beat the ubiquitous 555 timer IC. It is cheap, plentiful, and reliable. What’s interesting about the 555 is it isn’t so much a dedicated chip as a bunch of building blocks on a chip. You can wire those building blocks up in different ways to get different effects, and [learnelectronics] has a video showing the three major modes you typically see with the 555: astable, bistable, and monostable.
The 555 is really only a few comparators, a voltage divider, one or two transistors, a flip flop and an inverter. The idea is you use a capacitor to charge and the comparators can set or reset the flip flop in different ways. A reset input or the flip flop can turn on the transistor to discharge the capacitor.
Based on the WiFi / Bluetooth wunderchip, clad in a polycarbonate frame, and looking like something that would be an amazing cell phone for 2005, the WiPhone is now available on Kickstarter.
We’ve seen the WiPhone before, and it’s an interesting set of features for what is effectively an ESP32 board with some buttons and a screen. It’s become something of a platform, with expansion daughterboards for LTE, LoRa, a camera, a Bus Pirate, and a programmable NFC/RFID doohickey. If you’ve longed for the day of big ‘ol Nokia brick phones, want to hack your phone, but don’t really care about actually having cellular connectivity, this is something that’s right up your alley.
Although the WiPhone looks like a usable product that was designed by someone with a sense of design, it still is Open Source. You can build your own, and there are dozens of expansion boards that will plug into the back of the WiPhone for prototyping, experimentation, and RGB Gaming LEDs. There’s no cellular modem on the WiPhone, though; for calls you’ll have to turn to SIP or VoIP apps.
Considering how difficult it is to source a cellular modem in small quantities and the desire for a cell phone that respects your Right to Repair, we’ve got to hand it to the WiPhone for creating something people want. It gets even better when you consider this looks more like a product than the 3D printed pieces of electronic cruft we usually see, and we’re happy to see this crowdfunding campaign just passed its goal and is completely funded.
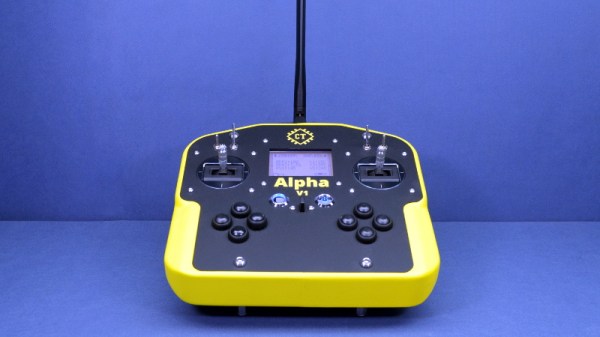
While we’ve come a long way in terms of opening up the world of radio control to open source software, a good deal of the hardware itself is still closed up. You can flash a cheap RC transmitter with a community developed firmware, in fact there’s a decent chance that’s what it ships with, but the hardware itself is still an immutable black box. That might be fine if you’re just flying an RC plane or quadcopter, but what if you’ve got something a bit more advanced in mind?
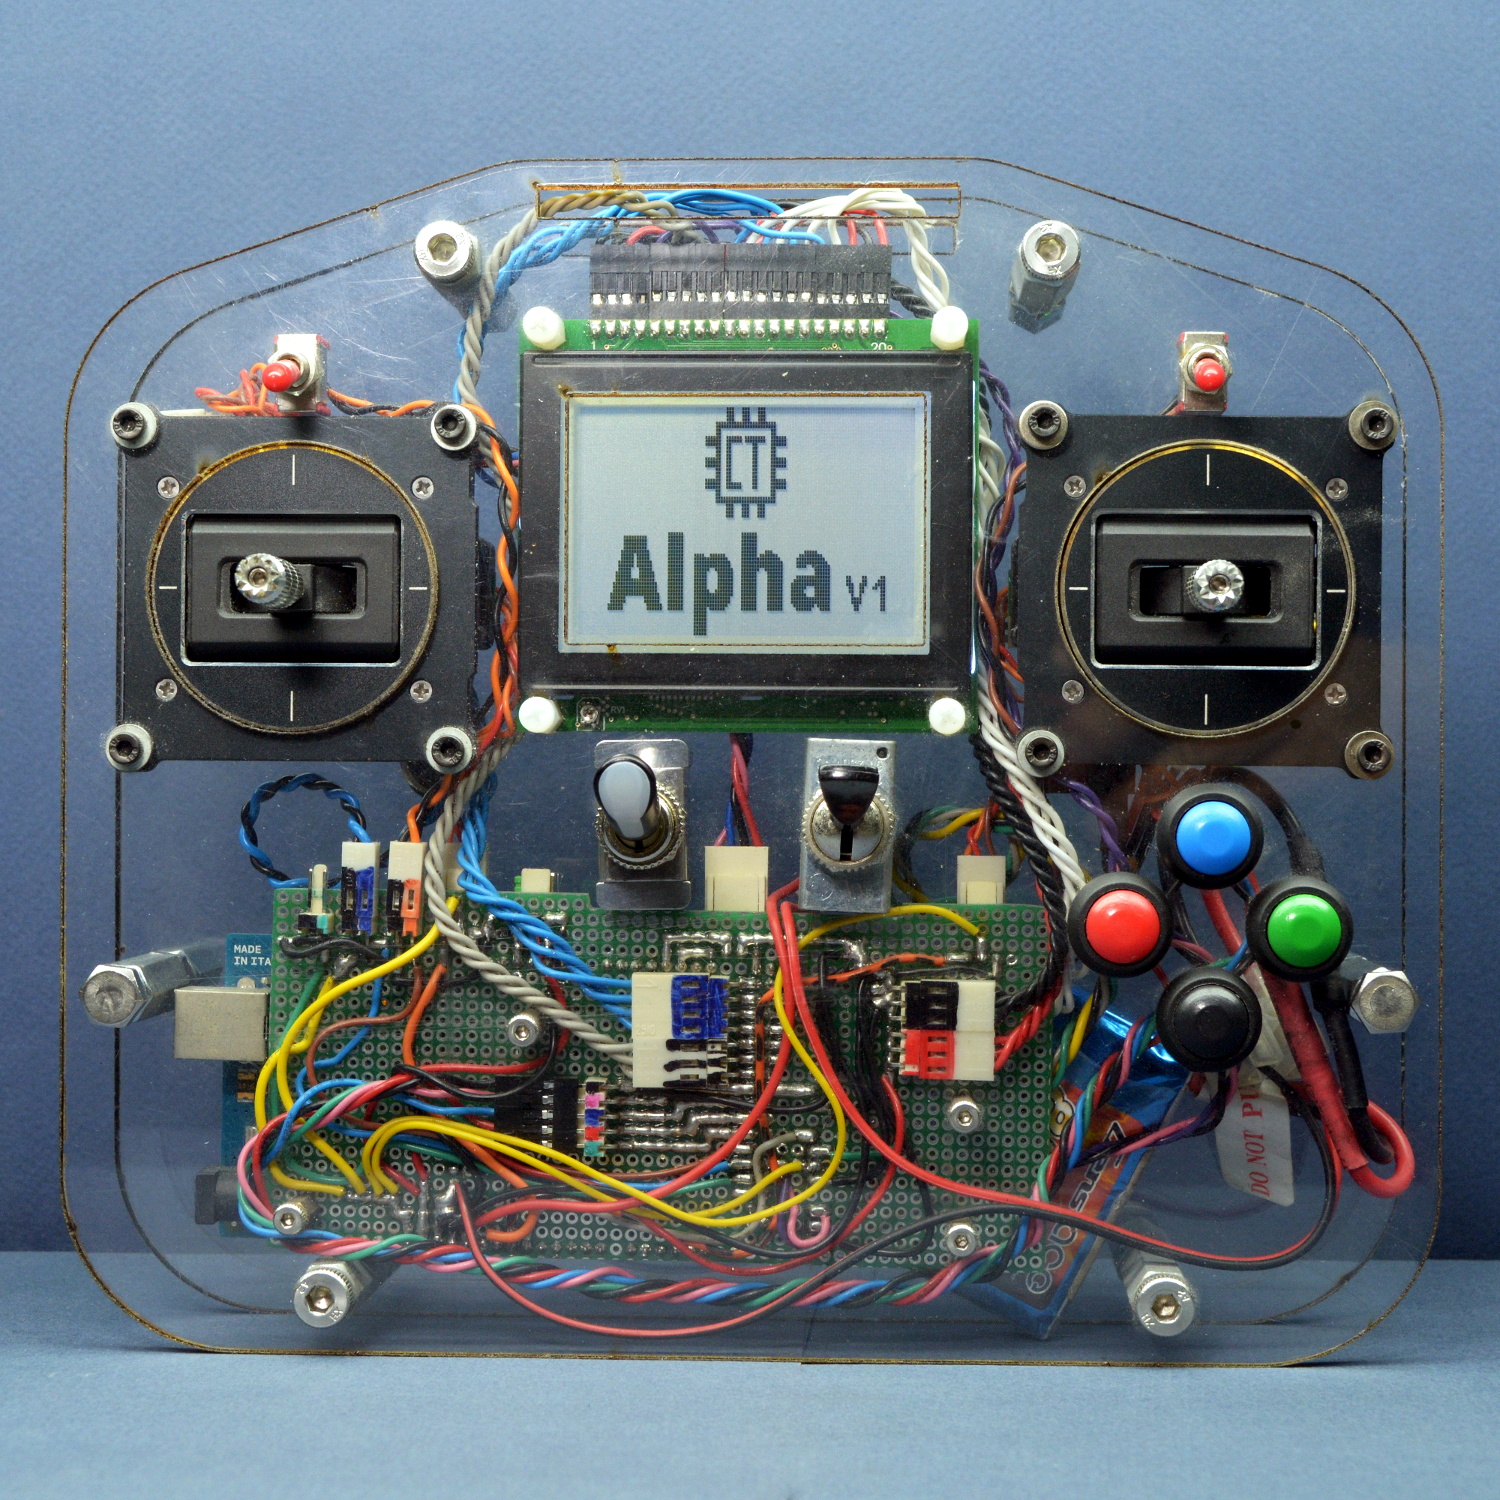
From his personal experience, [Alireza] found that traditional RC transmitters have their limits when you start using them for robotics. You’ll often want input schemes or devices which would never occur to the remote’s designers, and you’ll almost certainly want to have more channels and functions than the original hardware will allow. One of the big advantages with the Alpha V1 is that the front and back of the controller are simple acrylic panels, meaning you can easily cut openings or drill holes in them to add more hardware without having to deal with the (relatively) ergonomic shapes of a traditional transmitter.
Of course, that’s only one half of the equation. When you add new hardware, you’ll need to make the software aware of it. To that end, [Alireza] says he and his team have developed a library of adaptable firmware modules which should make it very easy to add in new components without having to get bogged down with software configuration. In fact, he says the goal is to allow the user to add new hardware to the Alpha V1 without requiring them to write a single line of code.
The Alpha V1 communicates at 2.4 GHz using either XBee or Murata DNT24 radios, and supports as many as 72 individual channels as well as two-way telemetry. If your requirements aren’t quite so high, we recently covered a significantly less intimidating attempt at building an open source RC transmitter that might suit your needs.


 It turns out that industrial push buttons have standardized components which can be assembled in an almost LEGO-like manner, with components mixed and matched to provide different switch actions, light indicators, and things of that nature. [Glen] decided to leverage this feature to make his custom PCB (the same design used in his