Assembling A Lathe From Not A Lot

Most people have a piece of equipment without which they consider their workshop or bench to be incomplete. For some, it is an oscilloscope, for others a bandsaw, but for many metalworkers, it is a lathe. Lathes are expensive if you are seeking a good one, quite cheap if you don’t mind a bad one, and sometimes even free if you can deal with a good one that’s very old and needs six burly friends and a forklift truck to move.

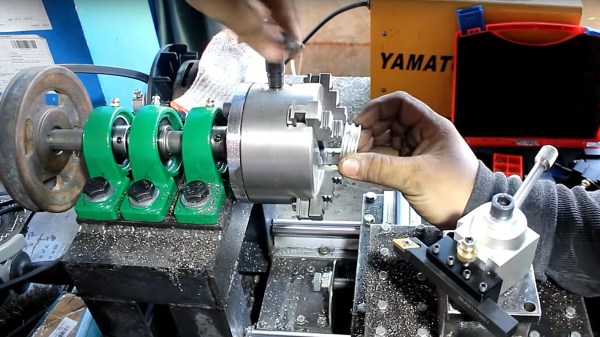
There is another way to acquire a lathe, and it’s one that [Sek Austria] demonstrates in the video below the break: build your own. It’s a fascinating demonstration of how machine tools evolved with each successive generation made by the last at every increasing precision. He achieves good-enough construction from a welded steel frame with little more than hand tools, and though his result is by no means a perfect lathe it does allow him to achieve the next level of machining precision. Off the shelf come a set of optical guide rails and linear bearings along with a chuck and tool holder, but the rest is all his. And the washing machine motor driving it is a touch of pure class, even though he is embarrassed enough to cover it with a glove for filming. Sometimes in our community, we adopt the sledgehammer to crack a nut methodology, usingĀ  CNC or similar techniques to fabricate things that can be made more speedily with less accomplished methods. We couldn’t help wincing at his hammering in the vice to create the lead screw nut bracket, though.

As homemade lathes go, this one is surprisingly conventional. Others have been fashioned from engine parts, or concrete.

Thanks [Xavier] for the tip.

Continue reading “Assembling A Lathe From Not A Lot”

Homebrew Laptop Makes A Statement With A Steampunk Theme

Some may argue, but your choice of computing hardware says exactly zero about you, at least when you buy off the shelf. Your laptop or PC is only one of millions, and the chances of seeing someone with the exact same machine are pretty good. If you want to be different, you really need to build something yourself.

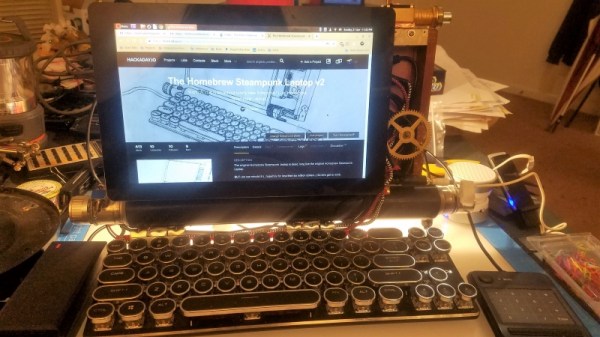
This homebrew steampunk laptop does a great job at standing out from the crowd. [Starhawk]’s build is an homage to the Steampunk genre, in a wooden case with brass bits and bobs adorning. The guts are based on an Intel motherboard, a bit dated but serviceable enough for the job. There’s a touch-capable LCD in the lid, and we absolutely love the look of the keyboard with its retro-style chrome and phenolic keycaps. Exposed USB cables run to and fro, and the braided jackets contribute to the old-timey look. The copier roller as a lid hinge is a nice touch too.

[Starhawk]’s build log is long and detailed, and covers the entire build. We’ve seen interesting builds from him before, like this junk-bin PC build for a friend in need. Looks like this one is for personal use, though, and we can’t blame him.

Protect Your Coffee Machine With A Filter Monitor

Coffee machines are delicate instruments, likely to be damaged by limescale. Thus they will often have a filter present, but filters have a limited capacity of water upon which they can be effective. At Make Bournemouth, they have approached the problem of when to change filters on their coffee machine by applying a bit of high-tech.

The water passing through the filter is monitored by a couple of DFRobot TDS modules, a flow meter, and a DS18B20 temperature sensor. The data from these is fed into an ESP32 dev board, which makes it available by a web interface for handy accessibility through a smartphone. It can then be used to work out how much of the filter’s capacity has been used, and indicate when a replacement is needed. All the code is available in a GitHub repository, and with luck now Bournemouth’s hackerspace will never see the coffee machine succumb to limescale.

Of course, this isn’t the first coffee maker water hack we’ve brought you. A year or two ago we told you about somebody making their pod coffee maker auto-fill too.

Simple Trick For LEDs On Solderless Breadboards

Sometimes the most useful hacks are also the simplest ones. A case in point is the LED and resistor assembly that [Skippy] recently posted on his blog. The idea is to solder up some pre-made indicators with integrated resistors to save space on the breadboard when prototyping — instead of four slots, you only use two per LED. This is about as easy a trick as you can imagine, but it has the hallmark of a classic hack: a high utility-to-work ratio.

The deluxe assembly uses a two-pin header as a base to plug into the breadboard. This, of course, could be optional since some breadboards have a memory for the widest pin previously inserted — using header pins may eventually make the slots a little flaky for smaller component leads. But, if you’re mostly using header pins in the breadboard anyway, this is a good way to avoid kinking the leads.

While there are LEDs available with integrated dropping resistors, building your own means you can use whatever LEDs you prefer — or simply have on hand — and adjust the resistor value for different voltages or to adjust the brightness. And for those of you who plug in LEDs without current-limiting resistors, we’re going to assume that you’ve thoroughly researched whatever is driving them and done the math to ensure they’re safe. Or not: they’re your LEDs after all.

We previously featured a no-solder breadboarding trick for SMD LEDs. What’s your favorite solderless breadboard hack? Let us know in the comments below.

Thanks to [Roboteernat] for the tip!

Lego Goes Underwater, With Model Submarines And Missiles

It is fun to make a toy vehicle with Lego, but it is even more fun to make one that actually works. [PeterSripol] made two Lego submarines, and you can see them in the video below. There isn’t a lot of build information, but watching the subs fire missiles and then getting destroyed by depth charges is worth something.

One of the subs is larger and uses a rudder to steer. It was apparently harder to control than the other smaller sub which used two motors thrusting opposite one another to steer. Looks like fun.

Continue reading “Lego Goes Underwater, With Model Submarines And Missiles”

Hail To The King, Baby: Reverse Engineering Duke

If you’re a fan of DOS games from the 1990s, you’ve almost certainly used DOSBox to replay them on a modern computer. It allows you to run software in a virtual environment that replicates an era-appropriate computer. That’s great for historical accuracy, but doesn’t do you much good if you’re trying to leverage modern computing power to breathe some new life into those classic titles. For that, you need to dig in a little deeper.

For the last two and a half years, [Nikolai Wuttke] has been doing exactly that for 1993’s Duke Nukem II. The end result is RigelEngine, an open source drop-in replacement for the original game binary that not only runs on a modern Windows, Linux, or Mac OS machine, but manages to improve on the original in a number of ways. An accomplishment made even more impressive once you learn that the original source code for the game has been lost to time, and that he had to do everything blind.

In a blog post chronicling his progress so far, [Nikolai] explains the arduous process he used to make sure his re-implementation was as accurate as possible to the original game. He spent untold hours studying the original game’s disassembled code in Ida Pro, handwriting out pages of notes and pseudocode as he tried to understand what was happening behind the scenes. Once a particular enemy or element of the game was implemented in RigelEngine, he’d record the gameplay from his version and compare it to the original frame by frame so he could fine tune the experience.

So what’s the end result of more than two years of work and over 25K lines of code? Thanks to the incredible advancements in computing power since the game’s release nearly 30 years ago, [Nikolai] has managed to remove the need for loading screens. His engine is also capable of displaying an unlimited number of particle effects on the screen at once, and multiple sound effects can now be played simultaneously. In the future he’s looking to implement smooth character movement (in the original game, movement was in 8 pixel increments) and adaptive volume for sound effects based on their distance from Duke. Ultimately, RigelEngine should be able to replace the original graphics with new high resolution textures once some issues with the rendering buffer gets sorted out.

It’s hard to overstate how important some of these classic games are to those who grew up playing them. With John Romero still releasing DLC for the original DOOM and hackers disassembling nearly 40 year old games to fix bugs, it doesn’t seem like they’re in any danger of being forgotten.

Continue reading “Hail To The King, Baby: Reverse Engineering Duke”

Circuit Bending Those Adorable Voices

Leapfrog make some pretty awesome kids electronics. Especially admirable is the low cost, the battery life, and the audio quality of these devices. This circuit bending hack takes advantage of those audio circuits by turning the Alphabet Pal into your lead vocalist. The performance in the demo video begins with some impressive tricks, but just wait for it because by the end the little purple caterpillar proves itself an instrument worthy of a position beside that fancy Eurorack you’ve been assembling.

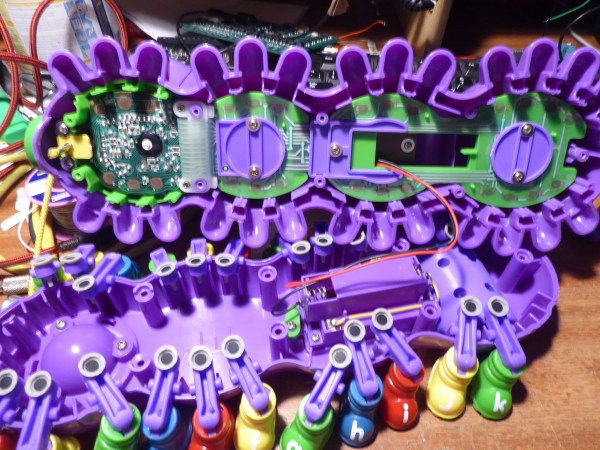
The image above provides a great look inside the beastie. [Jason Hotchkiss] mentions he’s impressed by the build quality, and we have to agree. Plus, look at all of those inputs — this is begging to leave toyland and join the band. With an intuitive sense that can only be gained through lots of circuit-bending experience, he guessed that the single through-hole resistor on the PCB was used to dial in the clock speed. That made it easy to throw in a trimpot for pitch-bending and he moved on to figure out individual note control.

All of those caterpillar feet are arranged in a keyboard matrix to detect button presses. After pulling out the oscilloscope for a bit of reverse engineering, [Jason] grabbed a PIC microcontroller and added it to the same solder points as the stock ribbon connector. The result is that the buttons on the feet still work, but now the Alphabet Pal also has MIDI control.

Take a look at the writeup for full details, and the video after the break to hear it in action. If you’re a fan of circuit-bent toys, this pretty pink keyboard hack always impressed us, especially the spring reverb that was added!

Continue reading “Circuit Bending Those Adorable Voices”