A Patch Antenna Is Just A Rectangle, It Should Be Easy To Design, Right?

If a grizzled RF engineer who bears the soldering-iron scars of a thousand projects could offer any advice, it would be that microwave antennas are not a field to be entered into lightly. Much heartache is to be saved by using an off-the-shelf design, and only the foolhardy venture willingly down the stripline into the underworld of complex microwave resonances.

But every would-be microwave designer has to start somewhere, and for [Adam Gulyas] that start came with a 2.4 GHz patch antenna. His write-up is a fascinating tale of the challenges and pitfalls of creating something which is deceptively simple at first sight but which becomes significantly more complex as he characterizes his design made real as a PCB.

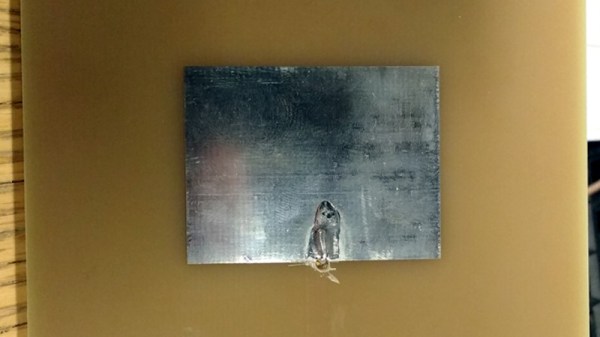
The process started with a set of calculations to derive the patch dimensions and a bit of PCB work adding a stripline feed. This was produced on a PCB, a normal 1.6mm thick FR4 fiberglass board. When hooked up to a VNA its impedance was all wrong. Further, it had a resonance at the required frequency but also unexpected ones at 3.7 and 4.6 GHz. Simulation of the design also yielded a different resonance from the one calculated, and discussing it with others yielded the conclusion that the feed might be at fault. He ended up using an inset feed, with a co-axial cable emerging away from the edge of the patch, and was able to achieve a far better result.

We can all learn something from [Adam]’s write-up, and we salute him for staying the course to get the design to a usable point. It would be interesting to see the same antenna produced from a more consistent dielectric material than generic FR4. Meanwhile, if you are interested in microwave RF design, take a look at Michael Ossmann’s primer on the subject.

The High Seas Are Open Source

One of the biggest problems of owning an older boat (besides being a money pit – that is common to all boats regardless of age) is the lack of parts and equipment, and the lack of support for those parts if you can find them at all. Like most things, this is an area that can benefit greatly from some open source solutions, which the Open Boat Projects in Germany has been able to show. (Google Translate from German)

This group has solutions for equipment problems of all kinds for essentially any sized boat. At their most recent expo, many people were interested in open source solutions for situations where there is currently only an expensive proprietary option, such as support for various plotting devices. This isn’t the only part of this project, though. It includes many separate projects, like their solutions for autopilot and navigation. There are even complete hardware packages available, all fully documented.

Open source solutions for large, expensive things like this are often few and far between for a number of reasons. There are limited options for other modes of open source transportation too, as it seems like most large companies are not willing to give up their secrets easily. Communities like this, however, give us hope that people will have other options for repairing their vehicles without having to shell out too much money.

Thanks to [mip] for the tip!

DIY Monochrome LCD Hack Doesn’t Go As Planned

Manufacturers of low-cost 3D printers that use the masked stereolithography (MSLA) process are able to build their machines so cheaply because they’re using repurposed smartphone or tablet LCD panels to mask off the UV backlight. Considering the quality you get out of even the entry-level MSLA resin printers, we certainly aren’t complaining about this bit of thrift. But as [Jan Mrázek] explains in a recent blog post, there’s certainly room for improvement.

The problem is that those repurposed LCD panels are, as you’d expect, color displays. After all, even the bottom of the barrel mobile devices moved away from monochrome displays decades ago. But in this case, that’s not what you really want. Since the printer operates on a single wavelength of light, the color filters inside the LCD are actually absorbing light that could otherwise be curing the resin. So an MSLA printer with a monochrome screen would use less energy and print faster. There’s only one problem: it’s not very easy to find high-resolution monochrome displays in the year 2020.

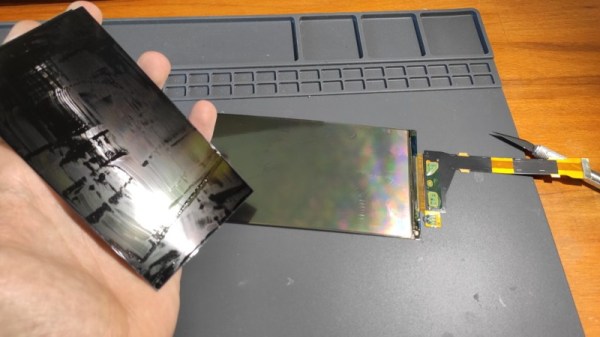
So [Jan] decided to see if he could take a replacement screen intended for his Elegoo Mars MSLA printer and convert it from color to monochrome by disassembling it and manually removing the color filters. If this sounds a bit crazy, that’s because it is. Turns out taking apart an LCD, modifying its internal layout, and putting it all back together in working order is just as difficult as you’d think.

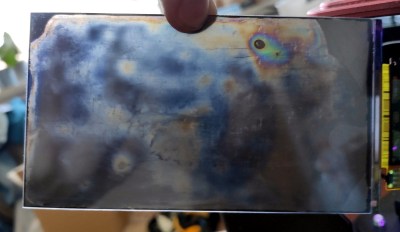
But it was still worth a try. [Jan] pulls the display apart, removes the liquid crystals, scrapes off the color filters, and then puts it all back together again. His first attempt got him a monochrome display that actually worked, but with debris trapped inside the screen, the image was too poor to be useful. He tried again, this time trying harder to keep foreign material out of the crystals. But when he got it back together a second time, he found it no longer functioned. He thinks it’s possible that his attempt to clean up the inside of the display was too aggressive, but really there are so many things that could go wrong here it’s hard to pin down just one.

Long story short, manually creating monochrome displays for low-cost MSLA printers might not be a viable option. Until a better solution comes along, you might be interested in seeing some slightly less invasive ways of improving your resin print quality.

Single Bolt Transformed Into A Work Of Art

Every once in a while, this job helps you to discover something new and completely fascinating that has little to do with hacking but is worth sharing nonetheless. Turning a single brass bolt into a beautiful Cupid’s bow is certainly one of those times.

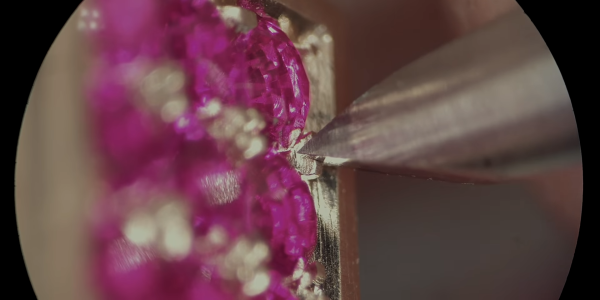
Watching [Pablo Cimadevila] work in the video below is a real treat, on par with a Clickspring build for craftsmanship and production values. His goal is to use a largish brass bolt as the sole source of material for a charming little objet d’art, which he achieves mainly with the use of simple hand tools. The stave of the bow is cut from the flattened shank of the bolt with a jeweler’s saw, with the bolt head left as a display stand. The offcuts are melted down and drawn out into wire for both the bowstring and the shaft of the arrow, a process that’s fascinating in its own right. The heart-shaped arrowhead and the faces of the bolt head are bedazzled with rubies; the technique [Pablo] uses to create settings for the stones is worth the price of admission alone. The complete video below is well worth a watch, but if you don’t have the twelve minutes to spare, a condensed GIF is available.

[Pablo]’s artistry reminds us a bit of this not-quite-one-bolt combination lock. We love the constraint of sourcing all a project’s materials from a single object, and we really appreciate the craftsmanship that goes into builds like these.

Continue reading “Single Bolt Transformed Into A Work Of Art”

Assistive Specs Help Jog Your Memory

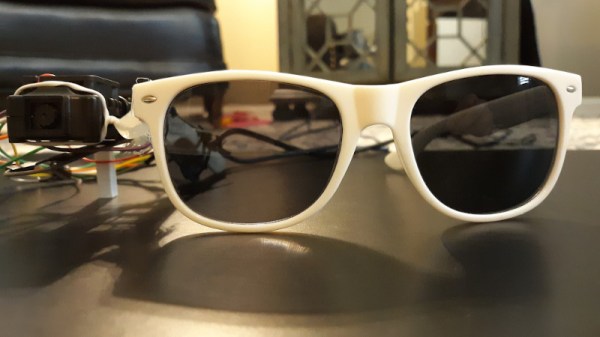
It’s something that can happen to all of us, that we forget things. Young and old, we know things are on our to-do list but in the heat of the moment they disappear from our minds and we miss them. There are a myriad of technological answers to this in the form of reminders and calendars, but [Nick Bild] has come up with possibly the most inventive yet. His Newrons project is a pair of glasses with a machine vision camera, that flashes a light when it detects an object in its field of view associated with a calendar entry.

At its heart is a JeVois A33 Smart Machine Vision Camera, which runs a neural network trained on an image dataset. It passes its sightings to an Arduino Nano IoT fitted with a real-time clock, that pulls appointment information from Google Calendar and flashes the LED when it detects a match between object and event. His example which we’ve placed below the break is a pill bottle triggering a reminder to take the pills.

We like this idea, but can’t help thinking that it has a flaw in that the reminder relies on the object moving into view. A version that tied this in with more conventional reminding based upon the calendar would address this, and perhaps save the forgetful a few problems.

Continue reading “Assistive Specs Help Jog Your Memory”

A Tin Can Phone, But With Magnets

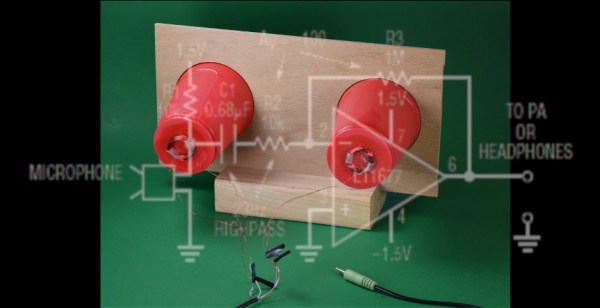
The tin can phone is a staple of longitudinal wave demonstrations wherein a human voice vibrates the bottom of a soup can, and compression waves travel along a string to reproduce the speaker in another can at the other end. All the parts in this electrical demonstration are different, but the concept is the same.

Speakers are sound transducers that turn electrical impulses into air vibrations, but they generate electricity when their coil vibrates. Copper wires carry those impulses from one cup to another. We haven’t heard of anyone making a tin can phone amplifier, but the strictly passive route wasn’t working, so an op-amp does some messy boosting. The link and video demonstrate the parts and purposes inside these sound transducers in an approachable way. Each component is constructed in sequence so you can understand what is happening and make sense of the results.

Can someone make a tin can amplifier transformer? We’d like to see that. In another twist of dual-purpose electronics, did you know that LEDs can sense light?

Continue reading “A Tin Can Phone, But With Magnets”

Adora-BLE Synth Wails Without Wires

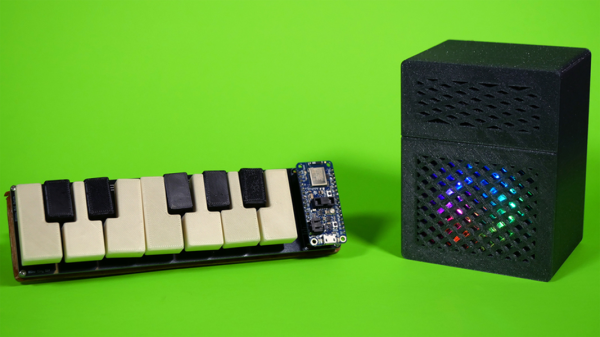
Isn’t this the cutest little synth you ever saw? The matching sparkly half-stack amp really makes it, visually speaking. But the most interesting part? There’s not a wire in sight, ’cause [Blitz City DIY]’s futuristic rig sends the bleep boops over Bluetooth LE.

Hardware-wise, both the synth and the amp are fairly simple. Underneath each of those cute little printed keys is one of those clicky momentaries that usually come with bright button caps in primary colors — the keys themselves just press-fit over the tops. All twelve ebonies and ivories are connected up to an Adafruit Feather, which communicates over Bluetooth LE to a CircuitPlayground Bluefruit (CPB) in the amp. Each time a note is played on the synth, its corresponding color circles comet-like around the CPB’s NeoPixels, which shine through the amp’s speaker grille.

The super interesting part is that all the hard work is happening in the code. Both boards have the same array of colors in rainbow order, and the CPB has an array of tone frequencies that match up one for one with the colors. For every note played, the CPB looks up the color, swirls it, and plays the note. If you want to build one, this project is wide open — [Blitz City DIY] even made a learn guide with all the dirty details. Be sure to check out the demo and extended walk-through after the break.

More in the market for making a computer keyboard? Just grab the nearest ESP32.

Continue reading “Adora-BLE Synth Wails Without Wires”