Polar Planimeter Quantifies Area By Plotting Perimeter

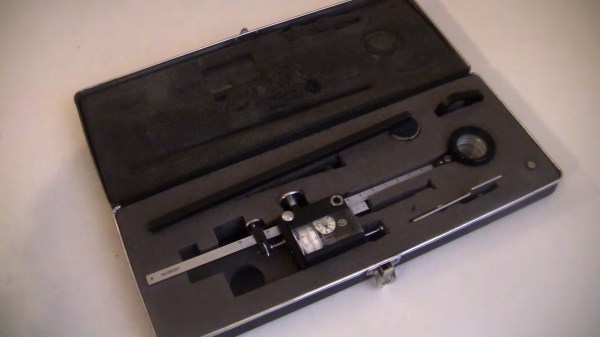
These days it’s hard to be carry the label “maker” or “hacker” without also being proficient in some kind of CAD- even if the C is for Cardboard. But before there was CAD there was Drafting and its associated arts, and one couldn’t just select a shape and see its area in the square unit of your choice. So how could an old school draftsman figure out the area of complex shapes? [Chris Staecker] introduces us to the polar planimeter, a measuring tool created specifically for the purpose and explained in full in the video below the break.

The polar planimeter being discussed is a higher end unit from the 1960’s. Interestingly, the first polar planimeters were invented in the early 19th century even before the math that describes their function was completed. A lever is placed in a fixed position on one end and into the planimeter on the other. The planimeter itself has another arm with a reticle on it. The unit is zero’d out with a button, and the outline of the shape in question is traced in a clockwise fashion with the reticle.

What makes the polar planimeter capable of measuring in multiple dimensions is the fixed arm. The fixed arm pivots around, allowing the planimeter to track angle changes which affects the output. So, the planimeter isn’t just measuring the length of the perimeter, but the size of the perimeter. The final measurement is output in square inches.

Overall it’s a really slick tool we didn’t know existed, and it’s fascinating to see how such problems were solved before everything could be done with a mouse click or two. Be sure to check out this 100+ year old reference set to round out your knowledge of past knowledge. Thanks to [Zane] for the great tip!

Continue reading “Polar Planimeter Quantifies Area By Plotting Perimeter”

Get GitHub Tickets IRL With A Raspberry Pi And A Receipt Printer

Thermal receipt printers are finding their way into all sorts of projects that are well beyond the point-of-sale environment that they normally inhabit. And while we applaud all the creative and artistic uses hackers have found for these little gems, this GitHub physical ticket printer has to be the best use for one yet.

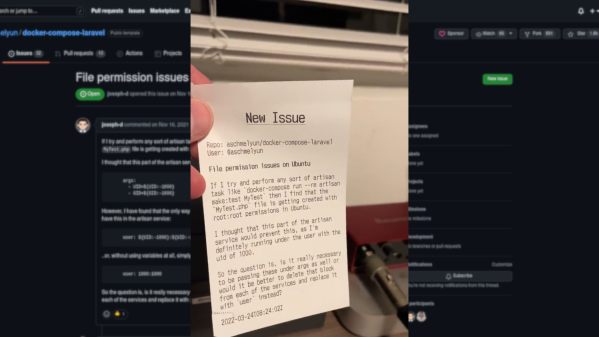
According to [Andrew Schmelyun], seeing a fast-food order pop up on a thermal printer was the inspiration for this build. Maintaining over one hundred GitHub repos as he does, it’s easy for the details of any one bug report or feature request to get lost in the swarm of sticky notes that [Andrew] previously used to keep track of his work. To make it happen, he teamed an Epson thermal printer up to a Raspberry Pi Zero W and worked out the details of sending data to the printer using PHP. Luckily, there’s a library for that — the beauty of GitHub.

With the “Hello, World!” bit out of the way, [Andrew] turned his attention to connecting to GitHub. He set up some webhooks on the GitHub side to send a POST request every time an issue is reported on one of his repos. The POSTs are sent via ngrok to a PHP web server running on the Pi, which formats the data and sends the text to the printer. There’s a short video in the tweet below.

Between the sound of the printer working and the actual dead-tree ticket, it’ll be hard for [Andrew] to miss issues now. We’ve seen thermal printers stuffed into cameras, used to send pictures to Grannie, and even watched them commit suicide slowly, but we say hats off to [Andrew] for his solid work ethic and a fun new way to put a receipt printer to use.

Continue reading “Get GitHub Tickets IRL With A Raspberry Pi And A Receipt Printer”

DIY Prony Dyno Properly Displays Power Production

When hackers in the US think of a retailer called Harbor Freight, we usually think of cheap tools, workable but terrible DVM’s, zip ties, and tarps. [Jimbo] over at [Robot Cantina] looked at the 212cc “Predator” engine that they sell and thought “I bet I could power my Honda Insight with that.” And he did, successfully! How much power did the heavily modified engine make? In the video below the break, [Jimbo] takes us through the process of measuring its output using a home built dyno.

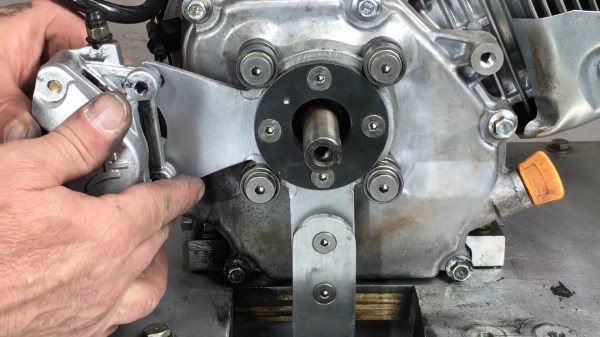
The dyno that [Jimbo] has built is a Prony Dyno, and it’s among the oldest and simplest designs available. A torque arm is extended from a disk brake caliper and connects to a force gauge. The engine is ran up to its highest speed, and then he brake is applied to the crankshaft until the engine almost stalls. A tachometer keep track of the RPM, and the force gauge measures the force on the torque arm. Torque is multiplied by RPM and the result is divided by a constant of 5252, and voilà: Horsepower. A computer plots the results across the entire range, and the dyno test is complete.

That only tells part of the story, and the real hack comes when you realize that the dyno stand, the force gauge setup and pretty much everything that can be built at home has been built at home. You’ll also enjoy seeing the results of some driving tests between the 212cc engine and its bigger 420cc brother, how even minor changes to the engine affect the horsepower and torque curves, and how that affects the Honda that he calls his “Street legal go cart.”

Speaking of unusual power plants, how about plant some hobby sized jet turbines on the back of your Tesla for fun?

Continue reading “DIY Prony Dyno Properly Displays Power Production”

DIY SLS 3D Printer Getting Ready To Print

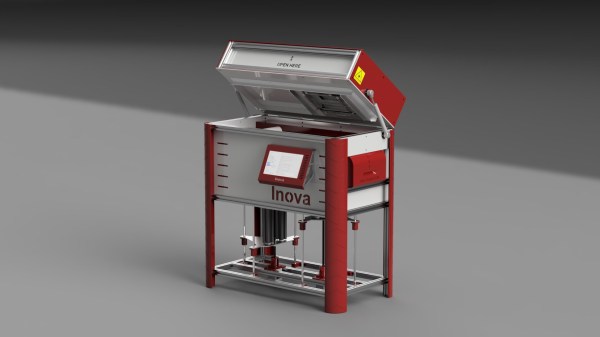
Ten years ago the concept of having on our desks an affordable 3D printer knocking out high quality reproducible prints, with sub-mm accuracy, in a wide range of colours and material properties would be the would be just a dream. But now, it is reality. The machines that are now so ubiquitous for us hackers, are largely operating with the FDM principle of shooting molten plastic out of a moving nozzle, but they’re not the only game in town. A technique that has also being around for donkeys’ years is SLS or Selective Laser Sintering, but machines of this type are big, heavy and expensive. However, getting one of those in your own ‘shop now is looking a little less like a dream and more of a reality, with the SLS4All project by [Tomas Starek] over on hackaday.io.

[Tomas] has been busy over the past year, working on the design of his machine and is now almost done with the building and testing of the hardware side. SLS printing works by using a roller to transfer a layer of powdered material over the print surface, and then steering a medium-power laser beam over the surface in order to heat and bond the powder grains into a solid mass. Then, the bed is lowered a little, and the process repeats. Heating of the bed, powder and surrounding air is critical, as is moisture control, plus keeping that laser beam shape consistent over the full bed area is a bit tricky as well. These are all hurdles [Tomas] has to overcome, but the test machine is completed and is in a good place to start this process control optimisation fun. Continue reading “DIY SLS 3D Printer Getting Ready To Print”

A Robot Game To Open Your Hackerspace

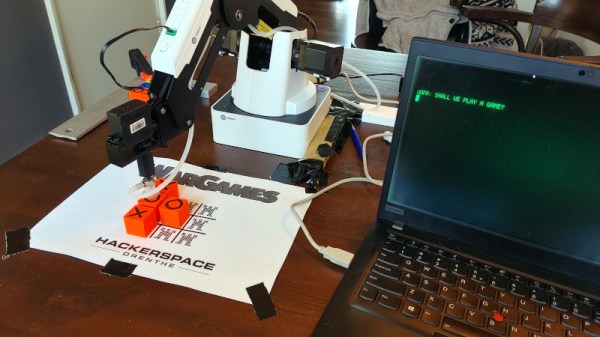
It’s always good to welcome a new hackerspace to the fold, and thus we’re pleased to hear about the upcoming opening of Hackerspace Drenthe, on the north-eastern edge of the Netherlands. Starting a new space during a global pandemic is something of a feat. As part of their opening something is required to demonstrate a robot for the curious public, and what could be more accessible than a robot arm playing tic-tac-toe!

It would be correct to say that a robot moving blocks with precision is not necessarily a ground-breaking achievement, but in its purpose of providing eye-candy for a hackerspace opening while also serving as an experiment for some of the students from the school adjacent to the space it is a success. The interface is a pleasingly retro War Games style terminal, and the software is written in Python. For the curious all can be found on a GitHub repository, and should you be in that region of Europe you can find Hackerspace Drenthe in the Netherlands border town of Coevorden and attend their opening on the 2nd of April.

Continue reading “A Robot Game To Open Your Hackerspace”

High Noon For Daylight Savings Time

The US Senate has approved the “Sunshine Protection Act”, a bill to make Daylight Saving time the default time and do away with the annual time changes. While I can get behind the latter half of this motion, redefining Daylight Saving time as Standard time is, in my opinion, nonsense.

It’s particularly funny timing, coming right around the Vernal Equinox, when the sun stands at its highest right at Noon Standard Time, to be debating calling this time “one PM” forevermore.

Right Idea, Wrong Time

Let’s do a quick overview of the good idea here — doing away with time changes. These are known to cause sleep disturbances and this leads not just to sleepy heads on Monday morning, but to an increased risk of heart attack and accidents in general. When researchers look into the data, it’s the “springing forward” that causes trouble. People who’ve slept one extra hour don’t seem to suffer as much as people who’ve lost one. Go figure.

So maybe it makes sense to stop changing times. If we’re going to settle on one standard time, do we pick Standard time or Daylight Saving time? Admittedly, this is a totally unfair way to pose the question, but there are a number of good reasons to prefer all-year Standard time. The biggest one is winter. Basically, it’s already tough enough to get up on a cold January morning when the sun is not due to rise for another hour or two. Add another hour of darkness on top, and you know why the two previous attempts to run all-year Daylight Saving were short-lived. And why the Swedes drink so much coffee.

France-002886 – Sundial” by archer10 (Dennis) CC BY-SA 2.0.

There’s also the fundamental logic behind our measurement of time that’s stood for centuries, and is embedded in most of our cultural references to time. Ante Meridian and Post Meridian. High Noon, when the hour hand on the clock points straight up, represents the sun itself. But even before clocks, the sun’s halfway point along its daily journey marked the halfway point of the day. That’s not only why we eat lunch when we do, it’s the origin of man’s time-telling itself.

If we change the definition of noon permanently, we’ve decoupled time from the sun. How will we explain time to future children? I’ll accept Daylight Saving time when we start reprinting analog watches with 1 o’clock at the top and start referring to 12 AM as the one that’s just before the sun reaches its peak. As soon as “one noon” replaces “twelve noon”, I’ll get on board. Midnight, when the clock strikes one, just doesn’t send the same shiver down my spine. Sorry, Dracula.

If culture and physics point to Standard Time, why would you want Daylight Saving to be the new normal? When people think of Daylight Saving, they naturally think of those nice long summer days that stretch out into the night. My personal bet is that many folks are confounding summertime with Summer Time. Heck, even the name of the bill proposes to protect sunshine itself, rather than just move the hands of the clock around. These are not good reasons.

Continue reading “High Noon For Daylight Savings Time”

Hackaday Podcast 161: Laser Lithography, Centurion Hard Drive, And Mad BGA Soldering

Join Hackaday Editor-in-Chief Elliot Williams and Staff Writer Dan Maloney for an audio tour of the week’s top stories and best hacks. We’ll look at squeezing the most out of a coin cell, taking the first steps towards DIY MEMS fabrication, and seeing if there’s any chance that an 80’s-vintage minicomputer might ride again. How small is too small when it comes to chip packages? We’ll find out, and discover the new spectator sport of microsoldering while we’re at it. Find out what’s involved in getting a real dead-tree book published, and watch a hacker take revenge on a proprietary memory format — and a continuous glucose monitor, too.

Or Direct Download, like you’ve got something to prove!

Take a look at the links below if you want to follow along, and as always, tell us what you think about this episode in the comments!

Continue reading “Hackaday Podcast 161: Laser Lithography, Centurion Hard Drive, And Mad BGA Soldering”