Custom Macro Keyboard With Sweet Backlighting

From the smallest 60% keyboards for those with no desk space to keyboards with number pads for those doing data entry all day, there’s a keyboard size and shape for just about everyone. The only problem, even with the largest keyboards, is that they’re still fairly limited in what they can do. If you find yourself wishing for even more functionality, you might want to build something like this custom macro keyboard with built-in LED backlighting.

Rather than go with a standard mechanical keyboard switch like a Cherry MX, this build is based around TS26-2 pushbuttons with built-in LED lighting. [atkaper] only really needed one button for managing the mute button on MS Teams, but still built a total of eight switches into this keyboard which can all be individually programmed with different functions. The controller is an Arduino Leonardo and the enclosure was 3D printed.

Paired with the classic IBM Model M keyboard, this new macro keyboard adds plenty of functionality while also having control over LED backlighting. Macro keyboards are incredibly useful, especially with their ability to easily change function with control over the software that runs on them. The key to most builds is the 32U4 chip found in some Atmel microcontrollers which allows it to easily pass keyboard (and mouse) functionality to any computer its plugged in to.

A camera slider made from wood and recycled parts

Turning Old Plotter Parts Into A Smooth Camera Slider

Taking apart old stuff and re-using the parts to make something new is how many hackers first got started in the world of mechanical and electronic engineering. But even after years working in industry we still get that tinge of excitement whenever someone offers us an old device “for parts”, and immediately begin to imagine the things we could build with the components inside.

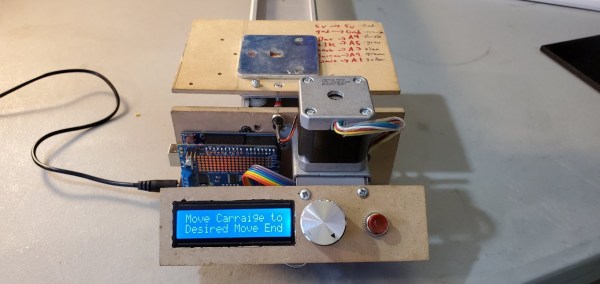
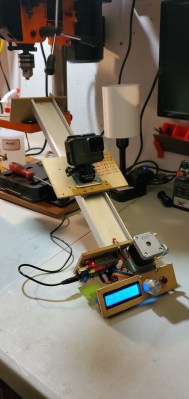
A GoPro mounted on a moving platform made from recycled partsSo when [Victor Frost] was offered an old Cricut cutting plotter, he realized he could use its parts to create the camera slider he’d been planning to build. The plotter’s X stage, controlled by a stepper motor, was ideal for moving a camera platform back and forth. [Victor] wanted to build the entire thing in a “freehand” way, without making a detailed design or purchasing any new parts. So he dived into his parts bin and dug up an Arduino, a 16×2 LCD, some wires and buttons, and a few pieces of MDF.

The camera mount is simply a piece of steel that a GoPro’s magnetic mount can latch onto, but [Victor] keeps open the possibility of mounting a proper tripod ball head. The Arduino drives the stepper motor through an Adafruit Motor Shield, with a simple user interface running on the LCD. The user can set the desired end points and speed, and then run the camera back and forth as often as needed. In this way, the software follows the same “keep it simple” philosophy as the hardware design.

If you’re planning to build your own camera slider, [Victor]’s design should be easy to copy, if you happen to have an old cutting plotter. If not, you can try this simple yet well-engineered model. Want even more? Then check out this fancy multi-axis camera motion control rig.

Continue reading “Turning Old Plotter Parts Into A Smooth Camera Slider”

Old Casio Calculator Learns New Tricks

[George Stagg] recently found himself stung by the burden of free time while in lockdown. Needing a project to keep him occupied, he decided to upgrade his 90s Casio CFX-9850G calculator to run custom machine code.

All [George] really wanted was for his vintage calculator to understand Reverse Polish Notation (RPN). The calculator in question can already run its own version of BASIC, however the bespoke Hitachi CPU struggles performance-wise with complex programs, and wouldn’t be a realistic way of using RPN on the calculator. An RPN interpreter written in assembly language would be much faster.

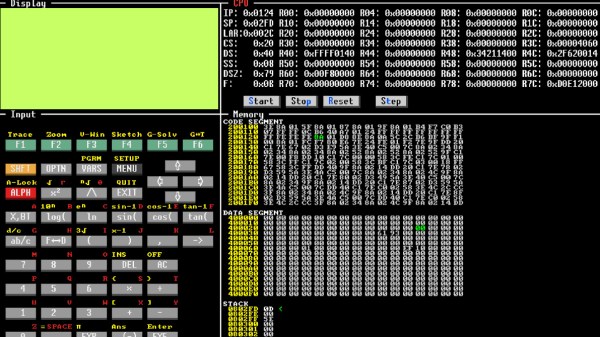
The first step in cracking this calculator wide open was a ROM dump, followed by writing a disassembler. Incredibly, the MAME framework already featured a ‘partial implementation’ of the calculator’s CPU, which was a much needed shot in the arm when it came time to write a full-featured emulator.

With the entire calculator emulated in software, the plan from here involved replacing one of the BASIC commands in ROM with new code that would jump to an address in RAM. With 32KB of RAM there ended up being plenty of room for experimentation, and uploading a program into RAM was simplified by using Casio’s original backup software to dump the RAM onto a PC. Here, the contents of RAM could be easily modified with custom code, then uploaded back into the calculator.

With RAM to burn, new routines were created to write custom characters to the screen, and a new font was created to squeeze more characters onto the display than normal. [George] ended up porting a Forth interpreter, which defaults to RPN style, to finally achieve his humble objective. He also managed to get a version of Conway’s Game Of Life running, check out the video after the break.

We can’t get enough of our calculator hacks here, so make sure to check out the CPU transplant on this vintage Soviet calculator.

Continue reading “Old Casio Calculator Learns New Tricks”

A Gaggle Of Boards Makes For An I2C Playground

It’s not much of a stretch to assume that the majority of Hackaday readers are at least familiar with I2C. In fact, there’s an excellent chance that anyone who’s ever done more with an Arduino than blink the onboard LED has at one time or another used the serial communication protocol to talk to a sensor, display, or other external gadget. Of course, just because most of us have used it in a few projects doesn’t mean we truly understand it.

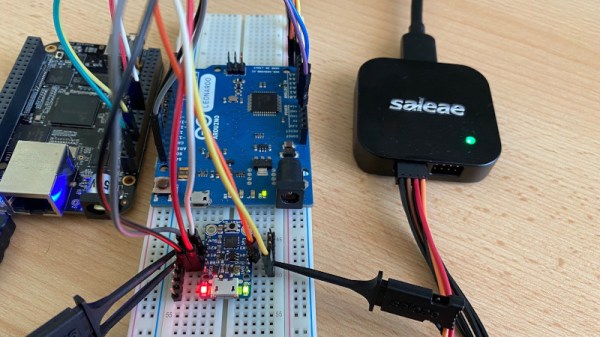
If you’re looking to brush up on your I2C knowledge, you could do worse than to follow the guide [András Tevesz] recently wrote up. With a title like Hardware Hacking 101: E01 I2C Sniffing, How to Listen to Your Arduino’s I2C Bus, you know you’re in for a good time. While the document is arguably geared more towards security researchers than electronic hobbyists, the concepts presented can be useful even if you’re just trying to debug your own projects. Continue reading “A Gaggle Of Boards Makes For An I2C Playground”

Accessible Arduino Mouse Helps

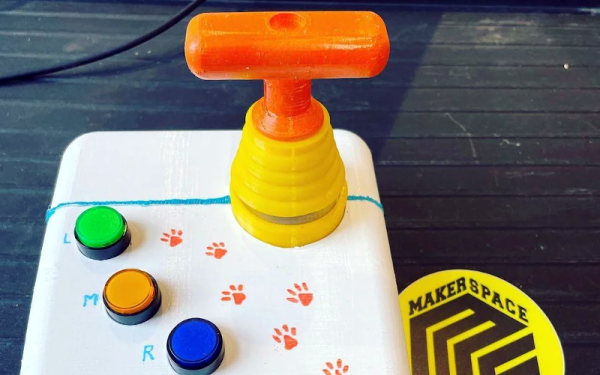
We enjoy access to cheap stuff because of the mass market for things like mice, keyboards, and cell phones. But if you need a device that doesn’t have mass appeal, you will have to pay a lot more if you can find it at all. However, with modern techniques like 3D printing and Arduino-like microcontrollers being cheap and simple to use, you now have the option to build that special one-of-a-kind device. Case in point: [Davy’s] mouse for people who have brain or nervous system disorders. This particular device is helping a 6-year-old who can’t manipulate a normal mouse.

The device uses an Arduino Pro and an MPU-6050 accelerometer and gyroscope. The original design uses machined aluminum, but 3D printing should work, too. There’s something wrong with the link to the design files in the post, but it is easy to find the correct link.

Continue reading “Accessible Arduino Mouse Helps”

Hacking A Fuel Sensor Into A Portable Tank, Literally

Regular readers of Hackaday will know that the projects we feature are generally of the high-tech variety. Microcontrollers, 3D printed parts, embedded Linux, lots of wires, that sort of thing. But that’s not to say we don’t appreciate the somewhat more visceral builds out there; after all, hacking is about creative problem solving and thinking outside the box, and none of that is limited to how complex the fix actually is.

Take for example this quick hack that [R. Preston McAfee] recently sent our way. Looking for a way to check how much fuel was left in his outboard motor’s small portable gas tank without crawling back to look at it, he decided to rig it up with a sending unit. While they’re technically designed for larger tanks which are permanently installed into a boat’s hull, he reasoned there was nothing about the float sensor that would keep it from working in his case so long as it could be safely mounted.

To that end, [Preston] started by cutting a 38 mm (1.5″) hole in the thickest part of the tank, and sanded the area around the opening to smooth things out. He then measured the depth of the tank at that point, and ordered an appropriately sized float sensor. He drilled out the holes for the five mounting bolts, and inserted them through the larger whole so their heads would be inside the tank. By holding the exposed threads with a pair of vice grips he was able to crank the nuts down on each bolt to form a tight seal to the gasket, though it should be noted that the resulting damage to the threads will likely make it difficult to remove the nuts in the future.

Admittedly this is a pretty simple fix, but it’s well thought-out and we appreciate the effort [Preston] put in to documenting the whole process. We’ve certainly covered more elaborate ways of seeing what’s left in the tank, but just because a solution is flashier doesn’t mean it’s necessarily any better.

Pong In Hardware… Virtually

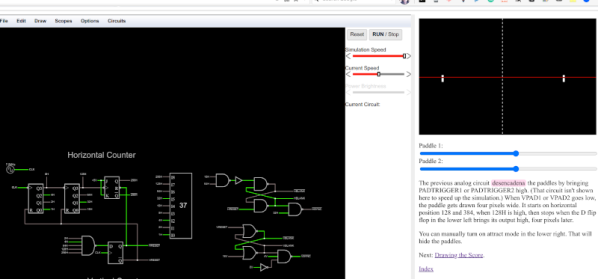
We are big fans of the Falstad circuit simulator. Sure, it isn’t perfect, but there’s nothing else like it when you want to whip up a simple circuit. But we were blown away when we saw a more or less complete hardware implementation of Pong in Falstad. No kidding. Starting with the original schematics, there are multiple pages that show each sub-circuit and even a playable subset that you can play the game in your browser.

But wait… you probably noticed there’s no CRT display in the simulator’s component menu. That’s true, there isn’t. However, you can write JavaScript to interact with a running simulation, so the display is a simple bit of JavaScript that samples signals at predetermined points and does the appropriate drawings. There’s even audio output for the sound effects, although that is built into the simulator.

Continue reading “Pong In Hardware… Virtually”