What Do You Get When A Raspberry Pi Pico Flashes A Nintendo 64

The joke was when the Nintendo 64 first hit the streets around a quarter century ago, that the 64 in the name referred not to the technology on board, but to the excessive cost of the cartridges. Whatever the truth in that, it’s something now completely laid to rest by [Konrad Beckmann] with his Nintendo 64 flash cart powered by a Raspberry Pi Pico (Nitter Link).

The schematic is surprisingly simple, in that the Pico does everything required to both interface to the N64 and to an SD card to hold the software. The clever work is done by the RP2040 firmware, which can be found along with the hardware details in the “develop” branch of the project’s GitHub repository. And while the earliest version was a Raspberry Pi Pico with a host of jumper wires, the more polished version focuses on a custom PCB and bare RP2040 chip.

Perhaps the N64 hasn’t received the attention it should have over the years, overshadowed as it was by its competitors such as the original PlayStation, but it’s projects like this one which remind us that there’s still life in Nintendo’s ’90s flagship. Speaking of which, if you were on Team Sony back in the day but still want to put your Pi Pico to use, check out this DIY PlayStation Memory Card we covered recently.

Scratch-Built Industrial Camera’s Modular Design Really Stacks Up

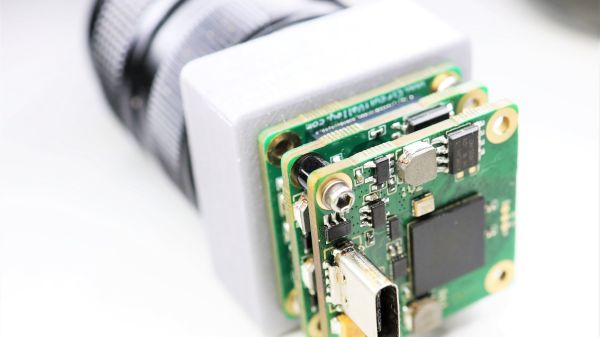
The news here isn’t so much that [Guarav Singh] built this high-quality industrial digital camera from scratch, but it’s in the way it was accomplished. That plus the amount of information that’s packed into the write-up, of course. And the excellent photography.

Modularity was one of [Guarav]’s design goals, with the intention of being able to swap out the sensor as the technology changes. To that end, [Guarav] came up with a stack of three PCBs. The middle board of the stack contains a Lattice FPGA chip along with two 16-MB RAMs and the FPGA config flash. The sensor board lies on one side of the FBGA board, while the USB 3.0 board is on the other. Each six-layer board is a masterpiece of high-density design, and the engineering that went into interfacing them and getting everything squeezed into a 3D-printed case with an integrated aluminum C-mount ring is pretty impressive.

[Guarav]’s write-up goes into a great deal of detail on processing the sensor data on the FPGA. Also, there’s quite a bit of practical information on implementing MIPI (Mobile Industry Processor Interface) and the CSI (Camera Serial Interface) specification. We’ve delved into this world before, but this project is a great hands-on explanation that might really help move your MIPI project along.

Thanks for the tip, [STR-alorman].

Around GPS In 100 Videos

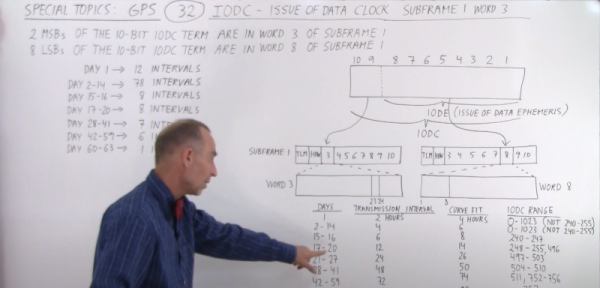
Do you know what the IODC word in GPS data means? If so, great! If not, head over to see the 32nd of [Michel van Biezen’s] 100-part video series on GPS. You probably want to watch the other 31 videos before he gets too much further ahead of you, too. [Michel] reminds you of that professor you had in college who knows a whole lot about something. In fact, scanning his YouTube channel, he knows a lot about many topics ranging from optics, chemistry, kalman filters, and lots of electronics.

There is a dedicated playlist for the GPS videos dating back to 2016. So 32 videos in about six years. So you might have a little time to catch up.  While the first video is pretty introductory as you might expect, by the time you get to video 7 the topics switch to things like the C/A code, BPSK, and gory details of all the frame data, including the IODC word.

Continue reading “Around GPS In 100 Videos”

Design Your Next Robot Hand In Minutes

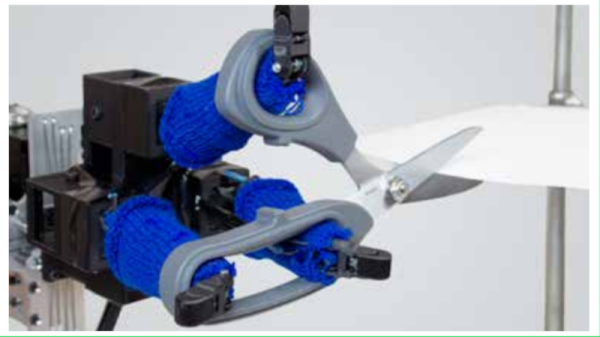
MIT complains that designing a robot hand is time-consuming and takes a lot of iterations. They want to improve that using a unique approach by giving a modular hand tactile sensors. They claim this can reduce the design time down to minutes for many practical applications. For example, cutting paper. You can see a video about the paper below as well as read the text itself.

Each style of manipulator has an associated graph. Predefined elements let you assemble a palm and specialized fingers. You deform the fingers to match the use of the hand. Then a sensor that looks like a mitten provides feedback fo the task.

Continue reading “Design Your Next Robot Hand In Minutes”

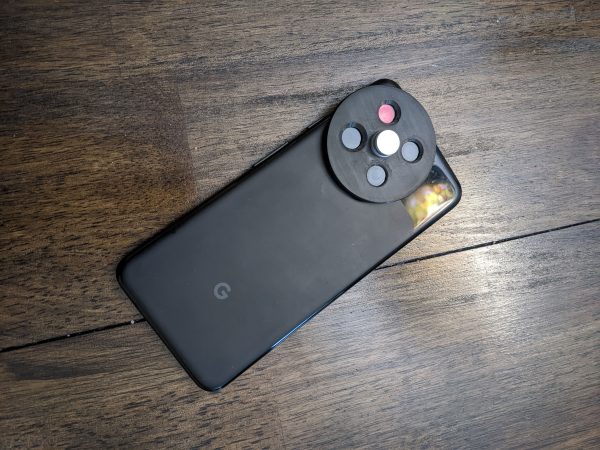
A Google Pixel 3a with a filter wheel attached to its camera

Hackaday Prize 2022: Multispectral Smartphone Camera Reveals Paintings’ Inner Secrets

Multispectral imaging, or photography using wavelengths other than those in ordinary visible light, has various applications ranging from earth observation to forgery detection in art. For example, titanium white and lead white, two pigments used in different historical eras, look identical in visible light but have distinct signatures in the UV range. Similarly, IR imaging can reveal a painting’s inner layers if the pigments used are transparent to IR.

Equipment for such a niche use is naturally quite pricey, so [Sean Billups] decided to transform an older model smartphone into a handheld multispectral camera, which can help him analyze works of art without breaking the bank. It uses the smartphone’s camera together with a filter wheel attachment that enables it to capture different spectral ranges. [Sean] chose to use a Google Pixel 3a, mainly because it’s cheaply available, but also because it has a good image sensor and camera software. Modifying the camera to enable IR and UV imaging turned out to be a bit of a challenge, however.

Image sensors are naturally sensitive to IR and UV, so cameras typically include a filter to block anything but visible light. To remove this filter from the Pixel’s camera [Sean] had to heat the camera module to soften the adhesive, carefully remove the lens, then glue a piece of plastic to the filter and pull it out once the glue had set. Perfecting this process took a bit of trial and error, but once he managed to effect a clear separation between camera and filter it was simply a matter of reattaching the lens, assembling the phone and mounting the filter wheel on its back.

The 3D-printed filter wheel has slots for four different filters, which can enable a variety of IR, UV and polarized-light imaging modes. In the video embedded below [Sean] shows how the IR reflectography mode can help to reveal the underdrawing in an oil painting. The system is designed to be extendable, and [Sean] has already been looking at adding features like IR and UV LEDs, magnifying lenses and even additional sensors like spectrometers.

We’ve seen a handful of multispectral imaging projects before; this drone-mounted system was a contestant for the 2015 Hackaday Prize, while this project contains an excellent primer on UV imaging.

Continue reading “Hackaday Prize 2022: Multispectral Smartphone Camera Reveals Paintings’ Inner Secrets”

Pocket Computer Reminds Us Of PDAs

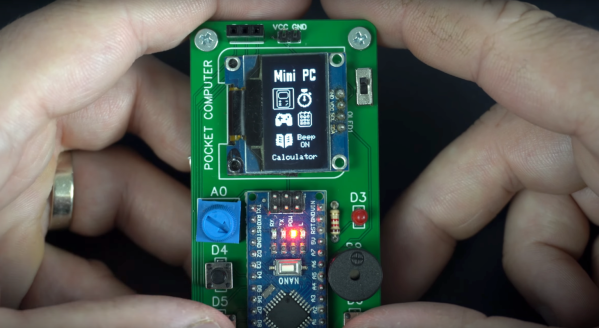
Before smartphones exploded on the scene in the late 00s, there was still a reasonable demand for pocket-sized computers that could do relatively simple computing tasks. Palm Pilots and other PDAs (Personal Digital Assistants) were all the rage in the ’90s and early ’00s, although for cutting-edge tech from that era plenty of these devices had astronomical price tags. This Arduino-based PDA hearkens back to that era, albeit with a much more accessible parts list.

The build is based around an Arudino Nano with an OLED screen and has the five necessary functions for a PDA: calculator, stopwatch, games, phonebook, and a calendar. With all of these components on such a small microcontroller, memory quickly became an issue when using the default libraries. [Danko] uses his own custom libraries in order to make the best use of memory which are all available on the project’s GitHub page. The build also includes a custom PCB to keep the entire pocket computer pocket-sized.

There are some other features packed into this tiny build as well, like the breakout game that can be played with a potentiometer. It’s an impressive build that makes as much use of the microcontroller’s capabilities as is possible, and if you enjoy projects where a microcontroller is used as if it is a PC take a look at this Arduino build with its own command-line interface.

Continue reading “Pocket Computer Reminds Us Of PDAs”

StarPointer Keeps Scope On Target With Stellarium

On astronomical telescopes of even middling power, a small “finderscope” is often mounted in parallel to the main optics to assist in getting the larger instrument on target. The low magnification of the finderscope offers a far wider field of view than the primary telescope, which makes it much easier to find small objects in the sky. Even if your target is too small or faint to see in the finderscope, just being able to get your primary telescope pointed at the right celestial neighborhood is a huge help.

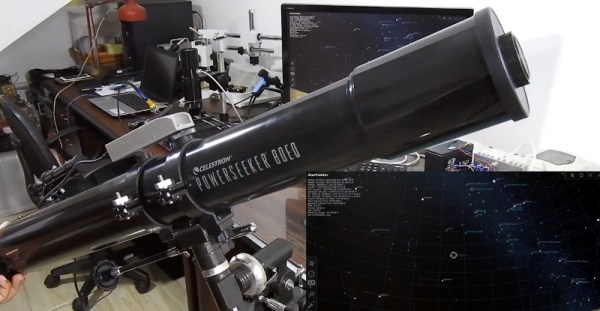
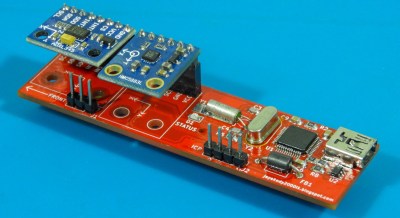
But [Dilshan Jayakody] still thought he could improve on things a bit. Instead of a small optical scope, his StarPointer is an electronic device that can determine the orientation of the telescope it’s mounted to. As the ADXL345 accelerometer and HMC5883L magnetometer inside the STM32F103C8 powered gadget detect motion, the angle data is sent to Stellarium — an open source planetarium program. Combined with a known latitude and longitude, this allows the software to show where the telescope is currently pointed in the night sky.

As demonstrated in the video after the break, this provides real-time feedback which is easy to understand even for the absolute beginner: all you need to do is slew the scope around until the object you want to look at it under the crosshairs. While we wouldn’t recommend looking at a bright computer screen right before trying to pick out dim objects in your telescope’s eyepiece, we can certainly see the appeal of this “virtual” finderscope.

Then again…who said this technique had to be limited to optical observations? As the StarPointer is an open hardware project, you could always integrate the tech into that DIY radio telescope you’ve always dreamed of building in the backyard.

Continue reading “StarPointer Keeps Scope On Target With Stellarium