3D Printing Aids Metal Polishing

While a machinist can put a beautiful finish on a piece of metal with their lathe or mill, to achieve the ultimate finish, a further set of polishing procedures are necessary. Successively finer abrasives are used in a process called lapping, which removes as far as possible any imperfections and leaves eventually a mirrored smoothness. It’s not without problems though, particularly at the edge of a piece it can result in rounded-off corners as the abrasive rubs over them. [Adam the machinist] has a solution, and he’s found it with a 3D printer.

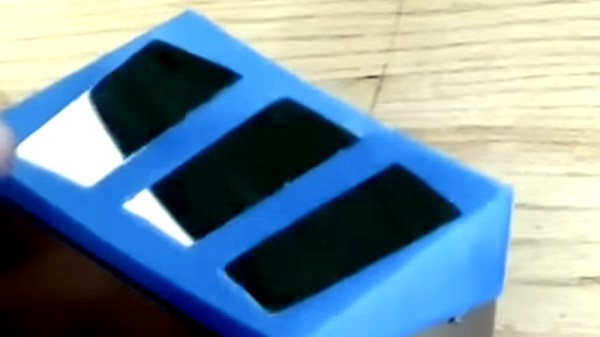
To avoid the rounded edges, the solution involves fitting a piece of metal or wood flush with the surface to be lapped, such that the pressure doesn’t act upon the corner. This can be inconvenient, and the solution avoids it by 3D printing a custom piece that fits over the entire machined object providing a flat surface surrounding the edges. We see it being used with a demonstration piece that has three separate surfaces in the same plane to lap,something that would have been challenging without the 3D printed aid.

Lapping isn’t a process we see too often here. But it has cropped up as an extreme overclocking technique.

Continue reading “3D Printing Aids Metal Polishing”

Glass 3D Printing Via Laser

If you haven’t noticed, diode laser engraver/cutters have been getting more powerful lately. [Cranktown City] was playing with an Atomstack 20 watt laser and wondered if it would sinter sand into glass. His early experiments were not too promising, but with some work, he was able to make a crude form of glass with the laser as the source of power. However, using glass beads was more effective, so he decided to build his own glass 3D printer using the laser.

This isn’t for the faint of heart. Surfaces need to be flat and there’s aluminum casting and plasma cutting involved, although some of it may not have been necessary for the final construction. The idea was to make a system that would leave a layer of sand and then put down a new layer on command. This turned out to be surprisingly difficult.

Continue reading “Glass 3D Printing Via Laser”

battery powered wall mounted clock with LCD display and 10 capacitive touch buttons

A Peppy Low Power Wall Mounted Display

[Phambili Tech] creates a battery powered mountable display, called “the Newt”, that can be used to display information about the time, calendar, weather or a host of other customizable items.

The Newt tries to strike a balance between providing long operating periods while still maintaining high refresh rates and having extensive features. Many of the battery powered devices of this sort use E-Ink displays which offer long operating windows but poor refresh rates. The Newt uses an LCD screen that, while not being as low power as an E-Ink display, offers extended battery operation while still being daylight readable and providing high refresh rates.

The display itself is a 2.7 inch 240×400 SHARP “Memory In Pixel” LCD that provides the peppy display at low power. The Newt is WiFi capable through its ESP32-S2-WROVER module with a RV-3028-C7 Real Time Clock, a buzzer for sound feedback and capacitive touch sensors for input and interaction. A 1.85Wh LiPo battery (3.7V, 500mAh) is claimed to last for 1-2 months, with the possibility of using a larger battery for longer life.

Continue reading “A Peppy Low Power Wall Mounted Display”

Shot of CubeTouch, a six sided cube built out of PCBs with each of the top PCB allowing for diffusion of the LEDs on the inside to shine through

Keyboard Shortcuts At The Touch Of A Planetary Cube

[Noteolvides] creates the CubeTouch, a cube made of six PCBs soldered together that creates a functional and interactive piece of art through its inlaid LEDs and capacitive touch sensors.

The device itself is connected through a USB-C connector that powers the device and allows it to send custom keyboard shortcuts, depending on which face is touched.

Finger touching the top of a CubeTouch device

The CubeTouch is illuminated on the inside with six WS2812 LEDs that take advantage of the diffusion properties of the underlying FR4 material to shine through the PCBs. The central microprocessor is a CH552 that has native USB support and is Arduino compatible. Each “planet” on the the five outward facing sides acts as a capacitive touch sensor that can be programmed to produce a custom key combination.

Assembling the device involves soldering the connections at two joints for each edge connecting the faces.

We’re no strangers to building enclosures from FR4, nor are we strangers to merging art and functionality. The CubeTouch offers a further exploration of these ideas in a sweet package.

The CubeTouch is Open Source Hardware Certified with all documentation, source code and other relevant digital artifacts available under a libre/free license.

Continue reading “Keyboard Shortcuts At The Touch Of A Planetary Cube”

The Inner Machinations Of The Arduino Are An Enigma

Arduinos have been the microcontroller platform of choice for nearly two decades now, essentially abstracting away a lot of the setup and lower-level functions of small microcontrollers in favor of sensible IDEs and ease-of-use. This has opened up affordable microcontrollers to people who might not be willing to spend hours or days buried in datasheets, but it has also obscured some of those useful lower-level functions. But if you want to dig into them, they’re still working underneath everything as [Jim] shows us in this last of a series of posts about interrupts.

For this how-to, [Jim] is decoding linear timecodes (LTCs) at various speeds. This data is usually transmitted as audio, so the response from the microcontroller needs to be quick. To make sure the data is decoded properly, the first thing to set up is edge detection on the incoming signal. Since this is about using interrupts specifically, a single pin on the Arduino is dedicated to triggering an interrupt on these edges. The rest of the project involves setting up an interrupt service routine, detecting the clock signal, and then doing all of the processing necessary to display the received LTC on a small screen.

The project page goes into great detail about all of this, including all of the math that needs to be done to get it set up correctly. As far as general use of interrupts goes, it’s an excellent primer for using the lower-level functionality of these microcontrollers. And, if you’d like to see the other two projects preceding this one they can be found on the first feature about precision and accuracy, and the second feature about bitbanging the protocol itself.

A retro-futuristic portable computer with a touch screen and a shoulder strap

2022 Cyberdeck Contest: The Hosaka MK I Connects You To Cyberspace, Neuromancer Style

It’s hard to pin down exactly what a cyberdeck is, as we’ve seen through the huge variety of designs submitted to our 2022 Cyberdeck Contest. The most basic requirement is that it is a type of portable computer, typically with a futuristic, cyberpunk-style design, but beyond that, anything goes. The original concept was introduced in William Gibson’s novel Neuromancer, where it refers to portable devices used to connect to cyberspace. The design of the ‘decks is not described in detail, but we do know that Case, the protagonist, uses a Hosaka computer which is supposedly “next year’s most expensive model”.

Inspired by Gibson’s novel, [Chris] designed and built the Hosaka MK I “Sprawl Edition” as he imagined it would have looked in the Sprawl universe. The result is an impressive piece of retro-futuristic hardware with lots of chunky tumbler switches, exposed metal screws, and even a shoulder strap. Processing power is supplied by a Raspberry Pi, with input and output happening through a 7″ touchscreen. There’s also an ESP32, which controls a set of RGB LEDs on the back as well as an FM radio module.

The Hosaka’s functionality can even be extended by adding modules to the side, which will snap into place thanks to a set of neodymium magnets integrated into the housing. The whole case is 3D printed, and a full set of .stl files is available for download, although [Chris] warns that the larger parts might be too big for some 3D printers: the whole thing barely fits inside his Prusa MK3s.

We’ve seen several cyberdeck creators that aimed to recreate Gibson’s vision: the XMT-19 Cutlass is one example, as is the massive NX-Yamato. If you’ve designed your own, be sure to submit it to this year’s contest.

Retrotechtacular: The Original Robot Arm

Do you know the name [George Devol]? Probably not. In 1961 he received a patent for “Programmed Article Transfer.” We’d call his invention the first robot arm, and its name was the Unimate. Unlike some inventors, this wasn’t some unrealized dream. [Devol’s] arm went to work in New Jersey at a GM plant. The 4,000 pound arm cost $25,000 and stacked hot metal parts. With tubes and hydraulics, we imagine it was a lot of work to keep it working. On the other hand, about 450 of the arms eventually went to work somewhere.

The Unimate became a celebrity with an appearance in at least one newsreel — see below — and the Johnny Carson show. Predictably, the robot in the newsreel was pouring drinks.

Continue reading “Retrotechtacular: The Original Robot Arm”