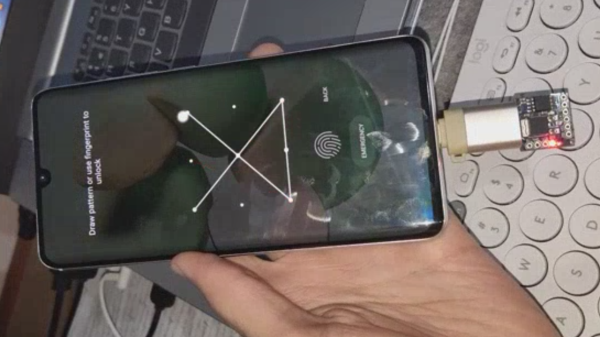
Photo of a smartphone with the ATTiny85 inserted into it, with a screen unlock pattern being drawn on the screen

ATtiny85 Automates Your Smartphone

It might not seem too impressive these days, but when microcontrollers with hardware USB support were more expensive and rare, the VUSB library was often used to create USB devices with an ATtiny85. It became so popular that the ATtiny85 even got packaged into USB dongle formfactors, like the DigiSpark boards. Well, you might not know this, but your Android smartphones can also work with USB mice and touchscreens in lieu of the built-in touchscreen display. [ErfanSn] combined these two ideas, creating a library to automate smartphone touchscreen events and keyboard input with an ATtiny85 — open for all of us to use, and with examples to spare.

The library is called DigiCombo, and it comes with plenty of examples for any screen touch event emulation that you might want. For instance, check out the README — it has video examples for Instagram page scrolling, unlock screen brute-forcing with random coordinates, playing the Stack rhythm game, and pinch zoom — all the building blocks for your smartphone touch emulation needs are covered pretty well! Of course, all of these have example code corresponding to them, that you can download and base your own ideas on. What’s more, the library is available in current Arduino IDE under the DigiCombo name. So if you need to, say, make a quick autoclicker for your phone, the library is a few steps away!

If your smartphone project was stalled because you needed to emulate touchscreen input, this library is your chance to get it done! We appreciate projects that let us get more from smartphones — there’s a lot of those laying around, they’re pretty functional and self-sufficient devices, so it makes sense that some projects of ours could do with a phone instead of a Raspberry Pi. Some manufacturers let us get a bit more of our phones, but this hasn’t really caught on, which means we have to make do with help of libraries like these. Or, perhaps, you rely on your phone day-to-day, and you’d like to add a touchpad to its back?

Swap The Clock Chip On The Mac SE/30 With An ATTiny85

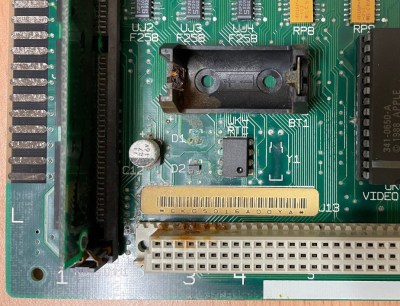
As [Phil Greenland] explains in the first part of his excellent write-up, the lithium battery used to keep the real-time clock (RTC) going on the Macintosh SE/30 has a nasty habit of exploding and leaking its corrosive innards all over the board. Looking to both repair the damage on a system that’s already had a battery popped and avoid the issue altogether on pristine boards, he started researching how he could replace the battery with something a bit more modern.

Damage from a ruptured RTC battery.

It turns out, the ATtiny85 is pin-compatible with the Mac’s original RTC chip, and indeed, [Andrew Makousky] had already written some code that would allow the microcontroller to emulate it. This is actually a bit more complex than you might realize, as the original RTC chip was doing double-duty: it also held 256 bytes of parameter random access memory (PRAM), which is where the machine stored assorted bits of info like which drive to boot from and the mouse cursor speed.

But after getting the mod installed, the computer refused to start. It turns out the project targeted earlier machines like the Macintosh Plus and SE, and not his higher-performance SE/30. Thanks to community resources like this KiCad recreation of the SE/30’s motherboard, contemporary technical documents, and his trusty logic analyzer, [Phil] was able to figure out that the timing was off — the code was simply struggling to respond to the faster machine. Continue reading “Swap The Clock Chip On The Mac SE/30 With An ATTiny85”

Hackaday Podcast 164: Vintage NASA Soldering, Mouse Bites, ATTiny85 Graphics, And PVC Pontoons

Join Hackaday Editor-in-Chief Elliot Williams and Managing Editor Tom Nardi as they review the most interesting hacks and stories of the previous week. This time we’ll start things off by talking about the return of in-person events, and go over several major conventions and festivals that you should add to your calendar now. Then we’ll look at a NASA training film from the Space Race, an interesting radio-controlled quirk that Tesla has built into their cars for some reason, a very promising autonomous boat platform, and some high performance visuals generated by an ATtiny85. Stick around to find out what happens with an interplanetary probe looses its ride to space, and why the best new enclosure for your Raspberry Pi 4 might be a surveillance camera.

Check out the links below if you want to follow along, and as always, tell us what you think about this episode in the comments below!

Direct Download

Continue reading “Hackaday Podcast 164: Vintage NASA Soldering, Mouse Bites, ATTiny85 Graphics, And PVC Pontoons”

Mindblowing Graphics From An ATtiny85

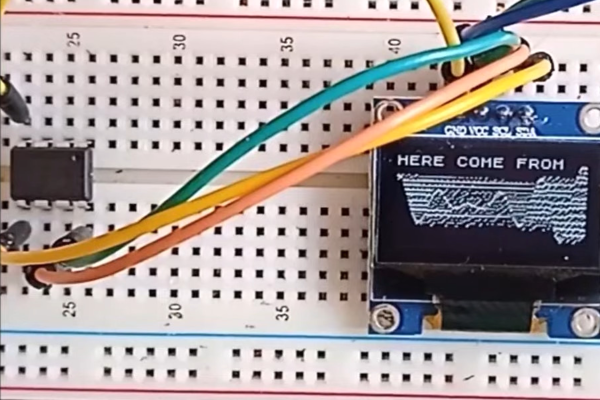
[Görg Pflug] wrote in with his really nice graphics library. It’s got multiple layers, two text consoles, greyscale, internal halftoning, and sprites. It can pull off a number of classic graphics tricks and demos. Oh yeah, and did we mention it runs on a freaking ATtiny85 and an I2C OLED screen?!

This is an amazing piece of work — if you’d asked us if this was possible, we would have probably said “no”. And now it’s yours to use in your own projects. The GitHub repo is full of demos showing off everything from switching between multiple layers, extremely rapid text scrolls, animations, boing balls, and even a Wolfenstein-style raycaster. On an ATtiny85.

There’s a demo video, embedded below, that shows it all off, but honestly you have to think about what’s going to to be suitably wowed. The first demo just seems to have a graphic wave over static text, for instance. No big deal? It’s blending the greyscale layers together and dithering them out to black and white for the OLED in real time! On an ATtiny85.

While the library is written in straight C++, there are even a couple examples of how you’d integrate this with Arduino’s Wire library if you so wished. We don’t know about you, but this makes us want to whip together an ATtiny85 and SSD1306 OLED demo board just to start playing around. This isn’t just an amazing hack, but it would also be a useful way to add graphics and a nice console to any project you’re working on.

Did we mention it’s all done on an ATtiny85?  Over I2C? Kudos!

Continue reading “Mindblowing Graphics From An ATtiny85”

ATtiny85 Snake Game Is A Circuit Sandwich

If there’s any looming, unwritten rule of learning a programming language, it states that one must break in the syntax by printing Hello, World! in some form or another. If any such rule exists for game programming on a new microcontroller, then it is certainly that thou shalt implement Snake.

This is [__cultsauce__]’s first foray away from Arduinoville, and although they did use one to program the ATtiny85, they learned a lot along the way.

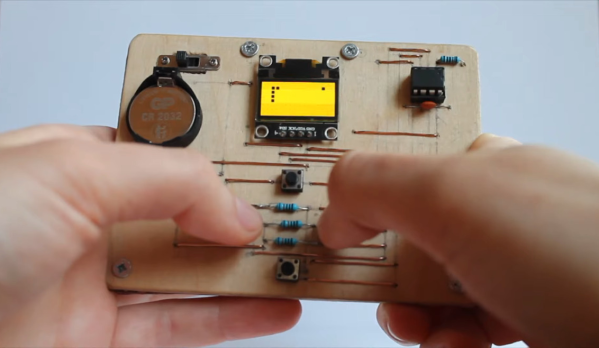
It doesn’t take much to conjure Snake with an ’85 — mostly you need a screen to play it on (an OLED in this case), some buttons to direct the snake toward the food dot, a handful of passives, and a power source.

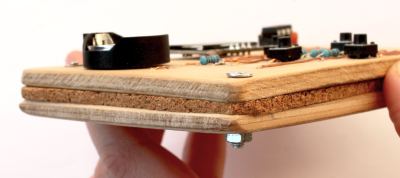
[__cultsauce__] started by programming the microcontroller and then tested everything on a breadboard, both of which are admirable actions. Then it was time to make this plywood and cork sandwich, which gives the point-to-point solder joints some breathing room and keeps them from getting crushed. Be sure to check it out in action after the break, and grab the files from GitHub if you want to charm your own ‘tiny Snake.

There’s a ton you can do with this miniature microcontroller, and that includes machine learning.

Continue reading “ATtiny85 Snake Game Is A Circuit Sandwich”

An OLED Photo Frame Powered By The ATtiny85

Rolling your own digital picture frame that loads images from an SD card and displays them on an LCD with a modern microcontroller like the ESP32 is an afternoon project, even less if you pull in somebody else’s code. But what if you don’t have the latest and greatest hardware to work with?

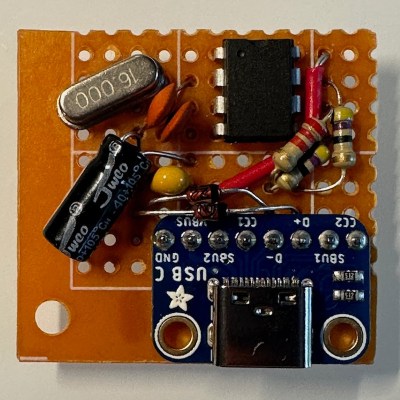
Whether you look at it as a practical application or an interesting experiment in wringing more performance out of low-end hardware, [Assad Ebrahim]’s demonstration of displaying digital photographs on an OLED using the ATtiny85 is well worth a look. The whole thing can put put together on a scrap of perfboard with a handful of common components, and can cycle through the five images stored on the chip’s flash memory for up to 20 hours on a CR2032 coin cell.

As you might expect, the biggest challenge in this project is getting all the code and data to fit onto the ATtiny85. To that end [Assad] wrote his own minimal driver for the SSD1306 OLED display, as the traditional Adafruit code took up too much space. The driver is a pretty bare bones implementation, but it’s enough to initialize the screen and get it ready for incoming data. His code also handles emulating I2C over Atmel’s Universal Serial Interface (USI) at an acceptable clip, so long as you bump the chip up to 8 MHz.

For the images, [Assad] details the workflow he uses to take the high-resolution color files and turn them into an array of bytes for the display. Part of that it just scaling down and converting to 1-bit color, but there’s also a bit of custom Forth code in the mix that converts the resulting data into the format his code expects.

This isn’t the first time we’ve seen somebody use one of these common OLED displays in conjunction with the ATtiny85, and it’s interesting to see how their techniques compare. It’s not a combination we’d necessarily chose willingly, but sometimes you’ve got to work with whats available.

The Mystery Of A Particular ATtiny85 Fuse

First-timers playing with 8-bit micros such as the AVR and PIC will at some point in their lives, find themselves locked out of their MCUs. This is usually attributed to badly configured fuses that disable certain IO functions rending the device unprogrammable via conventional ICSP methods. [Uri Shaked] shares his story of how his ATtiny85 got locked and became the subject of a lengthy investigation into fuse bit configurations.

[Uri]’s journey started when he accidentally left some pins of the device connected to a second board while he was flashing the firmware. He quickly researched online for a solution for the problem and it turns out, there are a number of recipes to resolve the issue. As it turns out, his problem was not so straight-forward and warranted more digging. [Uri] ended setting up a High Voltage Programming serial programming setup and then probing the communications. He discovered that the chip refused to reset its fuses and would reject attempts to set fuses.

Further investigation of the fuse bits and reading them proved useful in understanding that the memory protection features were preventing alteration of the device. The quick-fix was to erase the ATtiny and things were back to normal thereafter. [Uri] details his pursuit of reading and comparing fuse bits from the impacted chip against a fresh device which is where he makes the discovery. The write-up is a case study in the investigation into the idiosyncrasies of device programming and will be a great resource for many and reduce hair loss for some.

Once you get your hands on an ATTINY, there are a number of small experiments to be done to cure boredom. Be sure to share your experiments and stories with us to inspire the masses.