Hacker Dosed With LSD While Restoring Historical Synth

[Eliot Curtis] found himself a little too close to 1960’s counterculture while restoring a vintage modular synthesizer — he began tripping out on acid. The instrument in question is a Buchla Model 100. The Buchla is a modular synth. Instead of a keyboard, it used capacitance-sensitive touch plates. This particular model 100 was purchased by California State University East Bay Campus. The synth was popular for a while, but eventually fell into disuse, and was stored in a classroom closet.

Modular synths are experiencing a renaissance, as can be seen right here on Hackaday. The Buchla was pulled out of storage and given a proper restoration. [Eliot Curtis] is the Broadcast Operations Manager at KPIX 5, the San Francisco CBS TV station. He also is the hacker who volunteered to restore the Buchla.
During the restoration, [Curtis] found residue and crystals stuck under one of the knobs of the Control Voltage Processing Module. Was it flux, conformal coating, or something else? [Eliot] hit the board with contact cleaner and wiped it down. Within 45 minutes, he was feeling a strange tingling. It was the beginning of a nine-hour LSD trip. Three independent tests on the module came back positive for LSD.

Lysergic acid diethylamide (LSD for short) can be readily absorbed through the skin, which is exactly what happened to [Eliot]. Synth designer [Don Buchla] was friends with [Owsley Stanley], who worked for the Grateful Dead and allegedly cooked up some very potent LSD. Some of Buchla’s modules even found their way into Ken Keesey’s hands, where they wound up on his famous bus “further”. As it turns out there were rumors that modules had been dipped in LSD back in the ’60s. Why someone would do that to an electronic module, we’re not sure — they must have been on drugs. [Eliot] recovered from his brush with the ’60s and continued with the restoration with gloves on.

If there is a moral here, it should be to take precautions when working on equipment which might contain dangerous substances. We’ve learned this lesson ourselves cracking open broken laptops. You might find anything from coffee to soda, to pet urine or worse. A box of nitrile gloves definitely should be standard equipment in any hacker’s lab.

Set Your Nuts (and Bolts) Free With This Induction Heater

[Amon] built an induction heater to break stuck bolts loose. If you work on cars, machines, or anything big and metal, sooner or later you’re going to run into stuck nuts and bolts. Getting them unstuck usually involves penetrating oil, heat from a torch, and cheater bars. Heat usually works well, as heating the bolt makes the metal expand, helping it to break free. Torches aren’t exactly precision instruments though, and things can get interesting using one in tight spaces.

Fire isn’t the only way to heat a bolt through. Electricity can do the job as well. But why use a heating coil when you can grab an induction heater. Mechanics have had induction heaters in their toolboxes now for a few years, under names such as Bolt Buster or Mini Ductor. These devices cost several hundred dollars. However, you can purchase a 1000 watt induction heater from the usual sources for around $30. These are open frame Zero Voltage Switching (ZVS) power supplies, with uninsulated copper coils.

[Amon] bought one of these induction heaters, along with a beefy 24V, 40 amp switch mode supply to power it. He built the two into a plastic enclosure. A relay energizes the induction heater, so it isn’t always running. The key to this build is the handle. Rather than mount the induction coil directly on the supply, [Amon] ran two extension wires to a 3d printed gun style handle. This keeps the bulky part of the heater away from the work. The copper tube coil was re-shaped to better work with the gun. Some fiberglass sleeve keeps everything insulated, even at extreme temperatures.

The result is a very useful heater, ready to bust loose some bolts. We’ve seen homebuilt ZVS supplies powering induction coils before. It will be interesting to see how well these commercial units hold up.

Continue reading “Set Your Nuts (and Bolts) Free With This Induction Heater”

Comprinter Hides A Laptop Inside A Printer

Sometimes we find projects that border on the absurd but are too cool to pass up. The Comprinter is exactly that. [Mason Stooksbury] had a dream. An all-in-one scanner printer that was also a computer. What would turn heads more than walking into a hackerspace with a printer, plugging your headphones in, then opening up the top to reveal a monitor?

[Mason’s] dream became possible when friends gave him some old laptops and a dead Kodak printer. After going through the laptops, he picked a Dell Inspiron 1440 to be the donor machine. The printer and laptop were both carefully stripped down. [Mason’s] goal for the project was to build a “beautiful” printer/computer. No bodges allowed. He spent most of his time planning out how to mount the motherboard and display inside the scanner section of the chassis.

The actual assembly was quite fiddly. Working with only an inch or so of clearance, [Mason] installed standoffs for the motherboard and display. He to do all this without breaking the wires for the display and WiFi antennas.

Once the main parts of the laptop were assembled, [Mason] completed the build with a nine-port USB hub, some internally mounted speakers and a USB keyboard mounted in the paper tray. The twelve-hour operation was a complete success. What looks to be a cheap inkjet actually hides a complete laptop running Xubuntu. The only downside is that the printer doesn’t actually print, but [Mason] is quick to note that if the printer hadn’t been broken in the first place, it would work fine — all the modifications are in the scanner section.

We’ve seen some wild casemods over the years, including a Nintendo in a toaster, a modern PC stuffed into an original Xbox, and Raspberry Pi’s stuffed into just about everything.

Barn Door Tracker Needs No Special Tools

If you want to take a long exposure photograph, you need a tripod to hold your camera steady. But a tripod won’t help when the ground it’s standing on is moving. That’s exactly the problem [Emvilza] ran into when he wanted to take minutes or hours long photographs of the night sky. His solution was to build a barn door tracker, which he carefully documented in both English and Spanish.

Barn door trackers, also known as scotch mounts have been used by photographers for many years to cancel out the rotation of the earth. This causes stars to appear frozen in the sky and allows for photographs of very dim celestial objects. These trackers range from simple hand-cranked affairs to complex mechanical creations. [Emvilza] decided to have a go at designing and building his own tracker, using only basic tools, as he didn’t have access to a CNC or 3D printer.

The tracker itself is built from wood, with metal hardware. [Emvilza] spent a ton of time designing the tracker using SketchUp. The carefully drawn plans ensured everything would fit together and operate correctly.

One of the toughest parts was accurately bending a threaded rod enough to make it work with the tracker, but not bind the drive system. The mount’s motion comes from a threaded rod. The rod is driven by a stepper motor.  Control and sensing is handled by an ATmega328 programmed using the Arduino toolchain. [Emvilza] learned Eagle and designed a PCB. Rather than etch a board, he simply built the circuit on perfboard, following his layout and traces.

The end result is a tracker that looks and performs great — just check out the images on [Emvilza’s] site to see some examples. Not only that, [Emvilza’s] well written documentation will help anyone looking to build a tracker in the future!

9 Planes Combine To Make One Giant Flexible Flier

[Ran D. St. Clair] has created a unique flying machine in the Flex 9. It’s not every day that you see a completely new and unusual aircraft, but the Flex 9 definitely fits the bill. [Ran] took 9 radio controlled planes, connected them together, and made one giant plane — and with an 18-foot wingspan, giant isn’t a misnomer.

The planes that make up the Flex 9 are simple aircraft – foamboard wings, a boom, and a basic tail. The individual planes only have elevator control – no rudder, no ailerons. Power comes from a standard LiPo battery, ESC and brushless outrunner motor. The control system is interesting – every plane has a KK board flight controller running OpenAeroVTOL firmware. The center plane has a radio receiver and communicates to the other KK boards over standard servo wires. Rudder (yaw) and aileron (bank) control are achieved through mixing handled by flight controllers.

Even the couplings between the planes were carefully designed. [Ran] used an EPP foam core as a rubbery dampener, with plywood to strengthen the joint. Each joint is mounted at a 20-degree angle. As the planes bank relative to each other, the angle forces the airframe to twist, which should help the whole system stay level.

Check out the videos below for an explanation and a flight test. The Flex 9 launch isn’t exactly stable – there’s some crazy sinusoidal wobbling going on. But the mechanical and electronic dampeners quickly spring into action smoothing the flight out.

If you’d like to know more about the KK board, you can read about right here.

Continue reading “9 Planes Combine To Make One Giant Flexible Flier”

Welding Robot Takes On A Hot, Dirty, Dangerous Job

They used to say that robots would take over the jobs too dirty or dangerous for humans. That is exactly what [Joel Sullivan] had in mind when he created this welding robot. [Joel] designed the robot for the OSB industry. No, that’s not a new operating system, it’s short for Oriented Strand Board. An engineered lumber, OSB is made of strands (or chips) of wood. It’s similar to plywood but doesn’t require large thin sheets of lumber. To make a panel of OSB, a 5-inch thick matt of wood chips is mixed with glue and compressed down to 5/16″ at 7500 PSI and 400° F.

The presses used to make OSB are a massively parallel operation. 20 or more boards can be pressed at once. Thy press is also a prime area for damage. A nut or bolt hidden in the wood will dig into the press, causing a dent which will show up on every sheet which passes through that section. The only way to fix the press is to shut it down, partially dismantle it, and fill the void in with a welder. [Joel’s] robot eliminates most of the downtime by performing the welding on a still hot, still assembled press.

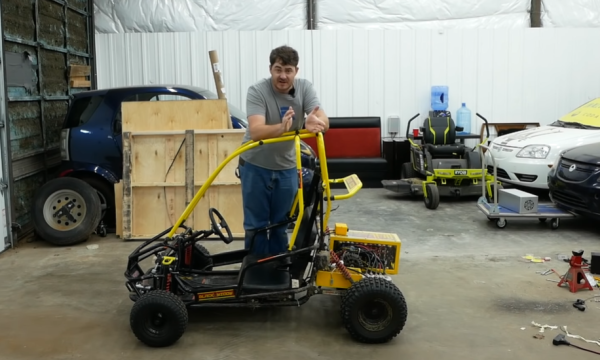
The robot looks like it was inspired by BattleBots, which is fitting as the environment it works in is more like a battleground. It’s a low, wide machine. In the front are two articulated arms, one with a welder, and one with a die grinder. The welder fills any voids in the press platen, and the die grinder grinds the fresh welds flat.  An intel NUC controls things, with plenty of motor drives, power supplies, and relays on board.

[Joel’s] bot is tethered, with umbilicals for argon, electricity and compressed air. Air travels through channels throughout the chassis and keeps the robot cool on the hot press. Everything is designed for high temperatures, even the wheels. [Joel] tried several types of rubber, but eventually settled on solid aluminum wheels. The ‘bot doesn’t move very fast, so there is plenty of traction. Some tiny stepper motors drive the wheels. When it’s time to weld, pneumatic outriggers lock the robot in place inside the narrow press.

Cameras with digital crosshairs allow the operator to control everything through a web interface. Once all the parameters are set up, the operator clicks go and sparks fly as the robot begins welding.

If you’re into seriously strong robots, check out trackbot, or this remote-controlled snow blower!

Continue reading “Welding Robot Takes On A Hot, Dirty, Dangerous Job”

The Modern Analog Soldering Station

There is a certain sense of accomplishment one gets when building their own tools. This is what [Alejandro Velazquez] was going for when he built his own soldering station. Sure you can get a decent station for a pittance on Amazon, or eBay. You can even build your own microprocessor controlled station. [Alejandro] is currently interested in analog electronics, so he went that route to build his own closed-loop station.

The handle is a 50 watt, 24-volt affair with a thermocouple. You can find this handle on many Hakko 907 clone soldering stations, often referred to as the 907A. The station itself is completely analog. A triac switches the current going to the heater. The triac is controlled by a PWM signal. The PWM itself is generated and regulated by an LM324 quad op-amp, which is the heart of the station. The op-amp compares the setpoint with the current temperature read from the soldering handle’s thermocouple, then adjusts the duty cycle of the PWM signal to raise, or lower the temperature.

It’s a classic control system, and the schematic is definitely worth checking out if you want to understand how op-amps can be used to create complex operations.

You can find plenty more information on analog electronics right here on Hackaday — we’ve covered thermocouple amplifiers, as well as instrumentation amps. If you’re more of a digital man, check out this Arduino controlled soldering station!