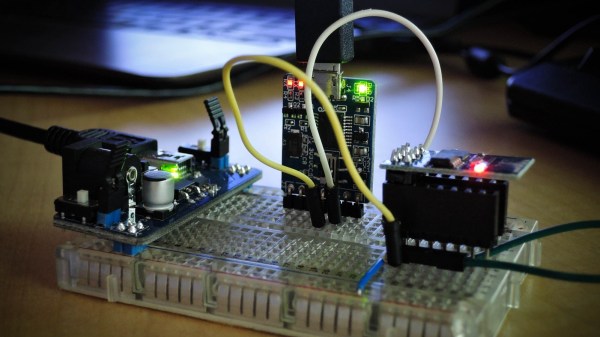
There are numerous instances where we need to know our location, but cannot do so due to GPS / GSM signals being unavailable and/or unreachable on our Smart Phones. [Blecky] is working on SubPos to solve this problem. It’s a WiFi-based positioning system that can be used where GPS can’t.
SubPos does not need expensive licensing, specialized hardware, laborious area profiling or reliance on data connectivity (connection to database/cellphone coverage). It works independently of, or alongside, GPS/Wi-Fi Positioning Systems (WPS)/Indoor Positioning Systems (IPS) as an additional positioning data source by exploiting hardware commonly available.
As long as SubPos nodes are populated, all a user wishing to determine their location underground or indoors needs to do is use a Wi-Fi receiver. This can be useful in places such as metro lines, shopping malls, car parks, art galleries or conference centers – essentially anyplace GPS doesn’t penetrate. SubPos defines an accurate method for subterranean positioning in different environments by exploiting all the capabilities of Wi-Fi. SubPos Nodes or existing Wi-Fi access points are used to transmit encoded information in a standard Wi-Fi beacon frame which is then used for position triangulation.
The SubPos Nodes operate much like GPS satellites, except that instead of using precise timing to calculate distance between a transmitter and receiver, SubPos uses coded transmitter information as well as the client’s received signal strength. Watch a demo video after the break.
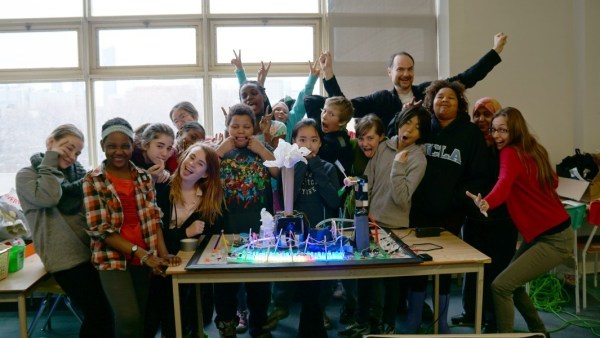
The STEAMLabs community makerspace teamed up with a grade 6 class from Vocal Music Academy, a public elementary school in downtown Toronto, to create a working model of the Ontario Power System. It pulls XML files and displays the live power generation mix from renewable and other sources on a 3D printed display on RGB LED strips. Arduino coding on a Spark Core provides the brains.
The kids learned HTML, CSS and Javascript to build a web interface to send commands to the Spark and explain how the system works. Their project was accepted as an exhibition at the TIFF DigiPlaySpace. The kids presented their project to adults and other kids at the event. STEAMLabs has also published a free, open source Internet of Things teaching kit to enable other educators to make projects with Internet brains.
STEAMLabs is currently crowd-funding a new makerspace in Toronto. They’re almost there, a few hundred dollars short of their target, with a couple of days to go. Help them help kids and adults make amazing things! When Hackaday visited Toronto recently, [Andy Forest] dropped in to show off this project. Projects like these which let kids become creators of technology, rather than mere consumers, is one of the best ways to get them hooked to hacking from an early age.
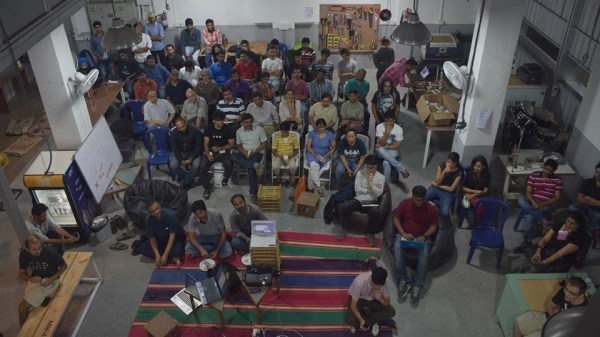
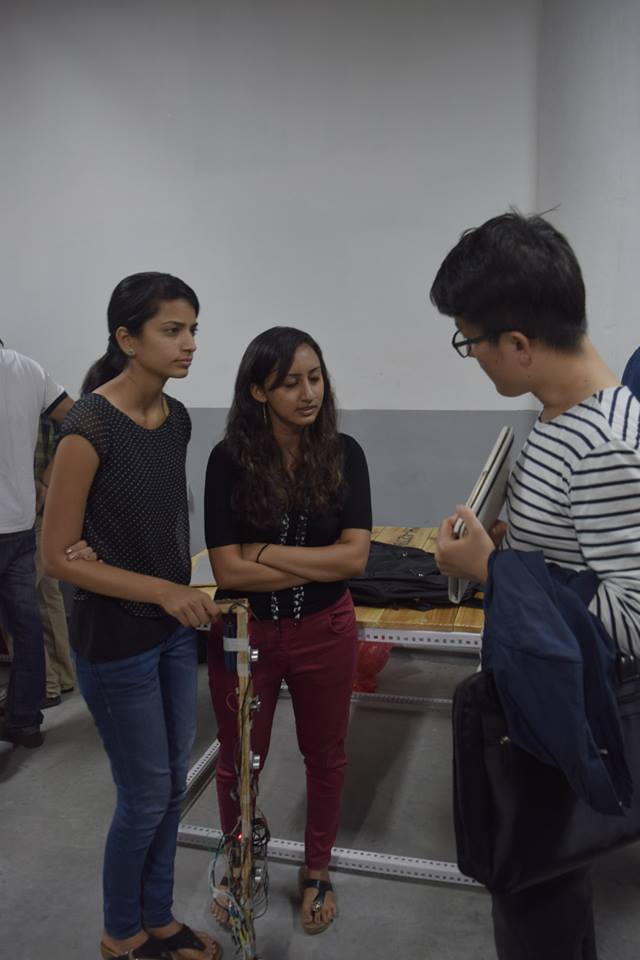
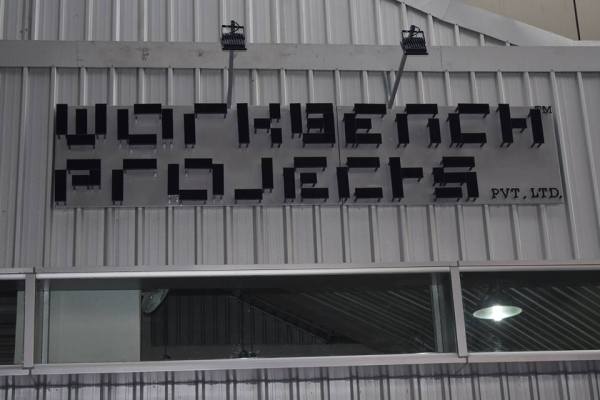
Bengaluru (formerly Bangalore) is a town full of awesome hackers. So when Workbench Projects, a local maker space there, asked if I’d like to come down and talk about the Hackaday Prize, I immediately set things in motion. We decided to arrange a “Bring-a-Hack” event, asking local makers to turn up with their hacks and give a talk or drop by and discuss ideas that matter. To reach out to a larger audience, we also partnered with IoT-BLR, a pretty large group of IoT enthusiasts in Bengaluru. 10,000 Startups (NASSCOM for Startups) helped ensure that all the hackers were well fed with sandwiches and cookies while Paper Boat chipped in with a cooler full of beverages. A freak hail storm meant that we had to delay the start a bit. But that turned into a blessing of sorts, as it allowed those already at the space to check out the hacks that had been set up at demo tables and generally network with each other.
almost 100 Hackers turned up
[Anupama], who set up Workbench Projects with [Pavan], set the ball rolling by telling us about how it all started off a year ago. She and [Pavan] had ideas buzzing in their heads, but no means to prototype them. “You can either continue cribbing about the lack of maker spaces, or jump right in and start one on your own”.
We then had [Pavan] tell us about the various “studios” that they have set up. He was also excited to announce their addition to the world-wide MIT FabLab network. Their space is located right under the escalator that goes to the Halasuru Metro Station. The use of that space, which would other wise have been wasted and empty, itself is brilliant.
I stepped up and talked about the Hackaday Prize and our call to makers this year to “Build something that matters”. I showed off last years winners, this years prizes and gave out other details asking the assembled hackers to jump in and submit their hacks to the Hackaday Prize. Next up we had [Nihal], who founded IoT-BLR and talked to us about their projects, events and initiatives. IoT-BLR is the 3rd largest IoT-focused Meetup community in the world.
Pavan talking about the facilities at Workbench Projects
Anupama talking about how Workbench Projects started
Anool talking about the Hackaday Prize
With that done, we opened up the floor for the assembled hackers to come forth and talk about their hacks. First up was [Anmol Agrawal] who showed off his earthquake early warning system which was prototyped using Littlebits, PubNub and Ruby.
I was glad that at short notice, my friend [Mohammed Khasim], who works at Linnaro, agreed to drop by to talk about and show off the modular phone being developed by Google as part of Project Ara.
Project Ara – front
Project Ara – back
The all-girls team of [Kruti], [Chitra] and [Archana] showed off their intelligent cane for the blind. Five ultrasonic ping sensors, one light sensor and a camera are all hooked up to a Raspberry Pi running off a battery pack. The cane communicates with a paired smart phone and the app provides audio cues. There’s also a pager motor for haptic feedback.
[Rahul] and his team showed up with what looked like the Iron-Man Arc Reactor on a T-shirt. It turned out to be an HID device that could be used to send key presses back to a paired computer. Their next iteration was less flashy and unobtrusive. They are now working on using this to provide safety for school kids by allowing them to send alerts in case of an emergency.
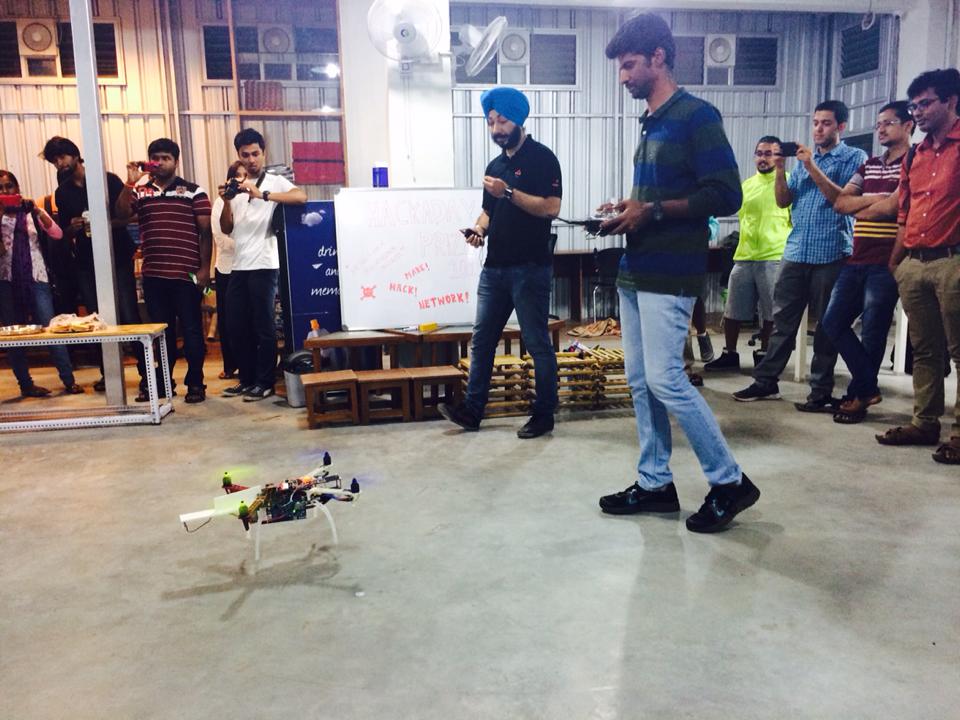
[Chetan] and his team from EdgeVerve showed off the work they are doing with putting various sensors on drones – CO2, temperature, humidity, multi-spectral camera – to enable them to be used for some real world applications. They have also integrated collision avoidance using cheap ultrasonic sensors and a ballistic parachute which deploys during an emergency.
The IoT-BLR connected cars project team talked about their project to tap into on-board diagnostics on vehicles and use the various sensor data to control pollution.
[Kumar Abhishek] came down just in time to show us his BeagleLogic. I had written about this project on the blog earlier, and it was nice to be able to see it in action.
There were some more projects up for display. [Osho Bajpai] had a demo of his “Smart Driving alert system” which detects if driver is falling sleep and wakes him up. [Sanju Mathew] demo’ed his prosthetic arm while [Supreet Joshi] showed off his “Smart Robotic Arm” which replicates the movements of a human arm using a smart glove. On display was also a remote controlled skate board driven by a BLDC motor controlled via the ESC. It was also interesting to see a bunch of school kids wheel in their chopper-inspired bicycle which is still work in progress. Those kids are learning a lot in the process such as ergonomics and welding. [Abdul] showed off a couple of devices he is working on to help harness tidal energy from coastal areas. The team from WiSense showed off some network connected environmental sensors. One measures soil moisture and temperature and transmits data via text message over GSM. This is aimed for use by Farmers and alerts them to water their farms at the right time. Another sensor worked as a tank level detector and controlled flow rate to prevent over flow.
Chopper inspired Bicycle, built by school kids
Remote controlled Skate Board
Drone gets some attention
Supreet Joshi’s Smart Robotic Arm
11 year old Nihar Thakker’s solar powered fan Cap
Smart Driving alert system
By this time, it was quite late in the evening, so folks spent the next hour looking up the various projects, talking and getting selfies taken using the OpenSelfie photobooth that I had set up. [Rishi Bhatnagar] from Workbench Projects, who set the whole event in motion, managed to archive the evening’s proceedings and you can watch the (long) video after the break.
My wife Samata, with her LED necklace
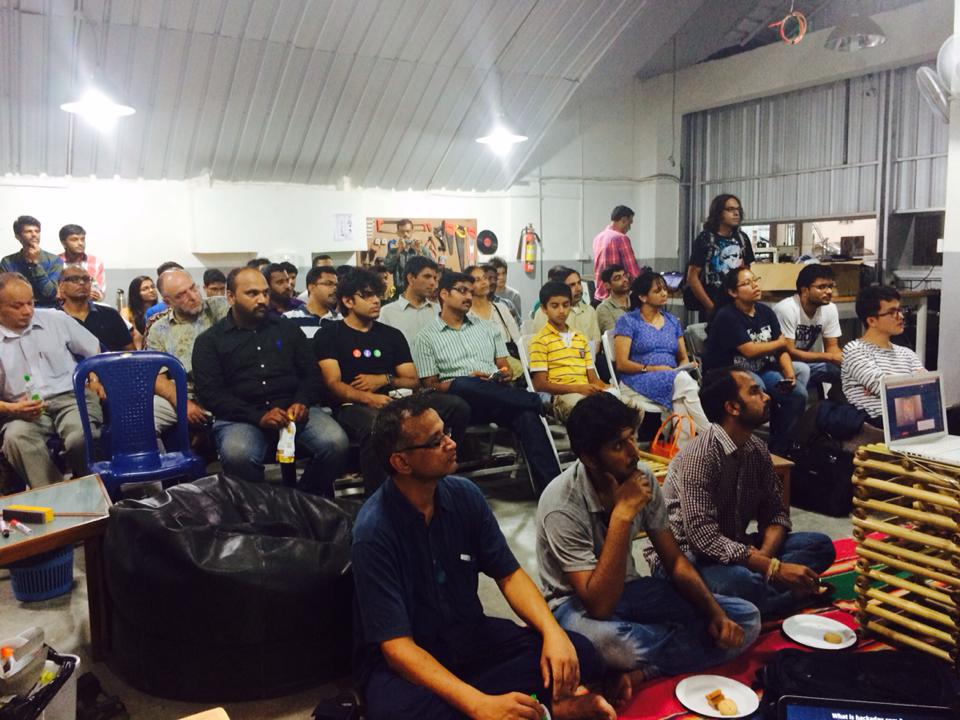
We ran out of chairs – standing room in a packed house
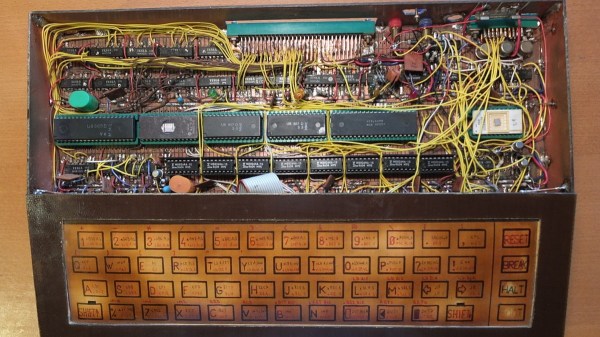
[M] recently tipped us off about hacker [Lumir Vanek] from the Czech Republic. Between 1985 and 1989, [Lumir] built his own home brew, Z80 based computer. The list of home computers available in the 1980’s is extensive. Those living in western Europe and the Americas could choose offerings from Acorn, Apple, Commodore, Atari, Radio Shack, and Sinclair Research to name just a few. Even the erstwhile Czechoslovakia had home computers available from Didaktik and Tesla.
[Lumir]’s built was based around the Z80 processor and is built using regular, double-sided, prototyping board. It featured the 8-bit Z80 processor CPU, 8kB EPROM with monitor and BASIC, two Z80 CTC timers, an 8255 parallel interface for keyboard and external connector, 64kB DRAM, and Video output in black & white, 40×25 characters, connected to a TV. The enclosure is completely made from copper clad laminate. [Lumir] documented the schematics, but there is no board layout – since the whole thing was discrete wired. He even built the membrane keyboard – describing it as “layers of cuprextit, gum, paper with painted keys and transparent film”. When he ran out of space on the main board, he built an expansion board. This had an 8251 serial interface for cassette deck, one 8-bit D/A converter, and an 8255 parallel port connected to the “one pin” BT100 printer.
On the software side, he wrote his own monitor program, which allowed simple interactions, such as displaying and modifying registers, memory, I/O ports and to run programs. He wrote this from scratch referring to the Z80 instruction set for help. Later he added a CP/M emulator. Since the Z80 had dual registers, one was used for user interaction, while the other was reserved to allow background printing. Eventually, he even managed to port BASIC to his system.
What started off as a quick prank-hack to re-map a colleague’s keyboard turned into a deep dive in understanding how keyboards work. [ch00f] and his other work place colleagues are in a habit of pulling pranks on each other. When [ch00f]’s buddy, who is an avid gamer and montage parody 1337-sp34k (leet speak) fan, went off on a holiday, [ch00f] set about re-mapping his friend’s keyboard to make it spit out words his friend uses a lot – “SWAG” “YOLO” and “420”. But remapping in software is too simple, his hack is a hardware remapping!
The keyboard in question used mechanical keys mounted on a keyboard sized PCB. Further, it was single sided, with jumper links used in place of front side tracks. This made hacking easier. The plan was to use keys not commonly used – Scroll Lock, Print Screen, and Pause/Break – and get them to print out the words instead. The signal tracks from these three keys were cut away and replaced with outputs from a microcontroller. The original connections were also routed to the microcontroller, and a toggle switch used to select between the remapped and original versions. This was eventually not implemented due to a lack of space to install the toggle switch. [ch00f] decided to just replace the keyboard if his friend complained about the hack. A bit of work on the ATMega PCB and firmware, and he was able to get the selected keys to type out SWAG, YOLO and 420.
And this is where a whole can of worms opened up. [ch00f] delves in to an explanation on the various issues at hand – keyboard scanning/multiplexing, how body-diodes in switching FET’s affected the scanning, ghosting and the use of blocking diodes. Towards the end, he just had the word SWAG activated by pressing the Pause/Break key. But he does get to the bottom of why the keyboard was behaving odd after he had wired in his hack, which makes for some interesting reading. Don’t miss the video of the hack in action after the break.
Bangalore, India evokes different responses depending on whom you ask. Old timer’s remember it as the Pension/Retirement City (not any more though). For other’s, it’s the Silicon Valley of India. And some call it the start up capital of India. For me, though, it brings back fond old memories. This was the city where I got my first job after finishing College in Mumbai, at the princely sum of $20 a month way back in 1986.
A lot of water has flowed under the bridge since then, and next month will find me back there at another awesome Maker Space called Workbench Projects, talking about the Hackaday Prize and how we can get hackers here to solve some of our big issues. We have huge problems in all sorts of areas – Pollution, Water resources, Energy, Climate, Agriculture, Transportation, Education – the list is long.
On Saturday, May 2nd, at Workbench Projects hackerspace we will gather for “Bring-A-Hack @ Workbench Projects” to talk about our passion for making and hacking. We’ll discuss the 2015 Hackaday Prize which offers $500,000 in prizes for hackers who can build solutions to problems faced by a wide-range of people. What does that really mean? That’s one of the topics of the evening. Of course there will be plenty of time to show off your own hacks, ask for advice on difficult projects, and to socialize with everyone that attends. Please visit the event page for all the details.
For present-day owners of vintage Commodore computers, keeping data and programs safe and backed up is top priority. Disk drive storage was more common in the US, whereas in Europe, the audio cassette was the preferred medium of storage.
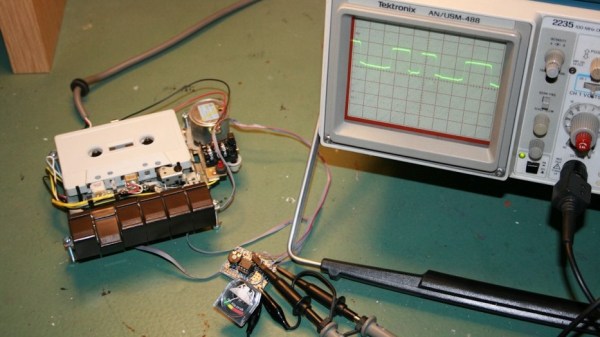
The Datasette device was what allowed interfacing the cassettes to the computer. Tape head alignment was critical to successfully writing and reading data to the cassette. Some models of the Datasette came with a small hole above the keys, to allow access to the adjustment screw of the tape head azimuth position. Tweaking this while looking at a signal meter could help you improve the signal from a bad cassette and prevent load errors. [Jani] tried a commercial solution called “Load-IT” which had a LED bargraph, but it couldn’t help much dealing with tapes with very bad signals. So he built a signal strength meter for his Datasette. He calls it the VU-sette since it uses an analog style meter quite similar to the VU-meters found in many audio equipment.
The hardware is simple and uses commonly available parts. The analog meter is extracted from a Battery Checker sourced from eBay. An op-amp drives the analog meter, and another transistor drives a separate speaker. This can be used to listen in on the cassette, if the speaker is enabled via a push button. [Jani] first breadboarded and tested the circuit before ordering out prototype boards.
To test performance, [Jani] used FinalTAP, a tool for examining, cleaning and restoring digitized data cassette tapes (TAP files) for the Commodore 64 computer. The “LOAD-IT” version worked well with tapes that were in fairly good condition. But his VU-sette version allowed him to adjust the head more precisely and get out a much better read from bad tapes. While on the subject, check out this nice 7-segment bubble LED digital counter for the 1530.