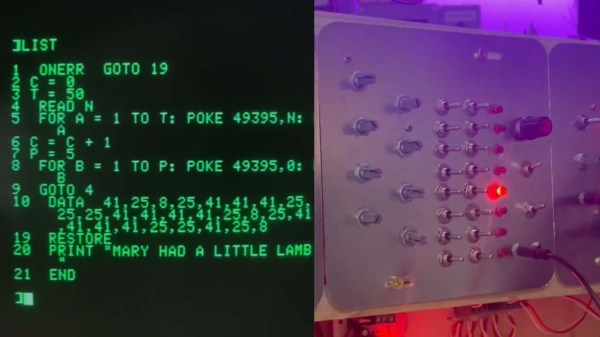
A computer program written in basic next to a modular synthesizer with many switches and lights

Modular Synth Pairs Perfectly With The Apple II

We have a soft spot for synthesizers – seriously, who doesn’t? So when [Joshua Coleman] combined his retro-looking DIY modular synth with the equally retro Apple II computer, we just had to share it with you.

The two machines are paired using a vintage digital-to-analog logic controller pack. This DAC was originally used to control model trains using your Apple II – something that we now desperately need to see in action. The pack can output voltages between 0 and 2.55 V at 8-bit resolution (or 256 steps), which is plenty for a retro synth.

With the card installed in Slot 7 of the Apple II and the DAC wired through to the synth’s CV/gate, it’s then a trivial matter of writing POKE statements in Applesoft BASIC to control the synth. The video after the break demonstrates playing a simple melody, as well as how one might use the Apple II keyboard to ‘play’ the synth in real time.

If you’re interested in building your own, the video below has all the information needed, as well as helpful advice on where to find a DAC for your preferred model of vintage computer. If all that doesn’t tickle your musical fancy, make sure to check out our coverage on the Game Boy MIDI synth, or perhaps this peculiar synth and visualizer combo.

Continue reading “Modular Synth Pairs Perfectly With The Apple II”

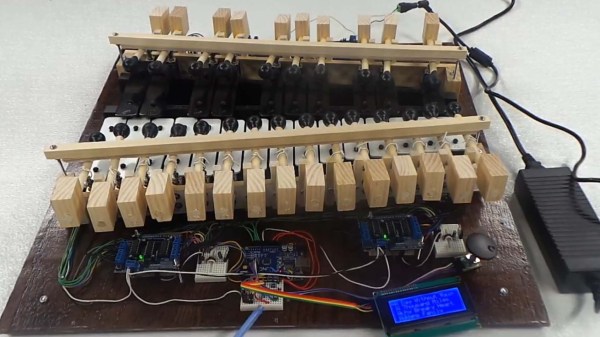
A wooden xylophone with electronic contraptions for robotic playback

Robotic Xylophone Makes Music With MIDI Magic

The MIDI format has long been used to create some banging electronic music, so it’s refreshing to see how [John P. Miller] applied the standard in his decidedly analog self-playing robotic xylophone.

Framed inside a fetching Red Oak enclosure, the 25-key instrument uses individual solenoids for each key, meaning that it has no problem striking multiple bars simultaneously. This extra fidelity really helps in reproducing the familiar melodies via the MIDI format. The tracks themselves can be loaded onto the device via SD card, and selected for playback with character LCD and rotary knob.

The software transposes the full MIDI music spectrum of a particular track into a 25-note version compatible with the xylophone. Considering that a piano typically has 88 keys, some musical concessions are needed to produce a recognizable playback, but overall it’s an enjoyable musical experience.

Perhaps most remarkable about this project is the documentation. If you want to build your own, everything you need to know is available online, and the no-solder approach makes this project very accessible. Most of the write-up happened some years ago, and we’re really interested to see what improvements have been made since.

The robotic xylophone is reminiscent of these automatic tubular bells from some time ago. These musical hacks can be particularly inspiring, and we can’t wait to see more.

Continue reading “Robotic Xylophone Makes Music With MIDI Magic”

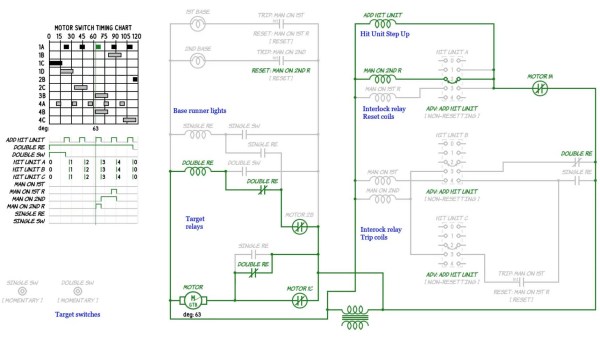
A screenshot of pinball schematics

Get A Grip On Troubleshooting Your Vintage Pinball Machine

Restoring vintage technology can be a tricky business, especially without the appropriate schematics and documentation. To this end [Mark] has spent the past twelve months building a comprehensive schematic editor and circuit simulator library for electromechanical pinball machines.

Rather than explore each and every table in excruciating detail, the emSim software aims to examine how specific circuits work, and how they are used as part of the gaming experience. The aim of the project is to aid in the diagnosis and repair of vintage electromechanical pinball machines, the types that rely on a dizzying array of switches, gears, motors and coils in their operation, operating like clockwork underneath the play field. While these older pinball machines typically use alternating current, the game logic (for the most part) is still binary, and can be effectively described with Boolean operators.

Like any machine with moving parts, these systems will eventually wear down and require servicing, a task which may not be in the wheelhouse for your casual pinball enthusiast. [Mark]’s hope is that his circuit simulations will allow just about anyone to repair these classic tables, and keep them around for future generations to explore and enjoy.

If tinkering with pinball innards isn’t for you, then make sure to check out our coverage of this awesome virtual pinball table.

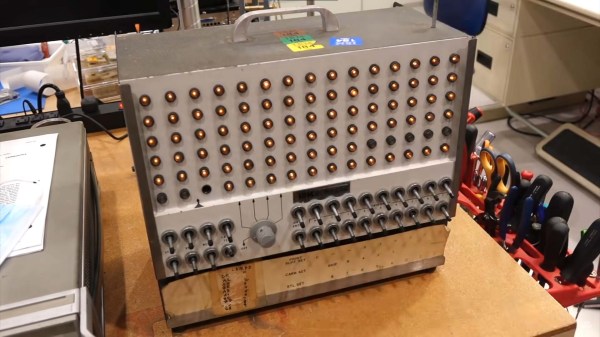
A briefcase sized electronic machine with many indicator lamps and switches

Restoring A Vintage IBM I/O Tester

By now, [CuriousMarc] and his team of volunteers are well versed in 1960s hardware restoration. So when a vintage IBM I/O Tester came into their possession, a full machine makeover was all but inevitable.

The I/O Tester dates from around 1965, which roughly coincides with the introduction of IBM’s lauded System/360 computer mainframe. In addition to the computer itself, business customers could order a variety of peripherals with their computing system. These included storage devices, printers, additional operator consoles, and so on. Since these peripherals shared the same I/O design, a portable hardware testing rig was a sensible design choice. One portable low-voltage tester could be paired with any number of IBM peripherals, doing away with the need to have unique debugging panels on every piece of computing hardware.

Fast forward to the present day, and the IBM I/O Tester looks positively antique with its blinkenlight lamp panel and switches. To use the tester, simply connect up one (or both) of its chunky 104-pin connectors to your IBM peripheral of choice, insert the accompanying paper overlay, and voilà. Operators could then observe the status of the many lamps to evaluate the inner digital workings of the connected peripheral. Depending on the connected hardware, the tester could reveal the contents of data registers, printing status, disk and tape transfer status, and probably much more. The purpose of the tester’s ninety indicator lights is completely dependent on the attached peripheral, and the paired paper overlays are essential to comprehend their meaning.

After [Ken Shirriff] deciphered the documentation, it wasn’t long before the tester could be powered up using 24 VAC (normally supplied by the equipment being tested). Several burned out lamps were noted for replacement. The lamp assemblies required minor surgery due to a dubious design choice, and at least one of the toggle switches needed a new guide and a heavy dose of contact cleaner before it came back to life.

For the moment, [CuriousMarc] is using the blinkenlights panel as a surprisingly striking retro clock. With a literal truckload of vintage IBM hardware sitting in his storage, it’ll be exciting to see whether this restored tester will be pulled back into operational service someday. Readers should also check out our coverage of his previous major project, restoring an Apollo Guidance Computer.

Continue reading “Restoring A Vintage IBM I/O Tester”

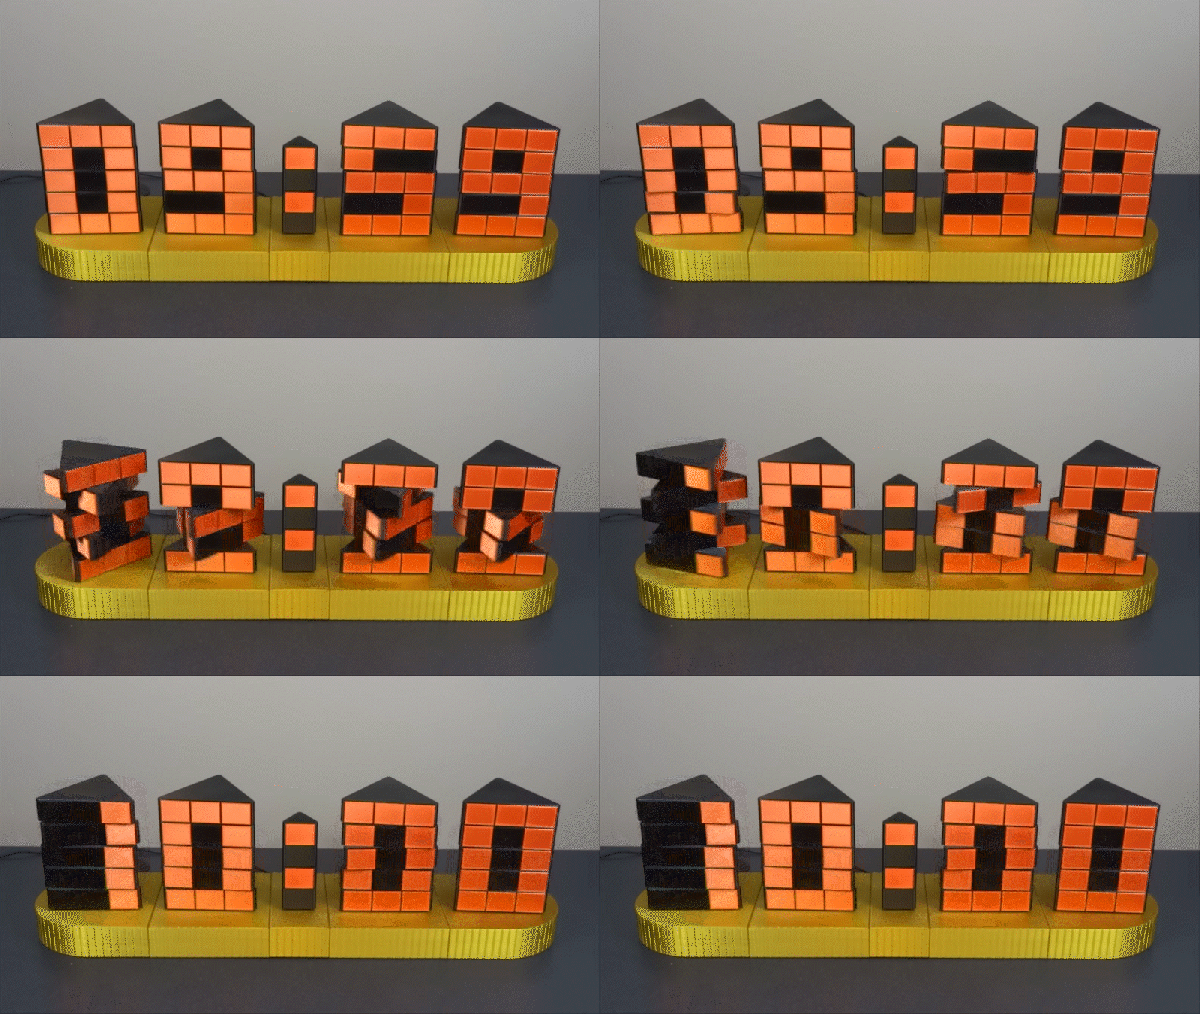
An orange 3D printed four digit clock with rotating segments

Be Mesmerized By The Latest Time Twister

[Hans Andersson] has been creating marvelous twisting timepieces for over a decade, and we’re pleased to be able to share his latest mechanical clock contraption with our readers, the Time Twister 5.

In contrast to his previous LEGO-based clocks, version five of the Time Twister uses 3D printed segments, undoubtedly providing greater flexibility in terms of aesthetics and function. Each digit is a mechanical display, five layers vertical and three segments horizontal, with a total of three unique faces. Each layer of each display can be individually rotated by a servo, and this arrangement allows for displaying any number between zero and nine. The whole show is controlled by an Arduino MEGA and a DS3231 real-time clock.

Watching these upended prisms rotate into legible fifteen-segment digits is enjoyable enough already, but the mechanical sound created by this timepiece in motion is arguably even more satisfying. Check out the video below to see (and hear) for yourself. If you want to build one yourself, all the details are here.

We last covered [Hans Andersson] and his very first Time Twister clock way back in November 2011. Since then we’ve come across many impressive mechanical clocks, like this seven-segment work of art. We’re constantly impressed by the outstanding craftsmanship of these mechanical clocks, and it’s inspiring to see one of our OG horologists back in the saddle once more.

Continue reading “Be Mesmerized By The Latest Time Twister”

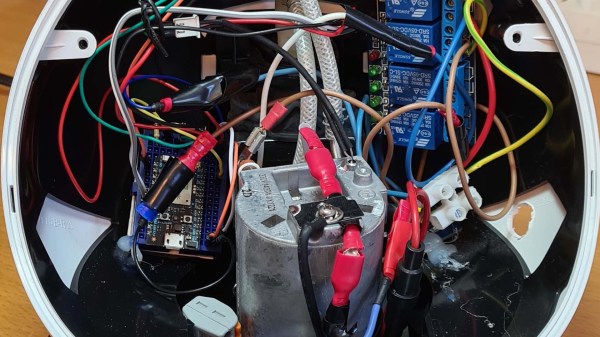
The insides of a coffee machine replaced with new smart electronics

Add Smarts To Your Old Capsule Coffee Maker

Everyone has their preferred method of making (and consuming) coffee. While modern coffee makers are starting to come standard with IoT and ‘smart’ capabilities, owners of older models should fear not, as [Andreas Skoglund] shows how just about any old machine can be upgraded with the latest automation wizardry.

The most involved part of this conversion is removing the electronic guts of the Dolce Gusto donor machine, leaving just the original heater, pump and the control levers. With safety in mind, the user must make the machine ‘hot’ by configuring the levers and replacing the coffee capsule manually, otherwise no automated coffee magic can take place.

A low-tech relay powers on the coffee maker, with the entire logic supported by an off-the-shelf microcontroller. If you’re using a Particle.io controller, the provided instructions offer some helpful tips on automatically brewing your first beverage. From there it’s trivial to start using Home Assistant to set up various rules and schedules for your coffee drinking pleasure. You can even select whether you want a small or large cup.

There’s a few improvements that our coffee-starved hero suggests implementing, such as upgrading the power supply, as well as investing in refillable capsules to spite a certain global conglomerate corporation (plus it’s cheaper and much better for the environment). We’re not short on coffee-inspired hacks, so why not also check out this AI Powered Coffee Maker.

Continue reading “Add Smarts To Your Old Capsule Coffee Maker”

Six GameBoy Pokemon games

Bridging Game Worlds With The ‘Impossible’ Pokémon Trade

Transferring hard-earned Pokémon out of the second generation GameBoy game worlds into the ‘Advance Era’ cartridges (and vice versa) has never been officially supported by Nintendo, however [Goppier] has made these illicit trades slightly easier for budding Pokémon trainers by way of a custom PCB and a healthy dose of reverse engineering.

Changes to the data structure between Generation II on the original GameBoy (Pokémon Gold, Silver and Crystal) and Generation III on the GameBoy Advance (Pokémon Ruby, Sapphire, FireRed, LeafGreen and Emerald) meant that trades between these cartridges was never a possibility – at least not through any legitimate means. In contrast, Pokémon trades are possible between the first and second generation games, as well as from Generation III and beyond, leaving the leap from Gen II to Gen III as an obvious missing link.

Modern players have already overcome this limitation by dumping the cartridge save files onto a PC, at which point any Pokémon could be added or subtracted from the save. Thus, this method relies on self-control as well as the right hardware. [Goppier]’s solution is arguably far more elegant, and requires very little extra hardware. A simple PCB with ports for older and newer GameBoy Game Link Cables is the physical bridge between the generations. An ARM Cortex microcontroller sits between these connections and translates the game data between the old and the new.

The microcontroller is required to translate the data structure between the generations, and seems fit for purpose. Not only does the Pokémon data require conversion, but a few other hacks are needed before the two generations will talk nicely to each other. Pokémon on the GameBoy Advance brought in new features such as representing player movement in the trading rooms (i.e. you can see the other player moving on your screen), which also had to be addressed.

The concern over the legitimacy of trades within the Pokémon community is a curious, yet understandable, byproduct of the multiplayer experience. As an example, modern players have to be wary of ‘hacked’ Pokémon, which can often introduce glitches into their game world following a trade. Apart from these issues, some Pokémon players simply desire genuine Pokémon as part of fostering a fair and enjoyable gaming experience.

This literal bridge between Gen II and Gen III game worlds brings the community tantalizingly close to a ‘legitimate’ means of transferring their Pokémon out of ancient cartridges and into modern games. Could Nintendo one day officially sanction Gen II to Gen III trades with a similar device? Crazier things have happened.

We love our GameBoy hacks here on Hackaday, so why not check out this project that replaces the battery-backed SRAM in your GameBoy games with FRAM?

Continue reading “Bridging Game Worlds With The ‘Impossible’ Pokémon Trade”