We techie types are quite often much more comfortable in front of a keyboard knocking out code, than out in the yard splitting logs for winter, and even the little jobs like cutting the grass are sometimes just too much like hard manual labour for our liking. The obvious solution is a robot mower, but they’re kinda boring, with their low-tech spinning metal blades. What we need is a big frickin’ laser. YouTuber [rctestflight] has been experimenting with using a 40W blue diode laser module to cut the weeds, (Video, embedded below) and it sort of works, albeit in a rather dangerous fashion.
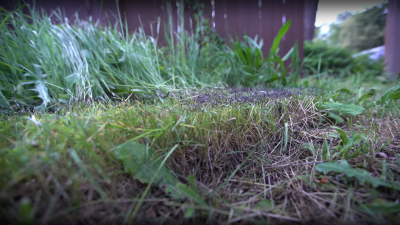
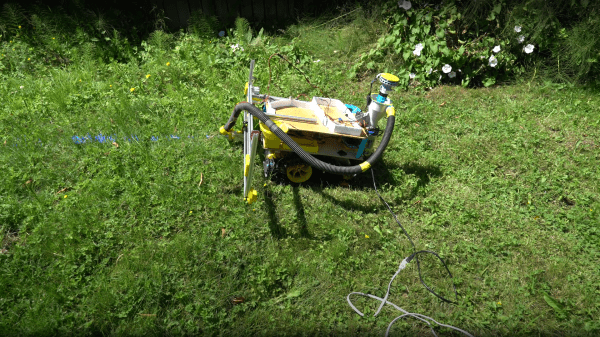
The first test used a fixed assembly, mounting the laser to a camera lens, upon a rotating gear driven by a small stepper motor. An Arduino controls the beam scanning, very slowly, burning the grass in its sights. But with a range limited to around eight feet best case, sitting in one spot just isn’t going to cut it. (sorry) The obvious next step was to mount one of the tested laser modules onto a moveable platform. After tweaking one of his earlier projects — a tracked rover — with a new gearbox design, it could now drive slow enough to be useful for this slow task. The laser was mounted to a simple linear rail slider, with an attempt at a vacuum pickup system to suck up the clippings, removing them from the beam path, and stopping them impeding the cutting efficiency of the laser.
Obviously this vacuum idea didn’t work, and since the contraption takes the best part of a week to cut just one small area, we reckon it would likely be growing faster than that! Still, it must have been fun to build it anyway. It just goes to show that despite the march of technological progress, maybe the boring old spinning blades of old are still the best way to get the job done.
Lawnmowing is clearly one of those jobs we love to hate, and do so with hacks. Here’s a way to prevent your mower sucking up foreign bodies and hurling them at you at ballistic speeds, and for those who really want to be hands off, add RTK-GPS to a robot mower, and just leave it to do the dirty work.
 crimping profile. A small piece of steel was welded on to each, to allow a small spring to act on the finger, enabling it to retract at the end of the crimping action. We did spot the steel plate being held in place with a small magnet, prior to welding. The heat from that would likely kill off the magnetic field in a short space of time, but they’re so cheap as to be disposable items anyway.
 which might be a bit tricky to track down if you were so inclined to reproduce the build. It appears (well if you believe the auto-translation by Google Lens, anyway) to be a spare blade for a commercial guide saw available in Japan at least.