Ultra-Low Power, Energy Harvesting Battery Charger

This half-inch square ultra-low power energy harvesting LiPo cell charger by [Kris Winer] uses a low voltage solar panel to top up a small lithium-polymer cell, which together can be used as the sole power source for projects. It’s handy enough that [Kris] uses them for his own projects and offers them for sale to fellow hackers. It’s also his entry into the Power Harvesting Challenge of the Hackaday Prize.

The board is essentially a breakout board for the Texas Instrument BQ25504, configured to charge and maintain a single lithium-polymer cell. The BQ25504 is an integrated part that takes care of most of the heavy lifting and has nifty features like battery health monitoring and undervoltage protection. [Kris] has been using the board along with a small 2.2 Volt solar panel and a 150 mAh LiPo cell to power another project of his: the SensorTile environmental data logger.

It’s a practical and useful way to test things; he says that an average of 6 hours of direct sunlight daily is just enough to keep the 1.8 mA SensorTile running indefinitely. These are small amounts of power, to be sure, but it’s free and self-sustaining which is just what a remote sensing unit needs.

Worn Train Rails Get Judged By Laser

[Calango] is a railway technician, and for a school final project created the Rail Wear Surveillance Trolley (RWST) which is a delightfully designed device made mainly from PVC conduit with one job: travel down a segment of train track while shining a green laser onto the rail, and capture camera images. The trolley holds both the laser and the camera at just the right angles for the camera to capture a profile of the rail’s curved surface. The images are sent via Bluetooth to a smartphone for later analysis. Rail wear can be judged by checking how well the profile of the rail conforms to the ideal profile of an unworn segment. The trolley is manually pushed by an operator, but [Calango] says that ideally, it would be self-propelled and able to inspect a length of the track then return on its own.

The project was made on a tight budget, which led to some clever solutions like using a rotary encoder attached to a wheel as a makeshift distance sensor. If things get desperate enough, it’s even possible to roll your own rotary encoder with a 3D printer and two microswitches.

RGB Sensor’s New Job: Cryptocurrency Trade Advisor

[XenonJohn] dabbles in cryptocurrency trading, and when he saw an opportunity to buy an RGB color sensor, his immediate thought — which he admitted to us would probably not be the immediate thought of most normal people — was that he could point it to his laptop screen and have it analyze the ratio of green (buy) orders to red (sell) orders being made for crypto trading. In theory, if at a given moment there are more people looking to buy than there are people looking to sell, the value of a commodity could be expected to go up slightly in the short-term. The reverse is true if a lot of sell orders coming in relative to buy orders. Having this information and possibly acting on it could be useful, but then again it might not. Either way, as far as out-of-left-field project ideas go, promoting an RGB color sensor to Cryptocurrency Trading Advisor is a pretty good one.

Since the RGB sensor only sees what is directly in front of it, [XenonJohn] assembled a sort of simple light guide. By enclosing the area of the screen that contains orders in foil-lined cardboard, the sensor can get a general approximation of the amount of red (sell orders) versus green (buy orders). The data gets read by an Arduino which does a simple analysis and sends alerts when a threshold is crossed. He dubbed it the Crypto-Eye, and a video demo is embedded below.

Continue reading “RGB Sensor’s New Job: Cryptocurrency Trade Advisor”

A Peek Into A Weed-Eating Robot’s Test Fixtures

When it comes to production, fast is good! But right the first time is better. Anything that helps prevent rework down the line is worth investing in. Some of the best tools to catch problems are good test fixtures. The folks at Tertill (a solar-powered robot for killing weeds that kickstarted last year) took the time to share two brief videos of DIY test fixtures they use to test components before assembly.

The videos are short, but they demonstrate all the things that make a good test: on the motor tester there are no connectors or wires to fiddle with, the test starts automatically, and there is clear feedback via prominent LEDs. The UI board tester also starts automatically and has unambiguous LED feedback, and sports a custom board holder with a recess just the right shape for the PCB. Once the board is in, the sled is pushed like a drawer to make contact with the test hardware and begin the test. The perfectly formed recesses in both units serve another function as well; they act as a go/no-go test for the physical shape of the components and contacts being tested.

Both videos are embedded below; and while there isn’t much detail on the actual test hardware, we do spy a Raspberry Pi and at least two Adafruit logos among other hacker-familiar elements like laser-cut acrylic, 3D printed plastic, pogo pins, and a PVC junction box.

Continue reading “A Peek Into A Weed-Eating Robot’s Test Fixtures”

DIY Socket For Prosthetics Contains Power Supply, Charger

Innovation in prosthetics is open to anyone looking to enhance the quality of life, but there’s an aspect of it that is sometimes under-served. The DIY Prosthetic Socket entry to the Hackaday Prize is all about the foundation of a useful prosthesis: a custom, form-fitting, and effective socket with a useful interface for attaching other hardware. While [atharvshringaregt] is also involved with a project for a high-tech robotic hand with meaningful feedback, socket fitting and design is important enough to be its own project.

The goal is not just to explore creating these essential parts in a way that’s accessible and affordable to all, but to have them include a self-contained rechargeable power supply that can power attachments. Thoughtful strap placement and a power supply design that uses readily available components with a 3D printed battery housing makes this DIY prosthetic socket a useful piece of design that keeps in mind the importance of comfort and fitting when it comes to prosthetics; even the fanciest robot hand isn’t much good otherwise.

Raspberry Pi Zero Stepper Driver, First Of Many Modules

The Raspberry Pi in general (and the Zero W model in particular) are wonderful pieces of hardware, but they’re not entirely plug-and-play when it comes to embedded applications. The user is on the hook for things like providing a regulated power source, an OS, and being mindful of proper shutdown and ESD precautions. Still, the capabilities make it worth considering and [Alpha le ciel] has a project to make implementation easier with the Raspberry Pi Zero W Stepper Motor Module, which is itself part of a larger project plan to make the Pi Zero W into a robust building block for robotic and CNC applications.

[Alpha le ciel] is building this stepper motor module as the first of many Raspberry Pi hats meant to provide the Raspi with the hardware for robotics applications. This module, in particular, features two A4988 stepper motor drivers, a connector for a power supply or battery providing 7-20V, and a buck converter to bring that power down to the 5V needed by the Pi itself. All the relevant pins are broken out onto the Pi’s GPIO header, making this module the simplest way possible to add a pair of motors to a Pi. What does that mean? Printers or self-balancing robots, really whatever you want.

A stepper driver that conforms to the footprint of the Pi Zero is a good start, and the larger concept of creating additional modules is a worthy entry to the Hackaday Prize.

PCB Holder Quick-fix Turns Out To Be Big Improvement

When something needs improving, most hacks often make a small tweak to address a problem without changing how things really work. Other hacks go a level deeper, and that’s what [Felix Rusu] did with his 3D printed magnetic holders. Originally designed to address a shortcoming with the PCB holders in his LE40V desktop pick-and-place machine, they turned out to be useful for other applications as well, and easily modified to use whatever size magnets happen to be handy.

The problem [Felix] had with the PCB holders on his pick-and-place was that they hold the board suspended in midair by gripping the sides. The board is held securely, but the high density of parts on panelized PCB designs leads to vibrations in the suspended board as the pick-and-place head goes to work. Things are even worse when the board is v-scored for the purpose of easily snapping apart the smaller boards later; they sometimes break along the score lines due to the stress.

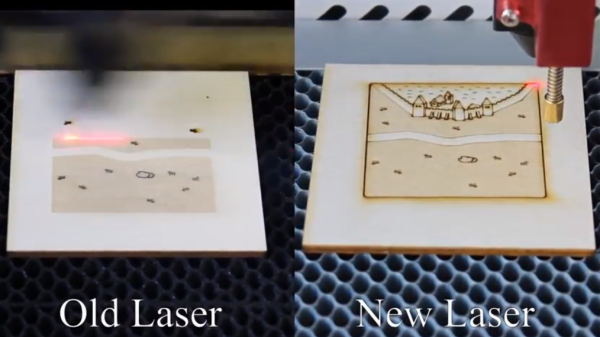
Most people would solve this problem by putting a spacer underneath the board to stabilize things, but [Felix] decided to go a level deeper and change the mounting system altogether with a simple mod. The boards now lie on a flat metal plate, and his magnetic holders are simple to make and easily do the job of holding any size PCB secure. As a bonus, it turns out that the holders also do a passable job of holding work materials down on a laser cutter’s honeycomb table. A video overview is embedded below, and the design files are available on Thingiverse.

Continue reading “PCB Holder Quick-fix Turns Out To Be Big Improvement”