Custom Engine Parts From A Backyard Foundry

Building a car engine can be a labor of love. Making everything perfect in terms of both performance and appearance is part engineering and part artistry. Setting your creation apart from the crowd is important, and what better way to make it your own than by casting your own parts from old beer cans?

[kingkongslie] has been collecting parts for a dune buggy build, apparently using the classic VW Beetle platform as a starting point. The air-cooled engine of a Bug likes to breathe, so [kingkongslie] decided to sand-cast a custom crankcase breather from aluminum.

Casting solid parts is a neat trick but hardly new; we’ve covered the techniques for casting plastic, pewter, and even soap. The complexity of this project comes from the fact that the part needs to be hollow. [kingkongslie] managed this with a core made of play sand and sodium silicate from radiator stop-leak solution hardened with a shot of carbon dioxide. Sure, it looks like a Rice Krispie treat, but a core like that will stand up to the molten aluminum while becoming weak enough to easily remove later. The whole complex mold was assembled, beer cans melted in an impromptu charcoal and hair-dryer foundry, and after one false start, a shiny new custom part emerged from the sand.

We’ve got to hand it to [kingkongslie] – this was a nice piece of work that resulted in a great looking part. But what we love about this is not only all the cool casting techniques that were demonstrated but also the minimalist approach to everything. We can all do stuff like this, and we probably should.

Continue reading “Custom Engine Parts From A Backyard Foundry”

A Hacker’s Guide To Getting Old

It’s no surprise that things change as we age, and that tasks that were once trivial become difficult. Case in point: my son asked for help with the cord on his gaming headset the other night. The cable had broken and we could see frayed conductors exposed. When I got it apart, I found that I could barely see the ultra-fine wires to resolder them after cutting out the bad section. I managed to do it, but just barely.

This experience got me thinking about how to deal with the inevitable. How do you stay active as a hacker once your body starts to fight you more than it helps you? I’m interested mostly in dealing with changes in vision, but also in loss of dexterity and fine motor skills, and dealing with cognitive changes. This isn’t a comprehensive list of the ravages of time, but they’re probably the big ones that impact any hacker-related hobby. I enlisted a couple of my more seasoned Hackaday colleagues, [Bil] and [Rud], for their tips and tricks to deal with these issues.

Continue reading “A Hacker’s Guide To Getting Old”

Walnut Windfall Winds Up In Custom Keyboard

When a neighbor decided to cut down a walnut tree, [voluhar] decided to make something of the wood. The result was this custom keyboard that combines wood and metal in a lovely and functional package.

Walnut is a wood with a rich heritage in consumer electronics. Back in the early days of TV, huge console sets were built into solid walnut cabinets and proudly displayed along with the other fine furnishings in a home. [voluhar]’s keyboard captures a little of that spirit while retaining all the functionality you’d expect. From the custom PCB to the engraved aluminum key caps, it looks like every part was machined with a CNC router. The keyboard sports satisfyingly clicky Cherry MX switches, and a few cleverly positioned LEDs provide subtle feedback on the state of the locking keys. As for the imperfections in the walnut case, we think it just adds to the charm and warmth of the finished product, which would look great on any desktop.

Wood has appeared in a couple of custom keyboards that we’ve featured before, like this all-wood version. But if you want the retro look without the wood, you could always try a keyboard built out of a typewriter.

Continue reading “Walnut Windfall Winds Up In Custom Keyboard”

Brutal Water Cannon Defeats Summer Heat; Kills It On Documentation

There’s a war on, and while this over-the-top water blaster is certainly an escalation in the Water Wars arms race, that’s not the war we’re referring to. We’re talking about the Documentation War. Hackers, you’re on notice.

Gj3YAOL
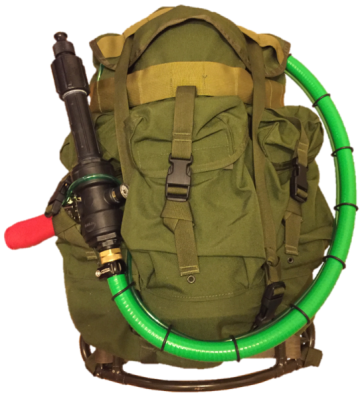
If you want to see how a project should be documented, look no further than [Tim]’s forum posts over at WaterWar.net. From the insanely detailed BOM with catalog numbers and links to supplier websites, to scads of build photos with part number callouts, to the finely detailed build instructions, [Tim] has raised the stakes for anyone that documents any kind of build.

And that’s not even touching on the merits of the blaster itself, which has air and water tanks plumbed with every conceivable valve and fitting. There’s even an inline stream straightener made of bundled soda straws to keep the flow as laminar as possible. It looks like [Tim] and his colleagues are obsessed with launching streams of water as far as possible, and although bad weather has prevented an official measurement so far, from the video below it sure looks like he’s covering a huge distance with a stream that stays mostly intact to deliver the full blast to its intended target without losing a drop.

For as much fun as amped-up water guns appear to be, we haven’t seen too many grace these pages before. Going way back we covered a DIY super-soaker. For something much less involved than [Tim’s] masterpiece, you can pull together this pressurized water pistol in an afternoon.

Continue reading “Brutal Water Cannon Defeats Summer Heat; Kills It On Documentation”

An Extremely Useful Shop-Built Belt Grinder

What’s green and black and used all over the shop? It’s [Make It Extreme]’s newest build, a scratch-built belt grinder. And as usual, the build video gets us in the mood to cut metal.

We’ll go out on a limb here and state that the lathe, and not the belt grinder, is the essential metalworking tool. That’s pretty clear from this build – the running gear is machined entirely on a lathe. But as central as the lathe is to machinery making, belt grinders like this one have to rate right up there in terms of shop utility.

You can sharpen with them, quickly remove stock, clean up welds, form chamfers, and remove rust and corrosion. They’re great all-around tools, and with the quick-release idler feature that this one has, fast belt changes for different jobs make it even more flexible. We’d like to see more adjustability in the work table – the ability to angle the table relative to the belt is very handy – but in all this is a great build and a nice tool to have.

On top of it all, watching the [Make It Extreme] builds – like this sandblaster, spot welder, or belt sander – is like high-speed shop class. There’s a lot to learn, although we have to admit that welding in shorts and a T-shirt gives us the willies.

Continue reading “An Extremely Useful Shop-Built Belt Grinder”

Cheap Torque Sensor Goes Back To Basics On Strain Gauges

Sooner or later, we’ve all got to deal with torque measurement. Most of us will never need to go beyond the satisfying click of a micrometer-style torque wrench or the grating buzz of a cordless drill-driver as the clutch releases. But at some point you may actually need to measure torque, in which case this guide to torque sensors might be just the thing.

[Taylor Schweizer]’s four-part series on torque is pretty comprehensive. The link above is to the actual build of his DIY torque transducer, but the preceding three installments are well worth the read too. [Taylor] describes himself as an e-waste connoisseur and tantalizes us with the possibility that his build will be with salvaged parts, but in the end a $20 bag of strain gauges and an LM358 were the quickest way to his proof of concept. The strain gauges were super-glued to a socket extension, hot glue was liberally applied for insulation and strain relief, and the whole thing wired up to a Teensy for data capture. A quick script and dump of the data to Excel and you’ve got a way to visualize torque.

An LCD display for real-time measurements is in the works, as are improvements to the instrumentation amp – for which [Taylor] might want to refer to [Bil Herd]’s or [Brandon Dunson]’s recent posts on the subject.

[via r/arduino]

Make Math Real With This Analog Multiplier Primer

Remember learning all about functions in algebra? Neither do we. Oh sure, most of us remember linear plots and the magic of understanding y=mx+b for the first time. But a lot of us managed to slide by with only a tenuous grasp of more complex functions like exponentials and conic sections. Luckily the functionally challenged among us can bolster their understanding with this demonstration using analog multipliers and op amps.

[devttys0]’s video tutorial is a great primer on analog multipliers and their many uses. Starting with a simple example that multiplies two input voltages together, he goes on to show circuits that output both the square and the cube of an input voltage. Seeing the output waveform of the cube of a ramped input voltage was what nailed the concept for us and transported us back to those seemingly wasted hours in algebra class many years ago. Further refinements by the addition of an op amp yield a circuit that outputs the square root of an input voltage, and eventually lead to a voltage controlled resistor that can attenuate an input signal depending on its voltage. Pretty powerful stuff for just a few chips.

The chip behind [devttys0]’s primer is the Analog Devices AD633, a pretty handy chip to have around. For more on this chip, check out [Bil Herd]’s post on analog computing.

Continue reading “Make Math Real With This Analog Multiplier Primer”