A Better Spectrum Analyzer For Your Rigol Scope

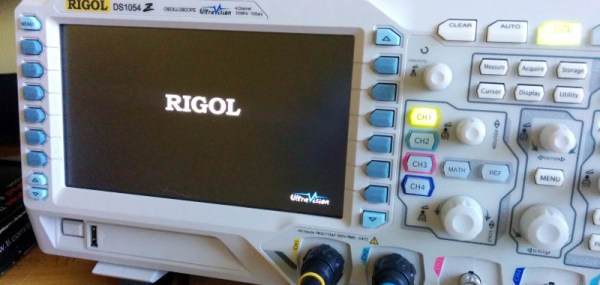
The Rigol DS1000 series of oscilloscopes are popular with hobbyists for good reason: they provide decent specs at a low price. However, their spectrum analysis abilities are lacking. While these scopes do have a Fast Fourier Transform (FFT) function, it’s limited and nearly useless for RF.
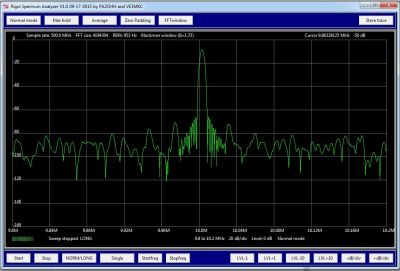
A FFT plotted by the PyDSA tool and a Rigol oscilloscope[Rich] wanted a spectrum analyzer for amateur radio purposes, but didn’t want to build his own sampling hardware for it. Instead, he wrote PyDSA, a software spectrum analyzer for Rigol DS1000 oscilloscopes. This tool uses the USB connection on the scope to fetch samples, and does the number crunching on a far more powerful PC. It’s able to plot a 16,000 point FFT at two sweeps per second when run on a decent computer.

PyDSA is a Python script that makes use of the Virtual Instrument Software Architecture (VISA) interface to control the scope and fetch the sample data. Fortunately there’s some Python libraries that take care of the protocol.

[Rich] is now able to use his scope to measure amateur radio signals, which makes a nice companion to his existing Teensy based SDR project. If you have a Rigol, you can grab the source on Github and try it out.

The Year Of The Car Hacks

With the summer’s big security conferences over, now is a good time to take a look back on automotive security. With talks about attacks on Chrysler, GM and Tesla, and a whole new Car Hacking village at DEF CON, it’s becoming clear that autosec is a theme that isn’t going away.

Up until this year, the main theme of autosec has been the in-vehicle network. This is the connection between the controllers that run your engine, pulse your anti-lock brakes, fire your airbags, and play your tunes. In most vehicles, they communicate over a protocol called Controller Area Network (CAN).

An early paper on this research [PDF] was published back in 2010 by The Center for Automotive Embedded Systems Security,a joint research effort between University of California San Diego and the University of Washington. They showed a number of vulnerabilities that could be exploited with physical access to a vehicle’s networks.

A number of talks were given on in-vehicle network security, which revealed a common theme: access to the internal network gives control of the vehicle. We even had a series about it here on Hackaday.

The response from the automotive industry was a collective “yeah, we already knew that.” These networks were never designed to be secure, but focused on providing reliable, real-time data transfer between controllers. With data transfer as the main design goal, it was inevitable there would be a few interesting exploits.

Continue reading “The Year Of The Car Hacks”

Hacking A $100 Signal Generator

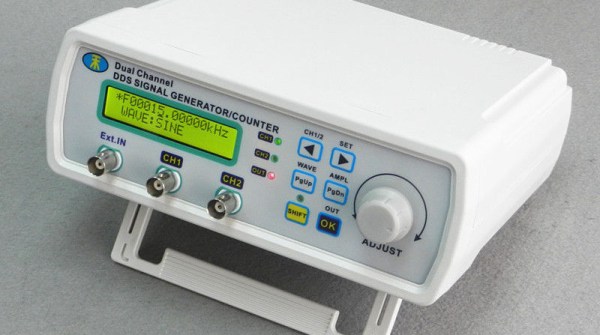
Signal generators are a useful piece of kit to have on your electronics bench. The downside is that they tend to be rather expensive. If you have $100 to drop on a new toy, the MHS-5200A is a low cost, two channel, 25 MHz generator that can be found on eBay.

The downside is the software. It’s an ugly Windows interface that’s a pain to use. The good news is that [wd5gnr] reverse engineered the protocol so you don’t have to. This means other software can be developed to control the device.

When connected to a computer, this function generator shows up as a virtual USB serial port. The documentation that [wd5gnr] assembled lists all the serial commands you can send, and what they do. If you aren’t into manually setting waveforms from a serial terminal (who is?) there’s a tool for doing that automatically on Github. This takes in a CSV file describing a waveform, and programs the generator to make it for you.

The software is also compatible with Waveform Manager Plus, a free GUI tool for defining waveforms. Putting this all together, you can have a pretty capable waveform generator for less than $100.

Wirelessly Weighing Plants With The ESP8266

There’s a good number of hacks, and commercial products, for telling you when a plant needs watering. Most of them use an ADC to measure the resistance in the soil. As the soil’s moisture content drops, the resistance increases. High impedance, dead plant.

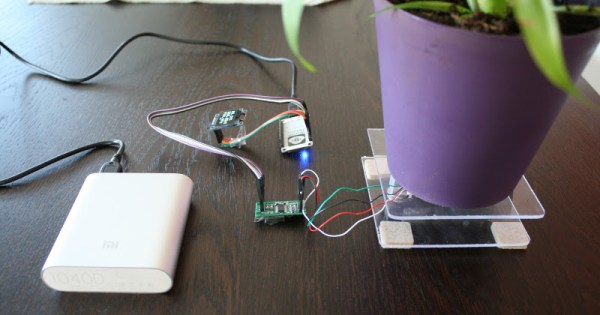
[squix]’s Thirsdee takes a different approach to plant health monitoring. Instead of measuring resistance, it simply weighs the plant. As the soil dries up, it gets lighter. By measuring the change in weight, the amount of water in the pot can be estimated.

Thirsdee uses a load cell to measure the weight. It’s read using an HX711 ADC, which is controlled by a NodeMCU. This development board is based on the ESP8266 chip. Since Thirsdee has WiFi, it can push notifications to your phone and log data on ThingSpeak. If you’re looking at the plant, an OLED shows you the current status of the plant. For us viewing from home, we can see a graph of [squix]’s plant drying out in real time.

[squix] provides us with a list of suppliers for the parts, and all the source code on Github.

Custom Downdraft Fume Extractor for Soldering

Downdraft Fume Extractor Saves Your Lungs

When you’re soldering, smoke rises from your iron. That smoke is full of a variety of chemicals, depending on what type of solder you’re using, but it’s almost certainly not good for you. That’s why you can buy fume extractors to suck smoke away.

But benchtop extractors tend to suck, and not in the way they’re supposed to. It can be hard to get the extractor to pick up all the fumes, leaving fumes that float into your face.

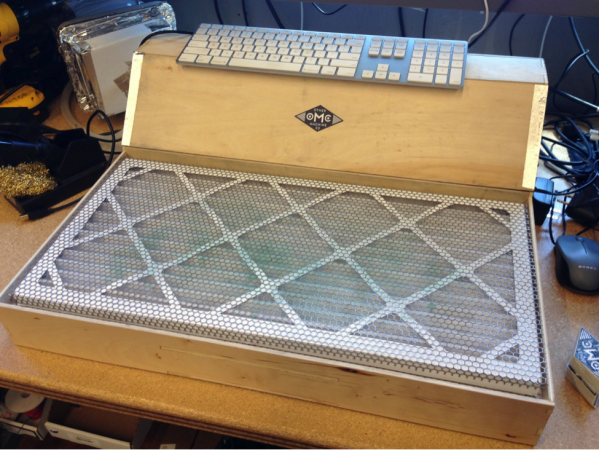
Over at Other Machine Co., they built up a custom downdraft fume extractor to solve this problem. The downdraft extractor is a table that you work on, providing downwards suction that grabs the fumes. Their table uses a standard MERV13 air filter that’s rated to trap particles as small as 1.0–0.3 μm. Cooling fans provide the airflow, and a piece of perforated sheet metal acts as a work surface.

The table works great for soldering, and is also helpful for working with other chemicals like adhesives and solvents. DXF files for the frame parts are provided, and everything else can be sourced from McMaster.

Astoundingly Great $60 3D Printer Called Chimera Bests Your Printer

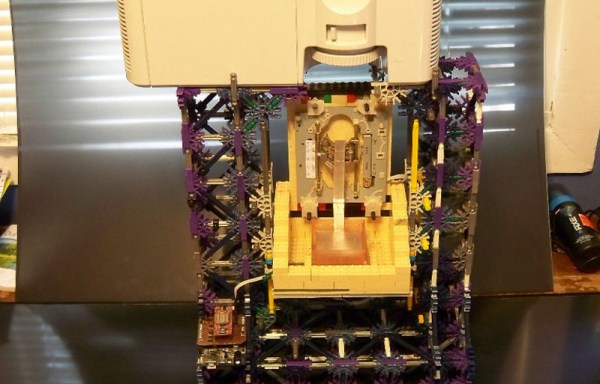
When most people think of 3D printing, they think of Fused Deposition Modelling (FDM) printers. These work by heating a material, squirting it out a nozzle that moves around, and letting it cool. By moving the nozzle around in the right patterns while extruding material out the end, you get a part. You’ve probably seen one of the many, many, many FDM printers out there.

Stereolithography printing (SLA) is a different technique which uses UV light to harden a liquid resin. The Chimera printer uses this technique, and aims to do it on the cheap by using recycled parts.

First up is the UV light source. DLP projectors kick out a good amount of UV, and accept standard video inputs. The Mitsubishi XD221u can be had for about $50 off eBay. Some modifications are needed to get the focus distance set correctly, but with that complete the X and Y axes are taken care of.

For the Z axis, the build platform needs to move. This was accomplished with a stepper motor salvaged from a disk drive. An Arduino drives the motor to ensure it moves at the right rate.

Creation Workshop was chosen as the software to control the Chimera. It generates the images for the projector, and controls the Z axis. The SLA process allows for high definition printing, and the results are rather impressive for such a cheap device. This is something we were just talking about yesterday; how to lower the cost of 3D printers. Obviously this is cheating a bit because it’s banking on the availability of cheap used parts. But look at it this way: it’s based on older technology produced at scale which should help a lot with the cost of sourcing this stuff new. What do you think?

Anodized aluminium phone mount for a bike

Anodized Phone Mount For Your Bike

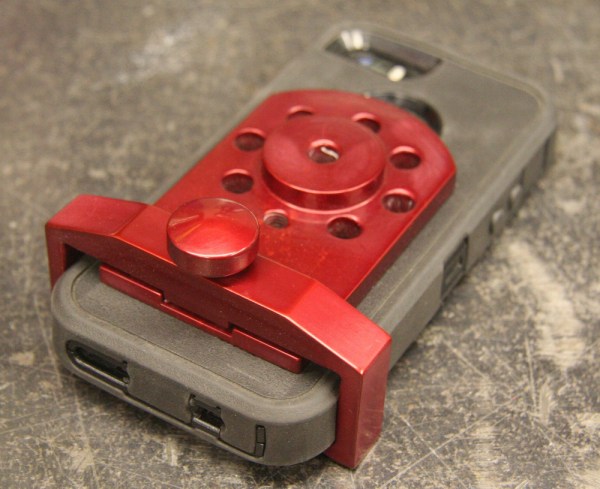
There’s a slew of apps out there for tracking your bike rides. If you want to monitor your ride while using the app, you’ll need it securely affixed to your bike. That’s where [Gord]’s No Dropped Calls build comes in. This aluminium mount was hand milled and anodized, which gives it a professional finish.

The mount consists of 3 parts which were machined out of stock 6061 aluminium. The plans were dreamt up in [Gord]’s head, and not drawn out, but the build log gives a good summary of the process. By milling away all of the unnecessary material, the weight of the mount was minimized.

Once the aluminium parts were finished, they were anodized. Anodization is a process that accelerates the oxidization of aluminum, creating a protective layer of aluminium oxide. [Greg] does this with a bucket of sulphuric acid and a power supply. Once the anodization is complete, the part is dyed for coloring. If you’re interested, [Gord] has a detailed writeup on home anodization.

The final product looks great, puts the phone within reach while biking, and prevents phone damage due to “dropped calls.”