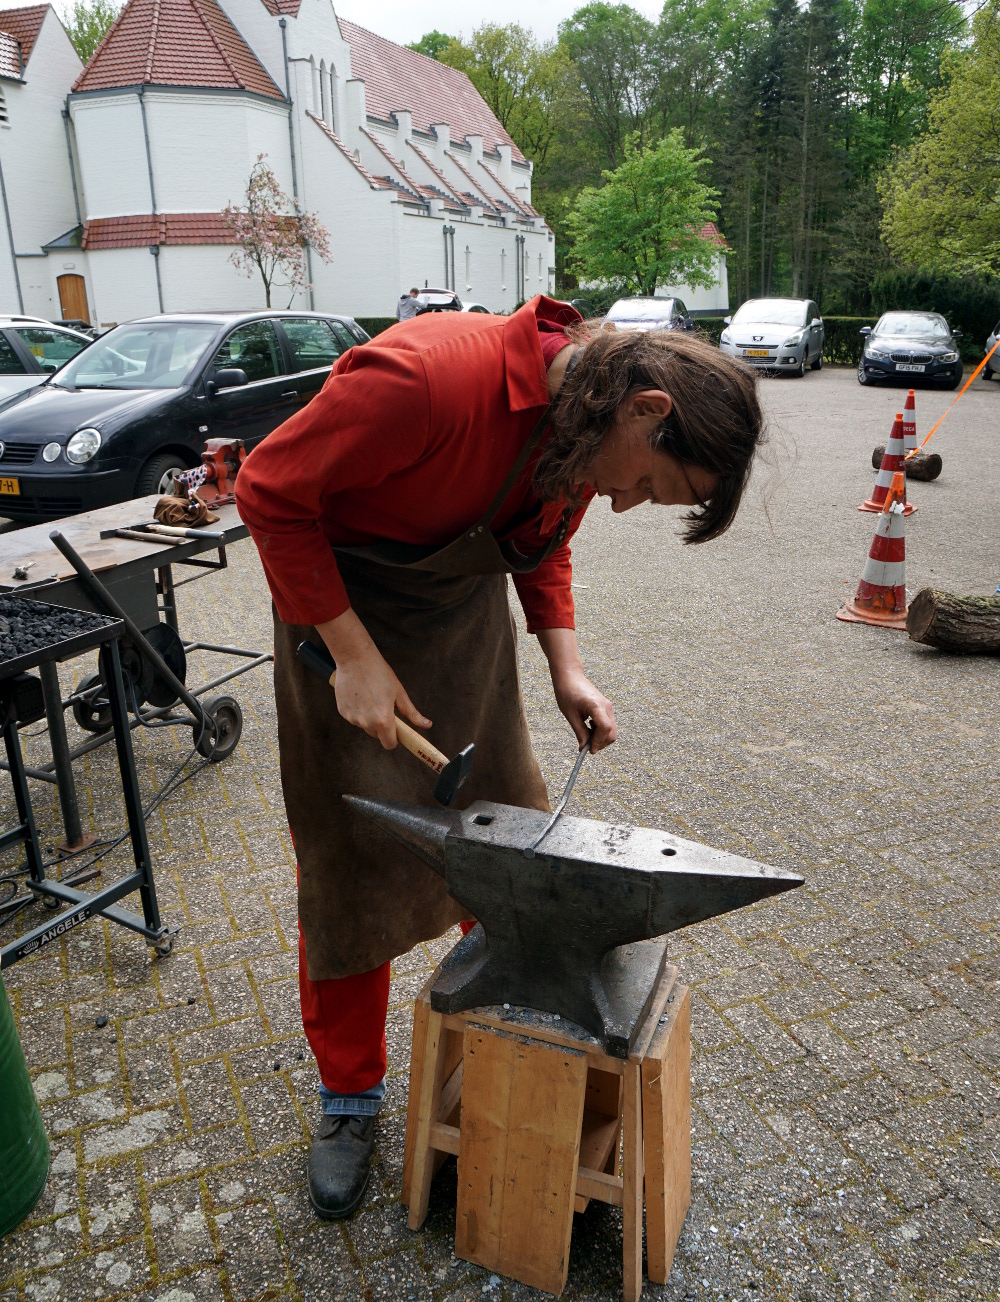
There is a dedicated community of plotter enthusiasts who keep their often-aging X-Y axis pen drawing devices going decades after they were built, and who share plotter-generated paper artwork online. [Dhananjay Balan] was seduced by this, so acquired a second-hand HP7440A through eBay and set about bringing it to life.
Bringing it to life was in the first instance the usual progression of cleaning the mechanism and checking all was in order, before doing a bit of research to find that the missing power supply was a 10-0-10V AC item. Then some adapters and a USB-to-serial port had it talking to a modern PC, and thanks to the wonders of HPGL it was working once more. This could thus have been a very simple tale worthy of the dreaded Not A Hack moniker, had the focus then not changed from the hardware into the software.
Back in the day, a 60-byte buffer in a plotter must have seemed huge. But in 2019 a plotter can be sent data at a rate that will swiftly fill it, after which the commands are not stored and are never drawn. Introducing a delay between sending commands solves the problem, but at the expense of very slow plotting. This was solved with a very clever use of the HPGL command to send the pen position, which waits until the pen has finished moving before sending its return value. This became a handy way to detect when the plotter was ready for more, allowing speedier printing without buffer overruns.
The plotter has an expansion port into which an optional module containing trigonometric drawing functions could have been plugged, but was missing in this example. HP’s idea was that the buffer was so small that a programmer would have difficulty writing their own, but the buffer hack in the previous paragraph put paid to that. Python code for all this and more is in a handy GitHub repository.
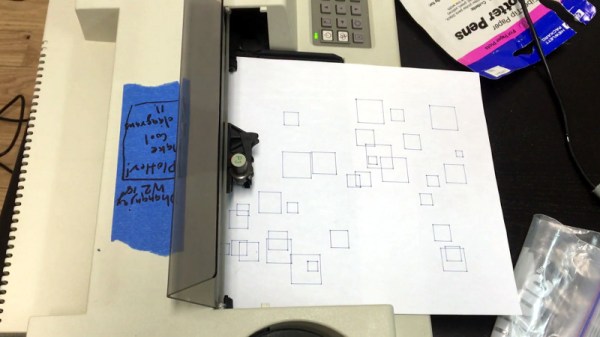
Making an event badge is hard work. Making a single prototype badge is hard enough, but the whole process of sourcing components and coordinating manufacture for hundreds of badges on a shoestring budget with the looming deadline of the event and its expectant attendees is a Herculean task.
[Uri Shaked] is one who bears the scars of producing an event badge, and he’s written a fascinating account of his experience. The conference in question was Aramcon 2019, a private tech event in Israel, and the badge has an nRF52840 driving an e-ink display, multi-colour LED, and an audio codec, with a set of full-size keyboard keys as user input. Since the nRF chip supports mesh networking, the idea was to produce a badge capable of streaming audio across the entire event.
A clothes-pin as a programming jig, we like it!
We follow the team through nail-biting months of prototype boards, reversed connectors with last-minute cable bodges, compatible parts that didn’t turn out to be quite so compatible, and wrong footprints, and see them arriving at a badge which worked, but without the audio they’d hoped for. Along the way they came up with a clothes-pin-based programming jig which would surely have merited its own Hackaday write-up had they covered it on its own. Demonstrating the mesh networking by turning a whole auditorium’s worth of badges LEDs yellow was their reward, and we can see they’ve produced a very creditable badge. We particularly like the use of keyboard key switches, and we commend them for planning a life for the badge after the event.
In the seven years since the Raspberry Pi was first launched to an expectant audience we have seen many laptops featuring the fruit-themed single board computers. Some of them have been pretty jaw-dropping in their quality, so for a new one to make us stop and gape it needs to be something really special. On cue, here comes [Igor Brkić] with one of the neatest efforts we’ve seen, a high quality Pi laptop that’s smaller in frontal area than many smartphones.
At its heart is a Pimoroni Hyperpixel touchscreen HAT, and a Pi sitting behind it that has been stripped of all bulky connectors to reduce its height. The keyboard is a mini Bluetooth affair, and power comes courtesy of a deconstructed USB power bank with a lithium-ion pouch cell. The whole is contained within a neatly designed 3D-printed clamshell enclosure, making for a tiny and very neat laptop. We want one, and now you probably do too. (We wouldn’t say “no” to some level shifters and a GPIO port…)
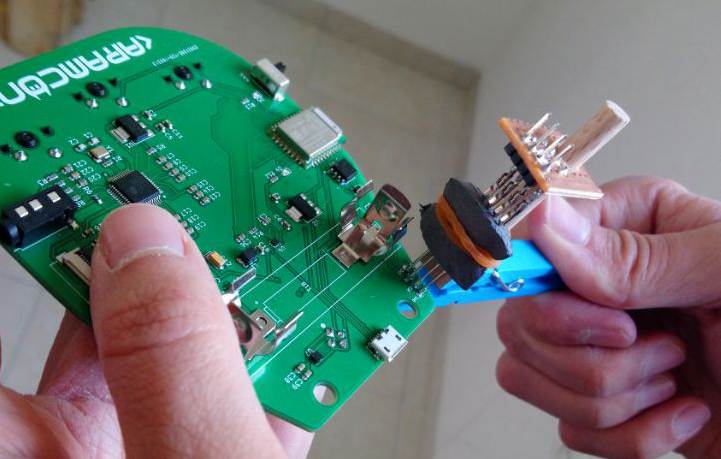
Some of us here at Hackaday are cat lovers, but we also understand that a plethora of unwanted cats using a suburban back garden can be bothersome, and a few years ago we featured a project from Aussie YouTuber [Craig Turner], in which he created a motion-detecting water spray for use as a relatively harmless cat repellent. Now he’s back with an updated version which is a little slicker and easier to make.
At its heart is the same PIR-turns-on-water operation, but this time there is a solenoid valve and purpose-built nozzle instead of a car central locking actuator and a lawn sprayer. Doing the electronic work is an off-the-shelf PIR module, so there is no longer any need to hack a security PIR detector. Add in some pipe sections and PTFE tape with a bit of hot glue, and the result is a far more professional and streamlined device. The video gives a full run-down on construction, though we notice he neglected to emphasise the polarity of his protection diode so keep an eye out if you follow his example.
So if the thought of a continuous supply of free feline company courtesy of your neighbours is not for you then now you are equipped to send them packing. The latest video incarnation of the project is below the break, but if you are in search of the original then you can go back to our coverage at the time.
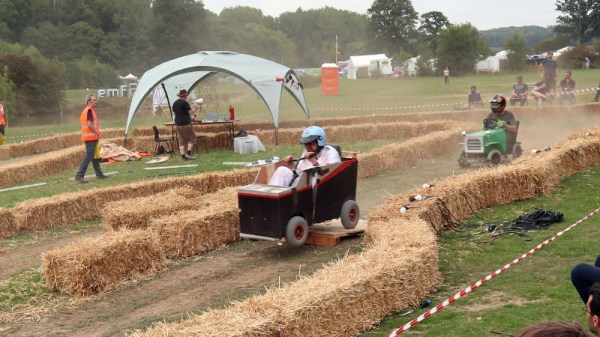
Running a brushed motor in muddy or dusty environments takes a toll on controllers, with both heavy back EMF and high stall currents. This explains one of the challenge in Europe’s Hacky Racer series, which is decidedly more off-road than America’s Power Racing Series.
In pushing these little electric vehicles to the limits, many builders use brushless Chinese scooter motors since they’re both available and inexpensive. Others take the brushed DC route if they’re lucky enough to score a motor — and then the challenge becomes getting the most performance without burning up your controller. To fix this, [MechanicalCat] has come up with a current limiter for cheap DC motor controllers.
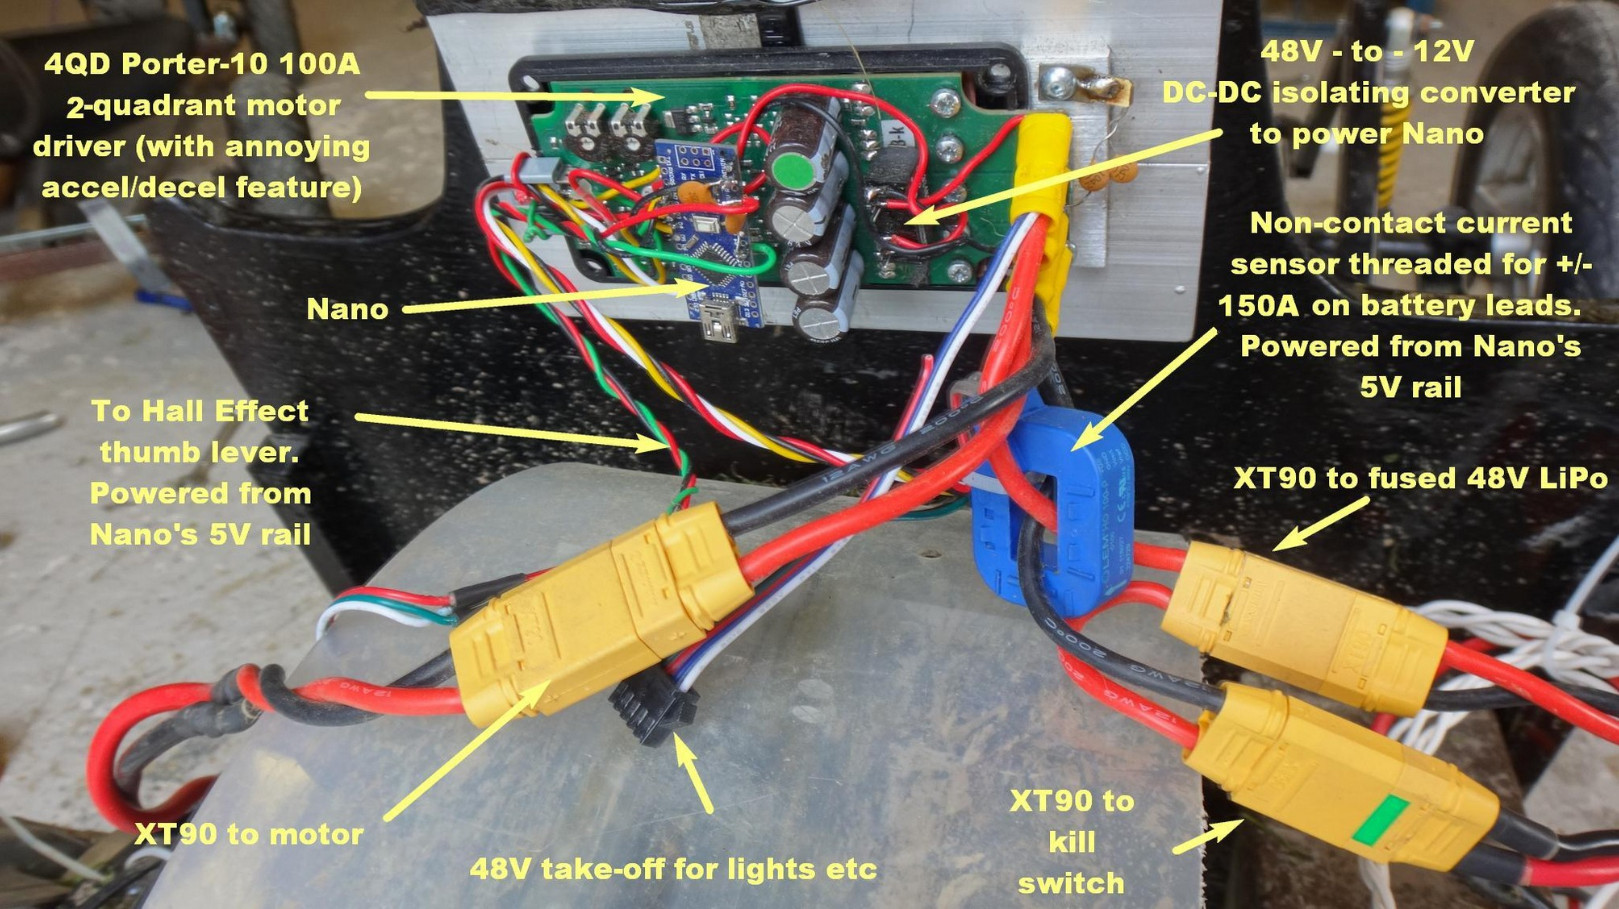
The full write-up is in the included PDF file, and describes the set-up of an Arduino Nano sitting between throttle and controller, and taking feedback from a current sensor. The controller in question is a 4QD Porter 10 so an extra component is a DC-to-DC converter to provide a floating ground for the Arduino. However, there is also the intriguing possibility of the same set-up being used with absurdly cheap Chinese motor controllers. There is also advice on fitting flyback diodes, something which might have saved one controller in the Hackaday pits last year.
It’s yet to be seen what effect this will have on Hacky Racer competitiveness, however its applications go far beyond that field into anywhere a reliable small DC motor drive on the cheap is required. Meanwhile, if you’re unsure where this Hacky Racer stuff came from, you could start here.
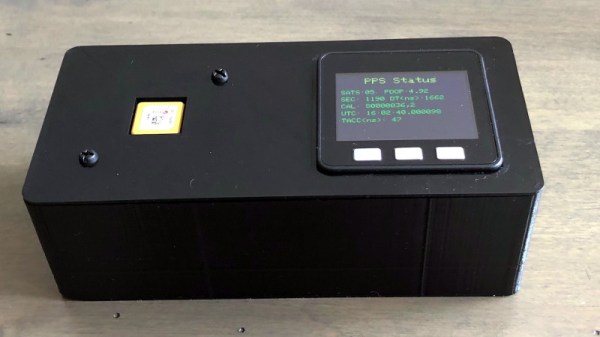
Making a GPS clock is a relatively straightforward process on the face of it. Buy a GPS module for a few dollars, hook it up to a microcontroller board of your choice, pick the appropriate library and write a bit of code, et voila! A clock with time-wonk bragging rights!
Of course, your GPS clock will always tell the right time, but it won’t be really right. Your microcontroller will introduce all sorts of timing errors and jitter, so at best it’ll only be nearly right. [Rick MacDonald] has been striving to quantify and minimise these errors in his OpenPPS project, which aims to be as accurate a GPS time and frequency reference as possible.
In a very comprehensive multi-page write-up, he details his progression, through the GPS modules he used, his experience with timing jitter when he used an ESP32 alone to process their output, and then his experiments with an FPGA and then temperature-compensated oscillators. It moves from being a mere description of a GPS clock into a fascinating run-down of both GPS timing itself and the development pitfalls he encountered along the way. At the end of it all he has a GPS clock in a smart 3D-printed enclosure which he admits as yet doesn’t do anything more than tell the time, but as he points out it’s a clock with minimised jitter, delay, and drift, and it remains an ongoing project that will evolve into a full-blown time and frequency standard.
Regular readers will recognise this as the third part of a series exploring blacksmithing for those who have perhaps always fancied having a go but have never quite known where to start. It’s written from a position of the unusual experience of having grown up around a working forge, my dad may now be retired but he has a blacksmith specialising in architectural ironwork.
So far in this series we’ve looked in detail at the hearth and anvil that you might find in a typical forge, and delivered some pointers as to where you might look to find or even construct your own.Those are the signature pieces of equipment you’ll find in a forge, but with them alone you can still not be a blacksmith.
If I Had A Hammer…
An array of hammers of different weights and types.
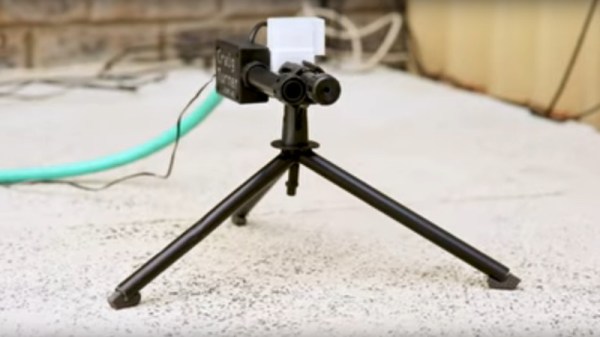
Given an anvil, a hearth, and a vat of water to quench hot work in, and you’re almost set for your forge, but not quite. Most of a modern blacksmith’s workshop is the standard metalworking assortment of welders and angle grinders, but there is a set of tools that remain essential for blacksmithing alone. Your hammers are what connect you to the work, and can be as individual as the preferences of the blacksmiths themselves. There is no “right” answer to the question of what hammer you should use, instead you should use the one that works best for you. I instinctively favour a round-faced ball-peen hammer because that’s what my dad mostly used, but for example my Dutch friends use square faced cross-peen hammers. Blacksmiths will often make their own hammers to suit their needs, for example my dad made more than one using the high-quality steel of vehicle half-shafts as a starting point. Hardening them is a specialist skill in its own right, and I remember quite a few experiments before he perfected it.
It may well be stating the obvious, but the weight of the hammer influences how much energy it can impart to the work, and in turn the size of work that can be done. Casting an eye over my dad’s hammers the three workaday weights were 2 pound, 3 pound, and 4 pound (roughly 1 kg, 1.5 kg, and 2 kg), allowing a variety from fine work to heavier hitting of larger pieces. In a recent project, making a mediaeval nail, I selected an unsubtle lump hammer to draw out the larger square stock, and a much smaller one to finish it up, create the fine point, and relatively thin head. These are only a subsection of the hammers at his disposal though, like most blacksmiths he has a variety for all tasks, up to sledgehammers. I have frequently taken my turn either holding a piece with tongs while he used a sledgehammer, or on the sledgehammer myself.
Tongs, for Hot Gripping Moments
A selection of tongs, including some designed for very specific tasks. Our thanks to [Igor Nikolic] for making this picture possible.The constant companion to a blacksmith’s hammer is a pair of tongs. These can be bought from blacksmith’s suppliers, but making a pair can be a task within the reach of most smiths. Two identical sides are made from pieces of stock, with long thin handles, a flat piece to form the hinge, and whatever jaw piece is required. It feels like cheating to form the hole for the hinge on a drill press rather than on the anvil with a punch, but riveting it with a short piece of bar is a straightforward enough process. Blacksmiths will have a huge array of tongs with different jaws for specific jobs, built up over years as jobs demand it. If you cast your mind back to the Finnish smith pictured halfway down the first installment of this series, you’ll find several racks of tongs. A later episode of this series will look at making a set of tongs, though we can’t promise in advance the quality of the finished article.
A final moment for today should be spent on the subject of protective equipment. The hazards of blacksmithing are relatively uncomplicated, but some basic protective clothing is still very much worth having. The most obvious hazard is heat, you will be working in a noisy environment with red hot metal and fire. Though you will generate fewer sparks than you’d expect, I have a blacksmith’s leather apron and a set of fire-resistant overalls. Both of these are readily available from blacksmith’s supply stores, and are well worth the investment. There are also a lot of heavy and sharp items involved, not to mention hot particles on the floor. For that reason I also have a set of steel-toecapped workboots rated for hot particles. They aren’t the most elegant of footwear, but they have saved me from a few nasty moments.
I do not have any face protection specifically for blacksmithing, but depending on the work in hand there may be some sparks created. A polycarbonate face shield rated for hot particles should be available from any safety equipment supplier, and shouldn’t cost too much, and is an essential thing to own if you are doing any grinding or rotary wire brushing. Beyond that, there are also leather gloves designed for handling hot metal. I don’t use them because I prefer the feel of the hammer directly and am happy to use a pair of tongs to hold hot pieces of steel.
We’ve taken you through the basic workshop equipment of a blacksmith over the last few episodes of this series, and you should now have a basic idea of the safety kit you would be well advised to own. From this foundation we’ll next take you into the forge and start looking at a few blacksmithing techniques and simple projects, and along the way we’ll see some of the materials involved, too.


![A selection of tongs, including some designed for very specific tasks. Our thanks to [Igor Nikolic] for making this picture possible.](https://hackaday.com/wp-content/uploads/2019/04/tong-selection.jpg)