Investigating The S3 Virge’s Reputation As A 3D Decelerator Card

The special 512x384 mode with S3 card installed. (Credit: Bits und Bolts, YouTube)
The special 512×384 mode with S3 card installed. (Credit: Bits und Bolts, YouTube)

Back in 1996 the 3D gaming market on PC was beginning to heat up, with hot new titles like Tomb Raider coming out that year and requiring much more graphics power than what was needed for old titles like Doom and Duke Nukem 3D to experience good graphics. Thus you had to pick some kind of 3D accelerator card to buy. Here a common joke was that of the available options, the S3 Virge GPU was so bad that it was actually worse than running in software rendering, but was this true? Cue [Bits und Bolts]’s investigation to finally put this myth to rest.

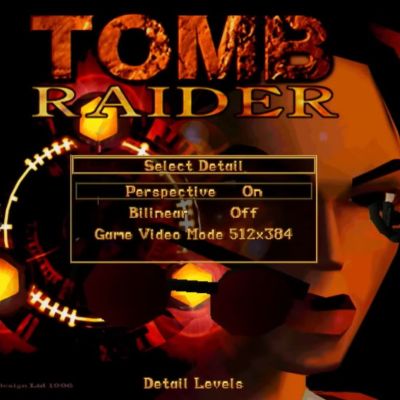
On software rendering mode a zippy Pentium 166 would struggle to render at 640×480 resolution, so if you wanted more than 320×240, or really knock down graphical fidelity, you had to get that 3D accelerator card. After combining a P166 with an S3 Virge/DX – a minor update to the original Virge – the Tomb Raider game was first compared while running in 512×384 resolution, which the game offers you with an S3 card installed along with bilinear filtering.

After hitting a capped 30 FPS on that first test, 640×480 was tried and hit a solid 15 FPS with bilinear filtering enabled, but the conclusion is basically that the special 512×384 resolution mode is pretty good. Perhaps the main causes of the myth was the wide variability in quality of the various GPUs using the S3 Virge chip, as well as trying to run at anything other than this special resolution which appears to target the card’s strengths.

Continue reading “Investigating The S3 Virge’s Reputation As A 3D Decelerator Card”

Over-Engineering An FDM Spool Holder From Prusa Mk4S Remains

Unlike resin printers where you generally just pour the fresh resin into the easily accessible vat, FDM printers need to squirrel away at least one spool and its requisite holder somewhere. For bed slingers this generally means a top-mounted spool holder, while for CoreXY enclosed printers they can appear on the sides, top or – inexplicably – on the back. While a side-mounted spool is often convenient, access to the side can still be blocked, in which case you do what [3D Maker Noob] did and over-engineer a fancy top-mounted spool holder.

The problem started after converting a Prusa Mk4S to a Core One using the conversion kit, which changes the position of the spool, forcing him to work around not having access to the right side of the machine where the default position is. After a first version using many of the left-over parts of the original Mk4S to create a fancy box-shaped spool holder, he proceeded to upgrade it as detailed in the video. All project files and instructions are available on Printables.

The result is a box you stack on top of the printer somewhat like a multi-spool box, just flatter and with a flippy lid on the front from which a rail slides out with the magnetically attached spool holder. A spool holder which you naturally can further customize to fit different spools. Even if over-engineered, you can’t deny that it would fit in confined spaces and looks pretty good while doing its job.

Continue reading “Over-Engineering An FDM Spool Holder From Prusa Mk4S Remains”

Using Windows 11 On An LGA 775 PC With AGP Videocard

Although the thought of installing a modern operating system like Windows 11 on something as archaic as a Core 2 Quad Q6600 Intel CPU may seem ridiculous, it being the flagship CPU of the time means that it still chews up low-end Celeron systems that are on the supported hardware list like the N4020. Hence [Omores] commencing on this latest adventure, with the snag being that the chosen mainboard features an AGP bus that Windows 11 no longer supports.

A GPU box from the related HD 4670 PCIe card, not the used HD 4650 AGP card with 1 GB of DDR2. (Credit: Omores, YouTube)
A GPU box from the related HD 4670 PCIe card, not the used HD 4650 AGP card with 1 GB of DDR2.

This system is intended to multi-boot a range of Windows OSes starting with Windows 98, while also playing nice with DOS and even Windows 11. In addition to the quad-core, 2.4 GHz Q6600 there’s also an amazing 3 GB of DDR1 RAM in the system.

The mainboard is the 2003-era Asrock 865PE, with the GPU being the highest-end GPU that still came in AGP flavor: the Radeon HD 4650 from 2009. Since the sole reason that Windows 11 doesn’t support AGP any more is due to the supporting files not being included with Windows 11, hence you can track it down on a Windows 10 1507 release install – such as the Intel AGP440.sys driver here – and install them with some file editing.

Since Windows 11 still supports the WDDM driver model from Windows Vista and 7 you can then install the Catalyst drivers from 2012 and be up and running. You only get 1 GB of VRAM for this card, but you probably don’t need much more on this level of hardware.

One major stumbling block remains, however, as Windows 11 24H2 enforces SSE4.2 instructions which the CPU doesn’t support. Ergo 23H2 is the newest Windows 11 version that can run on this system, with only the Education and Enterprise still receiving security updates, making it a bit of a pyrrhic victory, especially as Windows 7 benchmarks a fair bit faster on the same hardware.

Continue reading “Using Windows 11 On An LGA 775 PC With AGP Videocard”

Using Electrolysis For More Than Just Generating Hydrogen

When the topic of ‘electrolysis’ is mentioned, people typically think of just splitting plain old dihydrogen monoxide (hydric acid: H2O) into its constituent atoms, but this barely scratches the surface of what is going on during electrolysis. Once you understand the full picture it also becomes obvious how electrolysis can be used for other tasks, including metal refining, flow batteries and more, as covered in a recent video by [NightHawkInLight].

On a fundamental level electrolysis is what it says on the tin: a way to lyse (i.e. split apart) using electrons, which is what the anode and cathode provide or remove. This can be used to break down the bonds between hydrogen and oxygen, but also those of iron ore, like Fe3O4. Stripping the oxygen from the iron atoms is commonly done in a reduction process using the CO from coke or hydrogen,

Setup for electrolysing iron ore. (Credit: NightHawkInLight, YouTube)
Setup for electrolysing iron ore.

By instead dissolving the iron ore in acid, electrolysis can then be used to separate the two. In the example, the acid is created by one side of the electrolytic cell, with both electrodes separated by an ion-exchange membrane barrier that prevents the chemical processes on each side of the cell to affect the other side while still enabling the cell to work. How to make these membranes is also demonstrated in the video.

Through a careful arrangement of these membranes and the electrodes, you can guide which reactions can occur where, and which – negative or positively charged – ion can pass through which membrane, giving a lot of control. It can also be used to prevent undesirable reactions from happening, such as in this case the generating of chlorine gas from the NaCl being lysed.

Acidity indicator dye is used to show in great detail how the cell works, including its preparation of getting the acidity just right before the crushed iron ore is mixed with some of the generated acid and the resulting liquid added to the cell. Following this you get a closed-loop chemical process to which only fresh iron ore slush has to be added and electrodes swapped out for fresh ones as the build-up of iron becomes sufficiently thick. In addition to supplying the cell with electricity, naturally, though you can even invert the cell and use it as a chemical battery akin to a lead-acid one if that’s more your thing.

Continue reading “Using Electrolysis For More Than Just Generating Hydrogen”

Connecting Your Car To Home Assistant

With how much time many of us spend in our cars, it makes perfect sense to consider them a second home. Yet even if that’s not the case, there are still good reasons to connect a car to one’s smart home solution like Home Assistant, such as to keep track of certain parameters for easy monitoring and reminders. This is what [The Stock Pot] channel recently demonstrated using a widget that connects to the OBD-II port inside the car, as not every car comes with its own app yet.

The used dongle is the ESP32-S3-based WiCAN from Australian company MeatPi. This device runs the open source WiCAN firmware. After plugging the dongle into the OBD-II port of the car, the device powers on and can be configured via Wi-Fi like any other smart device these days. After that it’s just another Wi-Fi device on the network.

Since each car’s ECU will represent data differently, you need a car-specific configuration, which can take some tweaking. The idea of integrating with Home Assistant is directly supported by MeatPi, with a handy documentation page. Of course [The Stock Pot] shared their configuration if you want to feel inspired. Among the parameters monitored you get things like fuel level, days to service and coolant temperature.

Although you could make the argument that it mostly saves you from having to waddle over to the car to check the data there, being able to remotely access the OBD-II port of a car does seem rather practical even outside of home automation concepts, such as gathering performance statistics and early failure warnings, especially for aspects like tire pressure and unhappy engine or BEV battery conditions that can quickly go from an inconvenience to very expensive.

Continue reading “Connecting Your Car To Home Assistant”

Ways To Embed Magnets In 3D Prints And Not Ruin Printers

Adding magnets to a 3D print can be very useful in a design, but there are some things that can trip you up if you’re not aware of them. In a recent video by [Lost in Tech] some of the essentials are covered, including why you shouldn’t get magnets near most extruder nozzles or the printing bed.

The easiest method is of course to add magnets in after printing, using friction fit with or without ribs, or with a dab of glue. Here making sure that the magnet stays in place is the trick, as you do not want the magnet to get lost or end up in the tummy of a curious pet or toddler.

The magnetic pattern on an FDM printer's magnetic bed. (Credit: Lost in Tech, YouTube)
The magnetic pattern on an FDM printer’s magnetic bed.

Things get spicy when you’re talking about adding magnets during the printing process, as some extruders are made of a ferromagnetic material and thus a magnet will happily stick to said nozzle if it’s not pure brass or similar. As seen in the video even some purported ‘brass’ nozzles aren’t pure enough to not be significantly ferromagnetic.

Another issue is that of heat, which is something that magnets generally do not like much. Using magnets like you’d use heat inserts for bolts is a recipe for disaster, as the heat from a soldering iron will demagnetize the magnet, which for the typical magnet is less than 200°C. At least this should mean that the magnet stuck to your extruder nozzle will eventually fall off by itself after it demagnetizes.

With the bed of the typical FDM printer these days you’re talking about magnetically attached plates, with the underlying heated bed using a Halbach array configuration as is typical of flat magnets, yet with the gotcha that these aren’t typically real Halbach arrays, but knock-offs with simply alternating north-south pole magnets. As it turns out, these types of magnetic arrays can be disturbed by another magnet, such as a powerful neodymium magnet near said printing bed, flipping polarity in a way that cannot be easily undone.

You can still install magnets during printing, but it’s recommended to use something like side-insertion, where the extruder nozzle cannot pull out a magnet. Regardless of your approach, it’s good to know of the risks with ferromagnetic nozzles, the magnetic bed and treating magnets like they’re just heat inserts. While you can get higher-temperature magnets, many of the same issues still remain here.

Continue reading “Ways To Embed Magnets In 3D Prints And Not Ruin Printers”

Fixing A Nintendo Game Boy Clone That Runs Too Fast

There’s no shortage of cloned Nintendo hardware out there, and most of it is pretty poor. A few are actually pretty interesting though, such as the GB Boy by Gangfeng, which takes real cartridges and thus in many ways should provide the original Game Boy Pocket experience with modern hardware. But as you might imagine, even the best of the clones comes with various technical issues at no additional charge — with this particular unit having a habit of running the game too fast. It’s an issue that [Sharopolis] addresses in a recent video with a partial fix.

As can be seen in the demonstration, it runs games just too fast to make it very usable or fun, hence why it sat in a drawer for a few years after purchasing off AliExpress. This raises the question of what’s wrong with these units, as others report similar issues with this and other ‘GB Boy’ variants.

Fortunately the unit is easy to open, revealing the PCB with a couple of chips on it, one marked KF2001 being the brains of the operation alongside two memory chips. The crystal resonator marked X1 for the main IC is rated for 5 MHz, whereas a quick look inside the Game Boy Pocket shows that its crystal resonator runs at 4.1943 MHz, which is a bit of a difference.

Because of how buying components and pricing works, [Sharopolis] ended up with a reel of 100 of replacement resonators with the right parameters for a drop-in replacement. After swapping the resonator, the GB Boy now does indeed run games at the right speed, but a new issue has now cropped up in the form of flicker on the display.

In the comments it’s suggested that replacing the cheap capacitors on the GB Boy’s board can help here, but it highlights just how these clone systems keep managing to snatch defeat from the jaws of victory by pairing what looks to be a pretty good IC with either the wrong or sub-par components.

Continue reading “Fixing A Nintendo Game Boy Clone That Runs Too Fast”