NES Annoyance Timer Makes No Friends At Your Work

mario-annoyance-timer

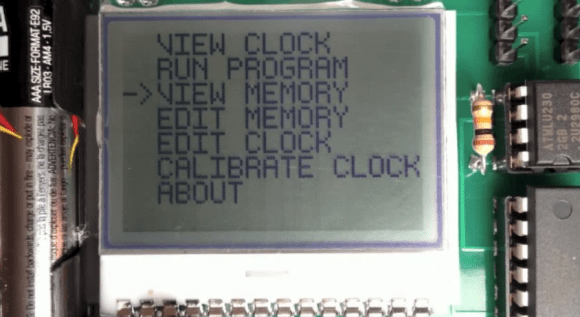
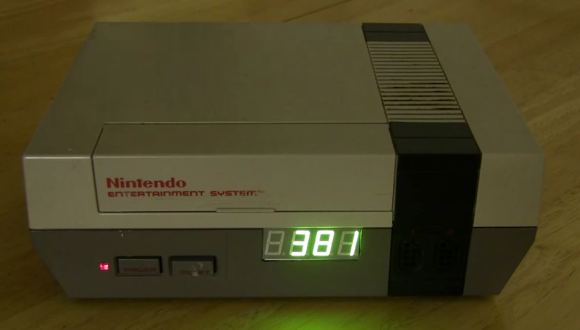
Still trying to solidify that reputation as the office Grinch? This project will let everyone know you’re a complete jerk in no time. It’s called the 8-bit Annoying Person Remover. It detects when someone enters your office at which point it starts to play the Super Mario Bros. theme song while the display counts down 400 seconds. Just like in the game the music gets faster at the end and when it stops they know it’s time to get the heck out.

The hardware inside isn’t too complicated. An Arduino and a Wave shield do most of the work. The song played is stored on an SD card and can easily be changed. There’s a speaker mounted under the top heat vent of the enclosure. The device defaults to displaying the time of day, but monitors a motion sensor on one side to detect when someone comes through the door. This also works when someone leaves, cutting off the music and resetting the display. Don’t miss a video of it in action after the break.

It’s as if this was made specifically for the Comic Book Guy

Continue reading “NES Annoyance Timer Makes No Friends At Your Work”

Viscerally Pleasing Electromechanical Doorbell

steam-punk-doorbell

Sure, we could just slap the steam-punk label on this doorbell hack, but we think that cheapens it. The rig uses a combination of mercury switch and creative mechanics to form a doorbell. And we think it goes beyond aesthetics to a statement of who you are starting with the front door of your house. No wonder [Nick Normal] has moved it along with him from home to home over the years.

The portion to the right is the ringer itself. Pulling on the lever moves the chain through an eyelet to affect the mercury switch mounted above. That switch completes the circuit which drives the motor on the “bell” unit. We use quotes because instead of ringing a bell it’s striking the large valve control wheel which looks like it came straight from the same industrial plant where The Joker took his unfortunate fall into a vat of acid.

This certainly gives you something to aspire to. And if you think you’ve already achieved a doorbell setup on similarly-geeky footing why haven’t you tipped us off about it?

SparkFun Takes Their Educational Show On The Road

sparkfun-national-education-tour

They’ve bought an RV and are headed for your state with buckets full of hobby electronic hardware. It’s SparkFun’s National Education tour and if you want them to host a workshop for kids in your area now’s the time to sign up!

It’s no stretch to say that our everyday lives are tightly bound with technology. Chances are every one of the kids in this picture will walk around with an embedded system in their pockets by the time they hit middle school if not earlier (seriously, many of them have the newest generation of high-end smart phones). The sad fact is that nearly 100% will never have any idea how the hardware in those devices functions. And that’s where we think this program really shines.

SparkFun is scheduling 50 stops where $1000 of the cost is subsidized. The team will work with each school/organization to come up with an appropriate workshop for the age of the students and their base knowledge on the topic. Hopefully this will inspire a new generation of hardware hackers who will eventually contribute to using technology to solve world issues. Check out their promo clip after the jump.

We mentioned subsidized visits. The program still costs $1500 and will go up to $2500 after the first 50 stops. But the hardware used in the workshop stays with the kids. And we hope that the $37.50-$125/head price tag will be seen as a worthwhile investment in getting kids interested in more than just entertaining themselves with the social medial offerings running on the hardware.

Continue reading “SparkFun Takes Their Educational Show On The Road”

Digging Deep Into How The 8085 Processor’s Registers Were Designed

Hardware design enthusiasts should already be salivating just looking at this image. But [Ken Shirriff’s] write-up on how the 8085 processor’s registers were designed will put you in silicon reverse-engineering heaven. He manages to get to the bottom of the tricks the designers used to make register access as efficient as possible, like routing some through the ALU on their path elsewhere.

We’re certainly not experts in studying dies like the one seen above. Luckily [Ken] does a great job of zooming in on important parts, then dissecting how they work by representing the silicone image as a functional flow chart. One of the parts which we found most interesting is the WZ temporary registers. These are a set of internal registers that are not accessible to the programmer. They’re only used internally by the chip. They act as temporary storage for multiple operand functions, and also hold register addresses for a handful of instructions (JMP, CALL, RST, etc.).

If you’re more interested in how images of these chips are attained you should do some searching on Hackaday. Just last week we featured one such project in a links post.

[via Reddit]

Programmable Computer Built From A Humble ATtiny84

attiny84-computer

Here’s a way to play around with simple computing concepts without going too crazy with the hardware side of things. [John Eisenmann] calls it the DUO tiny. It’s a programmable computer based around the ATtiny84. He wrote the operating system himself, building in a set of commands that make it quite functional, but allow the user to manipulate or even write the programs using the four button interface. Editing and running programs (which include some games) is demonstrated in the clip after the break.

The three major components used in the system are the ATtiny84, and EEPROM chip with 64 KB capacity to hold the programs, and the 102×64 pixel LCD screen seen above. The project began on a breadboard, but as he brought each part into being it transitioned to a strip-board prototype and finally this fab-house version.

Continue reading “Programmable Computer Built From A Humble ATtiny84”

Audiobook Player Used Only NFC Tags For Control

no-button-nfc-audiobook-reader

[Martynas Mickevičius] has a Grandmother who is visually impaired. She enjoys listening to audiobooks and has been doing so using a DVD player for quite some time. The problem is that there is no way for her to save her position in between listening session. He set out to help by building a dedicated audiobook reader that doesn’t have any buttons.

The project was inspired by a one-button reader we featured back in November. Like that project, [Martynas] chose to use the inexpensive, yet powerful Raspberry Pi. The main difference comes in the control method. He’s using an NFC tag reader, which is mounted in the top portion of the RPi case. The image above shows the rig during prototyping, but his final version is all bundled up in the pink enclosure and only needs the power and audio cables connected to it. See for yourself in the demo after the jump.

Each book has its own NFC tag. When she’s done reading she can simply cut the power and it will resume in the same place the next time it is plugged in. The tag setup is a vast improvement since it allows an entire library to be stored on the SD card and chosen using a different tag. With this hardware in place it should be trivial to code extensions to the system, like a script that uses text-to-speech to announce which book is being played before playback starts.

Continue reading “Audiobook Player Used Only NFC Tags For Control”

[Fran’s] PCB Etching Techniques

frantronics-pcb-tutorials

We think that anyone who’s done at-home PCB fabrication will appreciate the tidiness that [Fran] maintains throughout her etching process. She recently posted a three-part video tutorial which showcases her techniques. As you can see in the screenshot above, her habits reek of top-notch laboratory skills.

Regular readers can probably guess what circuit she’s etching. It’s the test boards for her LVDC reverse engineering. She is using the toner transfer method, but in a bit different way than most home-etchers do. She uses the blue transfer paper made for the job, but before transferring it to the copper clad she uses a light box (kind of like the X-ray film viewer at the doctor’s office) to inspect for any gaps where toner did not adhere. From there she uses a heat press to apply the resist. This is a heck of a lot easier than using a clothes iron, but of course you’ve got to have one of these things on hand to do it this way.

The second part of the tutorial is embedded after the break. We chose this segment because it shows off how [Fran] built her own chemical hood. It’s a clear plastic storage container lying upside down. A work window has been cut out of the front side, and a 4-inch exhaust hose added to the top. [Fran’s] lab has a high volume low velocity fan to which it connects to whisk the fumes outside.

Continue reading “[Fran’s] PCB Etching Techniques”