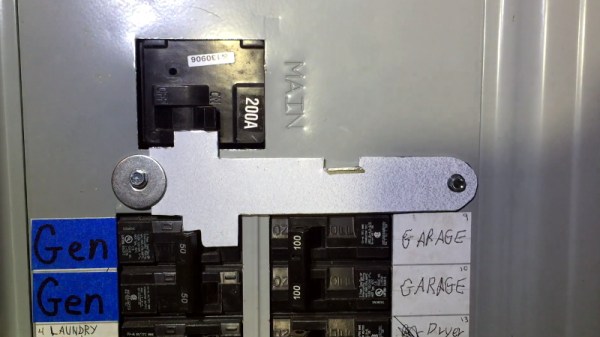
If you connect a generator to your home’s main electrical panel when the power goes out, you need to make sure the main breaker is shut off. Otherwise, when the power comes back on, you (or the linemen) are going to have a bad time. There are commercial interlock plates which physically prevent the generator and main breakers from being switched on at the same time, but since they tend to be expensive, [HowToLou] decided to make one himself.
The hardest part of this project is designing the template. It needs to be carefully shaped so its resting position prevents the generator’s breaker from being switched on under normal circumstances, but once the main is turned off and out of the way, you should be able to lift it up and have the clearance to flip the lower breaker. Spending some quality time at the breaker box with tape and a few pieces of cardboard is going to be the easiest way of finding the proper shape.
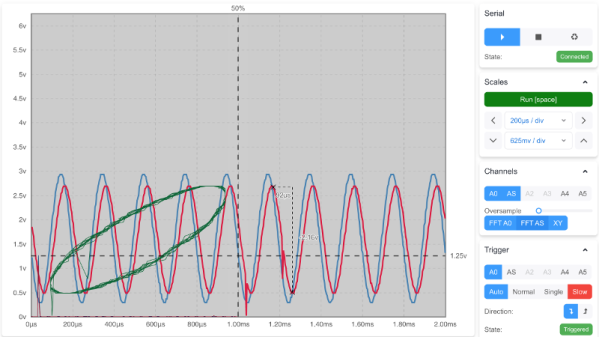
A bench oscilloscope is one of the most invaluable tools in the hardware hacker’s arsenal, but even the slimmest digital models are a bit large to be part of your everyday electronic carry. Sure you could throw one of those cheap pocket scopes in your bag, but what if there was an even easier way to take a peek at a few signals while you’re on the go?
For those who roam, the Arduino-web-oscilloscope project created by [David Buezas] is worth a close look. Using the Web Serial API built into recent versions of Google’s Chrome browser, this project allows you to pop open a software oscilloscope without installing anything locally. Whether it’s a public computer or that cheap Chromebook you keep around for emergencies, a valuable tool is just a few clicks away.
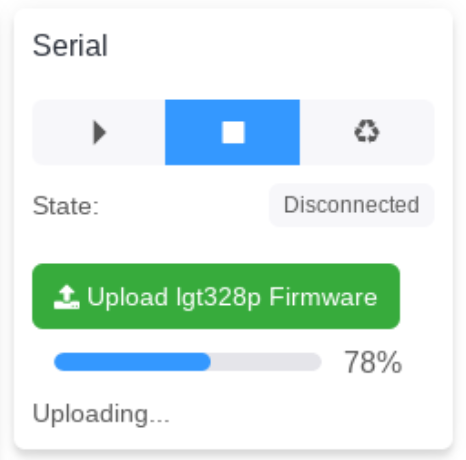
Flashing the MCU from the web interface.
Of course, there has to be some hardware involved. Despite what you might think given the name of the project, the code currently only supports the Logic Green LGT8F328P microcontroller. This cheap ATmega328P clone not only runs at 32 Mhz but according to [David], many operations can be done in fewer clock cycles than on the original 328P. In short it’s fast, and fast is good if you want more samples.
One of the best parts about this project is that a function to flash the firmware to the LGT8F328P is built right in the web interface. With the oscilloscope running in the browser, you just need to plug in a blank board, click the button to flash it, and start taking measurements. You could outfit a whole classroom or hackerspace with basic oscilloscopes in minutes, with a per-seat cost of just a few bucks.
Now as you might expect, there are some pretty hard limits on what you can realistically measure with this setup. For one thing, the board can’t handle anything higher than 5 volts. Even the cheapest oscilloscope kit is still going to be an upgrade, but the fact you can spin this up almost anywhere for the cost of a cheap MCU board makes it hard to complain about the results.
Controlling most desktop 3D printers is as easy as sending them G-code commands over a serial connection. As you might expect, it takes a relatively quick machine to fire off the commands fast enough for a good-quality print. But what if you weren’t so picky? If speed isn’t a concern, what’s the practical limit on the type of computer you could use?
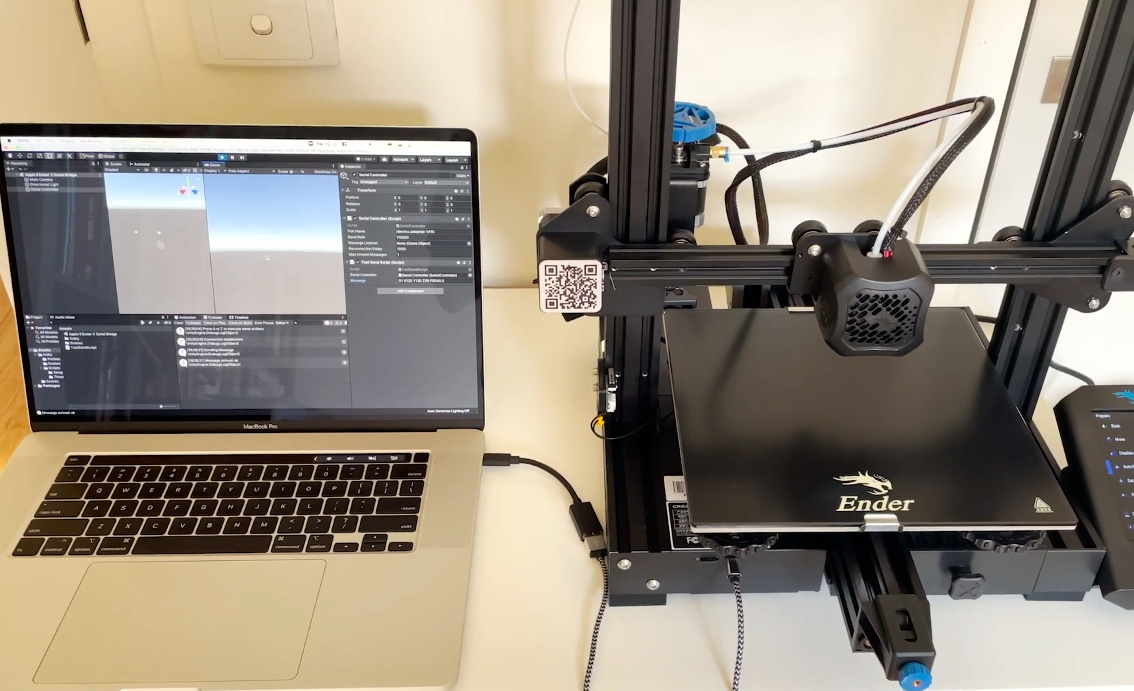
In an effort to answer that question, [Max Piantoni] set out to control his Ender 3 printer with an authentic Apple IIc. Things were made a bit easier by the fact that he really only wanted to use the printer as a 2D plotter, so he could ignore the third dimension in his code. All he needed to do was come up with a BASIC program that let him create some simple geometric artwork on the Apple and convert it into commands that could be sent out over the computer’s serial port.
Unity controlling the Ender 3
Unfortunately, [Max] ran into something of a language barrier. While the Apple had no problem generating G-code the Ender’s controller would understand, both devices couldn’t agree on a data rate that worked for both of them. The 3D printer likes to zip along at 115,200 baud, while the Apple was plodding ahead at 300. Clearly, something would have to stand in as an interpreter.
The solution [Max] came up with certainly wouldn’t be our first choice, but there’s something to be said for working with what you know. He quickly whipped up a program in Unity on his Macbook that would accept incoming commands from the Apple II at 300 baud, build up a healthy buffer, and then send them off to the Ender 3. As you can see in the video after the break, this Mac-in-the-middle approach got these unlikely friends talking at last.
We’re reminded of a project from a few years back that aimed to build a fully functional 3D printer with 1980s technology. It was to be controlled by a Commodore PET from the 1980s, which also struggled to communicate quickly enough with the printer’s electronics. Bringing a modern laptop into the mix is probably cheating a bit, but at least it shows the concept is sound.
On February 18th, the Perseverance rover safely touched down on the Martian surface. In the coming days and weeks, the wide array of instruments and scientific payloads tucked aboard the robotic explorer will spring to life; allowing us to learn more about the Red Planet. With a little luck, it may even bring us closer to determining if Mars once harbored life as we know it.
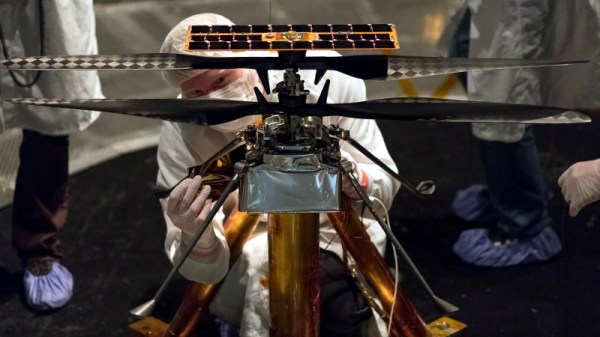
Among all of the pieces of equipment aboard the rover, one of the most intriguing must certainly be Ingenuity. This small helicopter will become the first true aircraft to take off and fly on another planet, and in a recent interview with IEEE Spectrum, operations lead [Tim Canham] shared some fascinating details about the vehicle and some of the unorthodox decisions that went into its design.
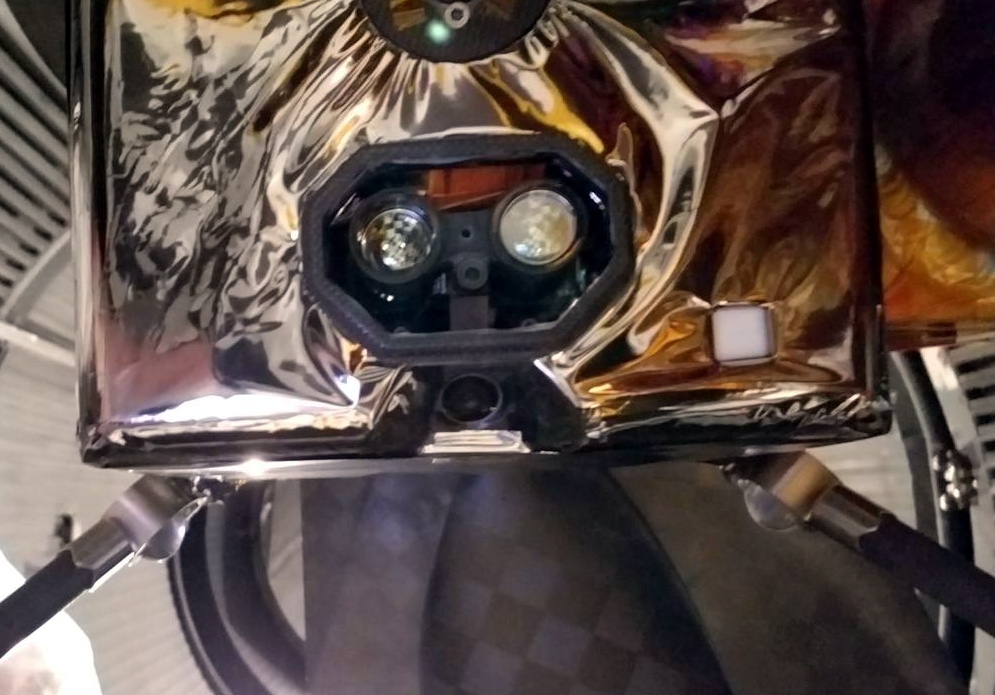
Ingenuity’s downward facing sensors.
[Tim] explains that, as a technology demonstrator, the team was allowed to take far more risks in developing Ingenuity than they would have been able to otherwise. Rather than sticking with legacy hardware and software, they were free to explore newer and less proven technology.
That included off-the-shelf consumer components, such as a laser altimeter purchased from SparkFun. It also means that the computational power packed into Ingenuity far exceeds that of Perseverance itself, though how well the helicopter’s smartphone-class Snapdragon 801 processor will handle the harsh Martian environment is yet to be seen.
On the software side, we also learn that Ingenuity is making extensive use of open source code. Not only is the onboard computer running Linux, but the vehicle is being controlled by an Apache 2.0 licensed framework developed by NASA’s Jet Propulsion Laboratory for CubeSats and other small spacecraft. The project is available on GitHub for anyone who wants it, and according to the changelog, the fixes and improvements required for the “Mars Helicopter Project” were merged in a few releases ago.
The fact that code currently ticking away on the surface of Mars can be downloaded and implemented into your own DIY project is a revelation that’s not lost on [Tim]. “It’s kind of an open-source victory because we’re flying an open-source operating system and an open-source flight software framework and flying commercial parts that you can buy off the shelf if you wanted to do this yourself someday.”
Of course, it took a whole lot more than some Python libraries and a handful of sensors from SparkFun to design and build the first space-going helicopter. But the fact that even a small slice of the technology inside of a project like Ingenuity is now available to the average hacker and maker is a huge step towards democratizing scientific research here on Earth.
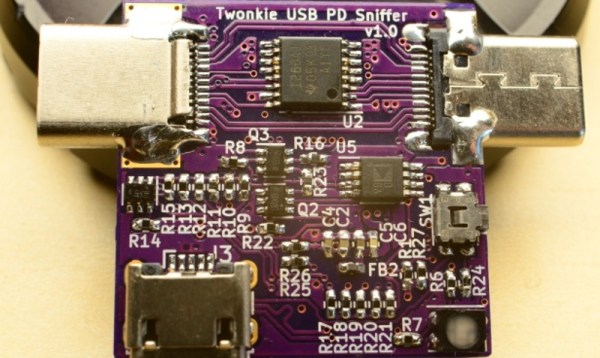
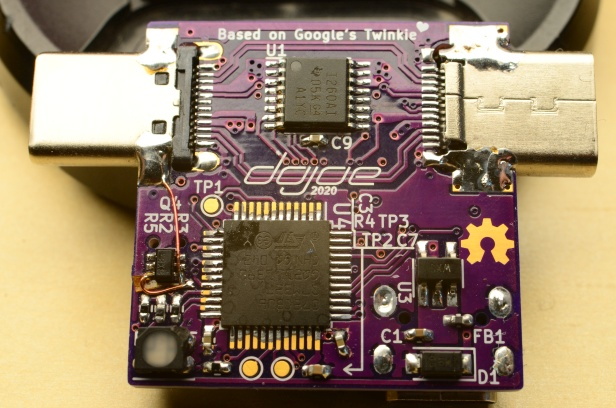
If you want to hack around with the communication protocol that USB Power Delivery devices use to negotiate their power requirements with the upstream source, a tool like Google’s Twinkie really helps. With it you can sniff data off the line, analyze it, and even inject your own packets. Luckily for us, the search giant made the device open source so we can all have one of our own.
Unfortunately, as [dojoe] found out, the Twinkie isn’t particularly well suited for small-scale hobbyist manufacturing. So he came up with a revised design he calls Twonkie that replaces the six layer PCB with a much more reasonable four layer version that can be manufactured cheaply by OSHPark, and swaps out the BGA components with QFP alternatives you can hand solder.
That said, it’s still likely to be a challenging build for the home gamer. There’s quite a few 0402 passives on there, and while those are doable with an iron, it can certainly be tricky. To take some pressure off, [dojoe] says he tried to optimize the board layout as much as possible for hand assembly. He was even able to avoid needing hot air by straddling the PCB with USB-C mounts intended for vertical applications.
Given the current chip shortage, [dojoe] says the biggest problem might actually getting your hands on the STM32F072CB microcontroller at the Twonkie’s core. To that end, the board supports TQFP44 and QFN44 footprints, and you can even use a STM32F072C8 at the cost of some functionality. With a bit of luck, hopefully you can find a chip that will work in the parts bin.
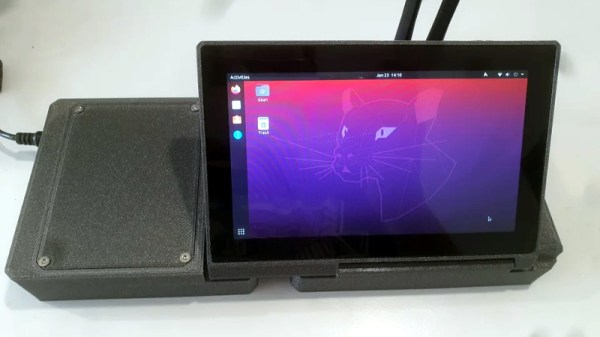
There are few hard and fast rules in the world of custom cyberdecks, but many of these bespoke machines do share a certain level of commonality. They generally use a low-power ARM board such as the Raspberry Pi that doesn’t consume much power or require any exotic thermal management, and a large mechanical keyboard is almost a given. But at a glance, it’s clear that [Daan Gerits] wasn’t concerned with the status quo when designing the Sypherdeck.
Now to be fair, dropping the ARM single-board computer for x86 isn’t completely unheard of. But those builds tend to be considerably bulkier than the Sypherdeck. The secret here seems to be that the 3D printed enclosure doesn’t hold much else than the LattePanda and a seven inch LCD touch screen. The hatch on the side covers the rear of the power, USB, and HDMI bulkhead connectors, but it looks like there’s enough room in there to squeeze in a bit of custom electronics should you wish. There’s no obvious place to install any batteries, so if you wanted to take the show on the road, you’ll need to use an external pack.
While not a Cabinet position, the NASA Administrator is nominated by the president of the United States and tasked with enacting their overall space policy. As such, a new occupant in the White House has historically resulted in a different long-term directive for the agency. Some presidents have wanted bold programs of exploration, while others have directed NASA to follow a more reserved and economical path, with the largest shifts traditionally happening when the administration changes hands between the parties.
So it’s no surprise that the fate of Artemis, a bold program initiated by the previous administration that aims to establish a sustainable human presence on the Moon, has been considered uncertain since the November election. But the recent announcement that SpaceX has been awarded a $331.8 million contract to launch the first two modules of the lunar Gateway station, an orbital outpost that will serve as a rallying point for astronauts coming and going to the Moon’s surface, should help quell some concerns. While the components still aren’t slated to fly until 2024 at the earliest, it’s a step in the right direction and strong indicator that the new administration plans on seeing Artemis through.