Pano Logic FGPA Hacking Just Got Easier

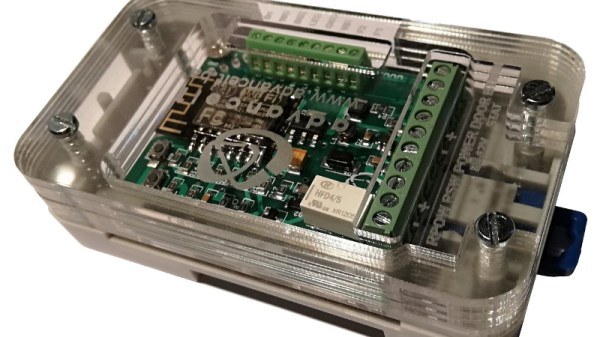
When Pano Logic went out of business in 2012, their line of unique FPGA-based thin clients suddenly became a burden that IT departments didn’t want anything to do with. New and used units flooded the second-hand market, and for a while you could pick these interesting gadgets up for not much more than the cost of shipping. Thanks to considerable interest from the hacking community the prices for these boxes have climbed a bit on eBay, but they’re still a great way to get your feet wet with FPGA hacking.

Especially now, as Pano Logic fanatic [Skip Hansen] has figured out how to flash a new firmware on them without having to crack open the case and break out the JTAG or SPI programmer. For the seasoned hardware hacker that might not seem like a big deal, but if you’re new to the game or just more interested in the software side of the equation, this trick makes things considerably more accessible. Having an external programmer is still a good idea if things go south, but if you’re just looking to flash some demos and see what the hardware is capable of this is a huge quality of life improvement.

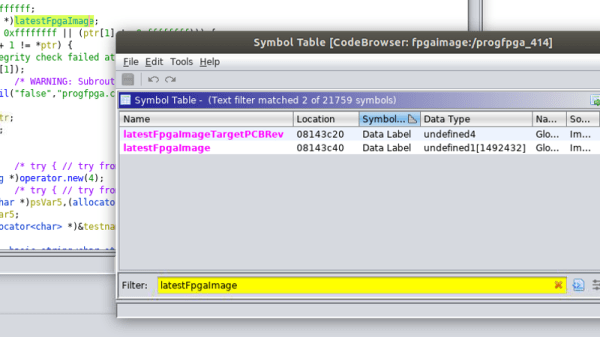
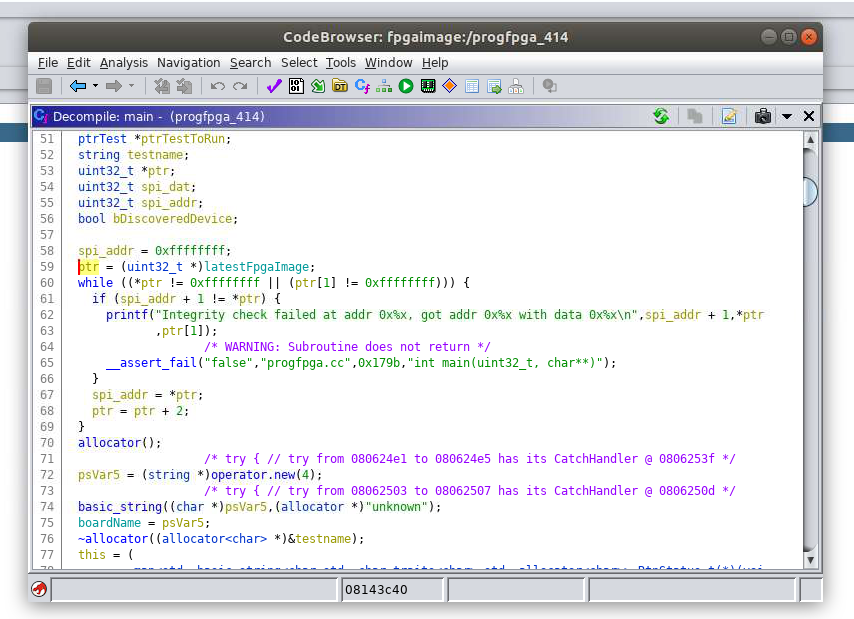
Even if you aren’t interested in fiddling with the orphaned products of a defunct Bay Area startup, the write-up is a fascinating look at practical software reverse engineering. As it turns out, [Skip] didn’t create this new firmware update tool from scratch. He actually opened up the official Linux update utility from Pano Logic in Ghidra and was able to figure out where the firmware image actually lived inside the program. He then wrote his own tool in C which will patch the update tool with a user-supplied firmware image.

After patching, all you need to do is follow the official update procedure, which Pano Logic helpfully documented in the YouTube video after the break. [Skip] mentions he didn’t find any clear license information in the official software he was fiddling with, and of course with the company out of business it’s not too likely anyone is going to come knocking down his door anyway. Still, he says the downloads for the Pano Logic updater are still floating around on the tubes out there for you to find, so he’s not distributing anyone’s code but his own in this project.

There are a number of hackers out there working to turn the Pano Logic thin clients into useful general purpose FPGA platforms, such as [Tom Verbeure], who’s incredible graphics demos got [Skip] inspired to grab his own unit off eBay. With support for USB and SDRAM added by [Wenting Zhang] while getting his FPGA GBA emulator running on the hardware, it seems there’s never been a better time to get on the Pano Logic train.

Continue reading “Pano Logic FGPA Hacking Just Got Easier”

The Drones And Robots That Helped Save Notre Dame

In the era of social media, events such as the fire at Notre Dame cathedral are experienced by a global audience in real-time. From New York to Tokyo, millions of people were glued to their smartphones and computers, waiting for the latest update from media outlets and even individuals who were on the ground documenting the fearsome blaze. For twelve grueling hours, the fate of the 850 year old Parisian icon hung in the balance, and for a time it looked like the worst was inevitable.

The fires have been fully extinguished, the smoke has cleared, and in the light of day we now know that the heroic acts of the emergency response teams managed to avert complete disaster. While the damage to the cathedral is severe, the structure itself and much of the priceless art inside still remain. It’s far too early to know for sure how much the cleanup and repair of the cathedral will cost, but even the most optimistic of estimates are already in the hundreds of millions of dollars. With a structure this old, it’s likely that reconstruction will be slowed by the fact that construction techniques which have become antiquated in the intervening centuries will need to be revisited by conservators. But the people of France will not be deterred, and President Emmanuel Macron has already vowed his country will rebuild the cathedral within five years.

It’s impossible to overstate the importance of the men and women who risked their lives to save one of France’s most beloved monuments. They deserve all the praise from a grateful nation, and indeed, world. But fighting side by side with them were cutting-edge pieces of technology, some of which were pushed into service at a moments notice. These machines helped guide the firefighters in their battle with the inferno, and stood in when the risk to human life was too great. At the end of the day, it was man and not machine that triumphed over nature’s fury; but without the help of modern technology the toll could have been far higher.

Continue reading “The Drones And Robots That Helped Save Notre Dame”

Teardown: Nihon Kenko Magnetic Wave Tester

You never know what kind of wonders you’ll find on eBay, especially when you have a bunch of alerts configured to go off when weird electronic devices pop up. You may even find yourself bidding on something despite not being entirely sure what it is. Perhaps you’re a collector of unusual gadgets, or maybe it’s because you’ve committed to doing monthly teardowns for the hacker blog you work for. In any event, you sometimes find yourself in possession of an oddball device that requires closer inspection.

Case in point, this “Magnetic Wave Tester” from everyone’s favorite purveyor of high-end electronics, Nihon Kenko Zoushin Kenkyukai Corporation. The eBay listing said the device came from an estate sale and the seller didn’t know much about it, but with just a visual inspection we can make some educated guesses. When a strong enough magnetic field is present, the top section on the device will presumably blink or light up. As it has no obvious method of sensitivity adjustment or even a display to show specific values, it appears the unit must operate like an electromagnetic canary in a coal mine: if it goes off, assume the worst.

If you’re wondering what the possible use for such a gadget is, you’re not the only one. I wasn’t able to find much information about this device online, but the few mentions I found didn’t exactly fill me with confidence. It seems two groups of people are interested in this type of “Magnetic Wave Tester”: people who believe strong magnetic fields have some homeopathic properties, or those who think it will allow them to converse with ghosts. In both cases, these aren’t the kind of users who want to see a microtesla readout; they want a bright blinking light to show their friends.

So without further ado, let’s align our chakras, consult with the spirits, and see what your money gets you when you purchase a pocket-sized hokum detector.

Continue reading “Teardown: Nihon Kenko Magnetic Wave Tester”

A Robust ESP8266 RFID Access Control System

By now we’ve seen plenty of projects that use an ESP8266 as a form of rudimentary access control: tap a button on your smartphone, and the door to your apartment unlocks. With the power and flexibility of the ESP, it’s a very easy project to pull off with minimal additional hardware. But what about if you want to get a little more serious, and need to support many users?

Rather than reinvent the wheel, you might want to check out the extremely impressive ESP-RFID project. It’s still based on the ESP8266 we all know and love, but it combines the diminutive WiFi-enabled microcontroller with a nice custom PCB and some exceptionally slick software to create a very professional access control system without breaking the bank. As the name implies, the system is geared towards RFID authentication and supports readers such as the MFRC522, PN532 RFID, or RDM6300. Add in a stack of Mifare Classic 1KB cards, and your hackerspace is well on the way to getting a new door control system.

The official hardware for ESP-RFID can be purchased through Tindie with or without an installed ESP-12F module, but as it’s a fully open source project, you’re also free to build your own version if you’d like. In either event, the board allows you to easily connect the ESP up to your RFID reader of choice, as well as door sensors and of course the door locks themselves.

On the software side of things, ESP-RFID should be able to handle about 1000 unique users and their RFID cards before the relatively limited RAM and storage of the ESP catches up with it. But if you’ve got that many people coming and going in your hackerspace, it might be time to update your systems to begin with. Incidentally, the project makes no guarantees about the security of the ESP-RFID code, and says that the system shouldn’t be used for secure locations. That said, you can run ESP-RFID without an Internet connection to reduce your attack surface, at the cost of losing NTP time synchronization.

If you’re not managing a few hundred users and their RFID cards, one of the more simplistic ESP8266 door locks might be more your speed. We’ve also seen similar tricks pulled off with the Particle Photon, in case you’ve got one of those rattling around the parts bin.

Bringing A Child’s Play Kitchen To Life

Given how many adults will go out of their way to avoid spending any extended amount of time in the kitchen, it’s pretty amazing how much children love playing in their miniature versions. Especially since they tend to be pretty simple: usually they’re little more than different sized boxes made out of MDF to represent the refrigerator, oven, and microwave. Of course, some kids are fortunate enough to have hackers and makers for parents.

[Brian Lough] wanted to get his two year old daughter her own play kitchen, but wasn’t terribly impressed with anything on the market. So he decided to start with the IKEA Duktig and add in his own personal touches to turn the stark white playset into something that would really get his daughter’s imagination going. With the liberal application of RGB LEDs and microcontrollers, her kitchen is sure to be envy of the sandbox.

Being the class act that he is, [Brian] starts his write-up acknowledging the various IKEA Duktig hacks and modifications that served as inspiration for his own build. Most of the prior art out there relates to making the microwave and oven a bit more exciting with the addition of lights and sounds, which ultimately ended up being the way he approached his daughter’s version as well.

For the oven, [Brian] decided to add some big arcade buttons over the door which would change the color of the RGB LEDs inside. He thought this association would be a good way to help his daughter learn her colors, since she’ll be able to see the oven change color when she presses the corresponding button. He also added a knob to control the intensity of the light, meant to be analogous to the temperature control in a real oven.

The modifications to the microwave are a bit more extensive, including a “timer” made out of a TM1637 LED display in a 3D printed panel complete with a buzzer to indicate when the plastic food has been thoroughly illuminated. [Brian] even made it so the LEDs in the NeoPixel ring light up in a spinning pattern to cast some shadows and simulate movement. He notes that the microwave was actually a bit overwhelming to his daughter at first, but after a couple months of getting used to the functions, she enjoys it as much as the oven.

While hacking a play kitchen might be new territory for him, [Brian] is no stranger to building awesome stuff. We’ve previously seen him put together a YouTube subscriber counter in the style of Tetris, and he even managed to create a gorgeous looking display out of shoelaces of all things.

Mods Keep The WaveBird Kicking In The Switch Era

Nintendo made some questionable decisions during the early 2000’s, but developing the WaveBird certainly wasn’t one of them. Years before wireless controllers were the standard on home game consoles, the WaveBird gave GameCube owners a glimpse into the future. It managed to deliver lag-free gaming without resorting to easily-blocked infrared, and had a battery life and range long enough that there was really no downside to cutting the cord aside from the lack of rumble support.

In fact, the WaveBird was such a good controller that some fans just can’t put the thing down even in 2019. [Bill Paxton] loves his so much that he decided to modify it so he could use it on Nintendo’s latest money printing machine, the Switch, without having to fiddle with any adapters. While he was at it, he decided to fix the only serious drawback of the controller and hack in some rumble motors; arguably making his re-imagined WaveBird superior in just about every way to the original.

It might be counter-intuitive, but the trick here is that [Bill] actually took the internals from a standard wired GameCube controller and fitted it all into the case for the WaveBird. That’s how he got the rumble support back, but where does the signature wireless capability come from?

For that, he took apart a “GBros. Wireless Adapter” from 8BitDo. This gadget is intended to let you use your existing GameCube controllers on the Switch wirelessly, so all he had to do was shove its PCB inside the controller and wire it directly to the pads on the controller’s board. Thankfully, the WaveBird was rather husky to begin with, so there’s enough space inside to add all the extra hardware without much fuss.

Between modifications like this and efforts to reverse engineer the controller’s wireless protocol, hackers aren’t about to let this revolutionary accessory go gently into that good night. You might see a GameCube slaughtered for a meme, but WaveBirds never die.

Continue reading “Mods Keep The WaveBird Kicking In The Switch Era”

Building An RC Air Boat From Garbage

What do you get when you combine an old optical drive, some empty soda bottles, and a microcontroller? Well…nothing, really. That’s still just a pile of rubbish. But if you add in a battery, an RC receiver, and some motors, you’re getting dangerously close to a fun little toy to kick around the pond as [Antonio Rizzo] recently demonstrated.

A couple of plastic bottles lashed together make up the hull of the boat, and [Antonio] has used the internal frame of an old optical drive bent at a 90 degree angle to hold the two small DC motors. In a particularly nice touch, the drive’s rubber anti-vibration bushings are reused as motor mounts, though he does admit it was just dumb luck that the motors were a perfect fit.

For the electronics, [Antonio] has paired a custom motor controller up with the uChip, a diminutive Arduino-compatible microcontroller in a narrow DIP-16 package. Wireless communication is provided by an off-the-shelf cPPM receiver such as you might see used in a small plane or quadcopter.

The whole build is powered by a common 18650 lithium-ion battery, which could also be easy enough to recover from the trash given how common they are in laptop batteries; though if you threw a new cell into this build we wouldn’t hold it against you. Everything is put into a high-tech plastic sandwich bag to provide minimum of waterproofing with the minimum of effort.

If using a commercial RC receiver and transmitter is a bit too mainstream for your tastes, you could always roll your own radio.

Continue reading “Building An RC Air Boat From Garbage”