Hackaday Podcast 011: Weird Keyboards, Salvaging LCD Screens, And Mike Interviews Ivan Of Espressif In Shanghai

With our intrepid Editor in Chief Mike Szczys off being kind of a big deal in China, Managing Editor Elliot Williams is joined by Staff Writer Tom Nardi to talk about all the hacks that were fit to print over the past week. Join us as we talk about the wide world of custom mechanical keyboards, reviving a woefully antiquated display technology, building your own RC transmitter out of stuff you have laying around the lab, and the unexpected parallels between Pepto Bismol and rocket fuel. We’ll also look at what it takes to build a robust embedded system, and see if we can’t figure out a way to draw schematics worth looking at. Plus, hang around until the end of the episode to hear Mike interview the man instrumental in getting the ESP8266 to play nice with Arduino, and now running firmware for the ESP32.

Take a look at the links below if you want to follow along, and as always, tell us what you think about this episode in the comments!

Take a look at the links below if you want to follow along, and as always, tell us what you think about this episode in the comments!

Direct download (60 MB or so.)

Continue reading “Hackaday Podcast 011: Weird Keyboards, Salvaging LCD Screens, And Mike Interviews Ivan Of Espressif In Shanghai”

First WOPR Summit Finds The Winning Move

At the climax of 1983’s “WarGames”, the War Operation Plan Response (WOPR) computer famously opines “The only winning move is not to play” when presented with a barrage of no-win scenarios depicting global thermonuclear war. While the stakes aren’t quite as high when it comes to putting on a brand new hacker convention, there’s certainly enough pitfalls that most of us would take WOPR’s advice and never even try. But for those who attended the inaugural WOPR Summit in Atlantic City, it was clear that not only did the team behind it have the tenacity to play the game, but that they managed to prove their supercomputer namesake wrong.

That’s not to say there isn’t room for improvement going forward, but it was hard not to be impressed by such a strong initial showing. The WOPR Summit organizers not only had to contend with the myriad of things that could go wrong, but they had to deal with what actually did go wrong; such as a sizable storm hitting the New Jersey coast just as the event got rolling. Yet from the attendees perspective the weekend-long event went off without a hitch, and everyone I spoke to was excited for what the future holds for this brand-new East Coast event.

It’s never easy to capture 20+ hours worth of talks, workshops, and hands-on projects into a few articles, but we do our best for the good readers of Hackaday. Below you’ll find just a few of the highlights from the first-ever WOPR Summit, but it’s nothing quite like attending one of these events in person. This far out we don’t know when and where the next WOPR Summit will take place, but you can be sure that Hackaday will be there; and so should you.

Continue reading “First WOPR Summit Finds The Winning Move”

Let Your Pi Make A Pie Chart For Your Pie

March 14th is “Pi Day”, for reasons which should be obvious to our more mathematically inclined readers. As you are not reading this post on March 14th, that must mean we’re either fashionably late to Pi Day 2019, or exceptionally early for Pi Day 2020. But in either event, we’ve got a hack for you that celebrates the day using two things we have it on good authority most hackers overindulge in: food and needless complexity.

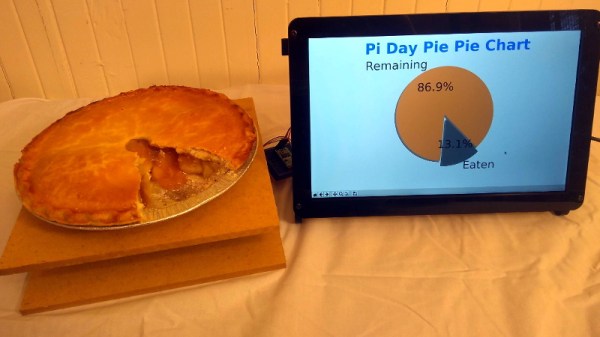
This project comes from [Mike MacHenry], and it’s just as straightforward as it looks. Put simply, he’s using a load cell connected to the Raspberry Pi to weigh an actual pie and monitor its change over time. As the pie is consumed by hungry hackers, a pie graph (what else?) is rendered on the attached screen to show you how much of the dessert is left.

One might say that this project takes a three dimensional pie and converts it to a two dimensional facsimile, but perhaps that’s over-analyzing it. In reality, it was a fun little hack [Mike] put together just because he thought it would be fun. Which is certainly enough of a motive for us. More practically though, if you’re looking for a good example for how to get a load cell talking to your non-edible Raspberry Pi, you could do worse than checking this out.

We’ve also got to give [Mike] extra credit for including the recipe and procedure for actually baking the apple pie used in the project. While we’re not 100% sure the MIT license [Mike] used is actually valid for foodstuffs, but believe it or not this isn’t the first time we’ve seen Git used in the production of baked goods.

An ESP8266 Sundial For Your Wall

Hackers absolutely love building clocks. Seriously, there are few other devices for which we’ve seen such an incredible number of variations. But while the clocks that hackers build might blink out the time in binary, or write it out in words, they generally don’t feature hands. Apparently in 2019 it’s more reasonable to read binary than know which way the “little hand” is supposed to be pointing.

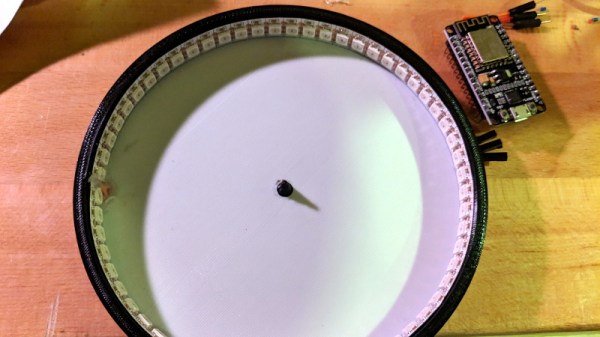
This ESP8266 powered “shadow clock” from [Dheera Venkatraman] technically keeps that tradition intact, but only just. His clock doesn’t feature physical hands, but it does use a strip of RGB LEDs to cast multi-colored shadows which serve the same function. With his clock, you don’t even have to try and figure out which hand is the big one, since they’re all the same length. Now that’s what we call progress.

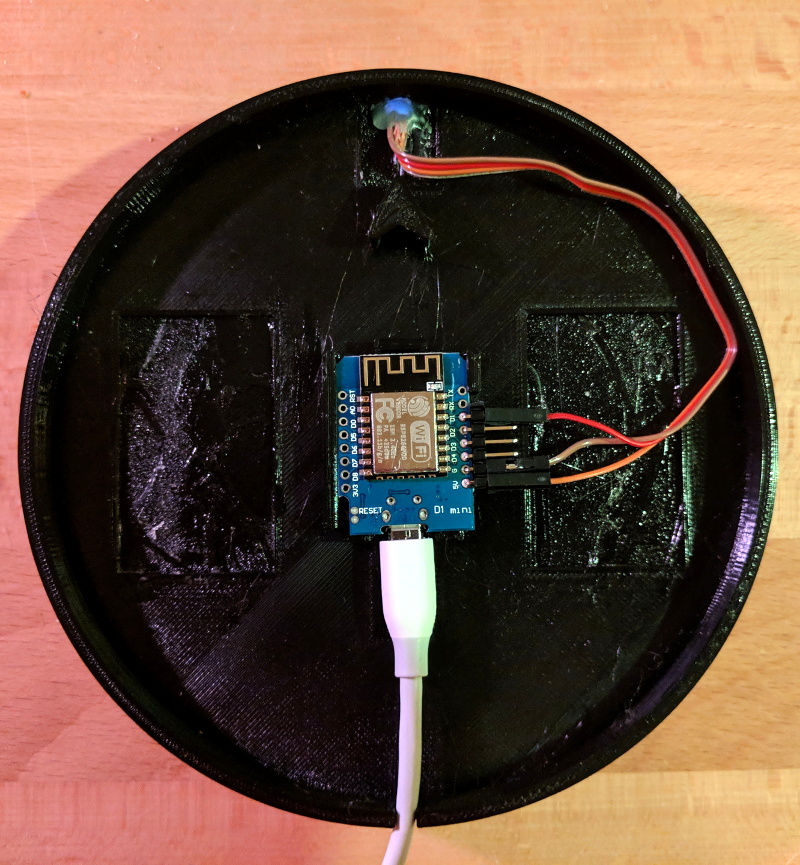
Probably the biggest surprise about this clock, beyond how legitimately good it looks hanging on the wall, is how little work it takes to build your own version. That’s because [Dheera] specifically set out to design something that was cheaper and easier to build than what he’d seen previously, and we think he delivered on that goal in a big way. All you need are the 3D printed components, an ESP8266 board, and a strip of 144 WS2812B LEDs.

The software side of the project is similarly simplistic, and all you need to do is plug in your WiFi network credentials to have the ESP pull the current time from NTP. If you were so inclined, his source code would be an excellent base on which to implement additional features such as animations at the top of the hour.

Compared to something like the Bulbdial clock from 2009, it’s incredible how simple some of these projects have become in the last decade. With the tools and components available to hackers and makers today, there’s truly never been a better time to build something amazing.

World’s Oldest Computer Festival Is This Weekend

There was a time when owning a home computer was kind of a big deal. In the days before the popularization of the Internet, so-called “computer shows” were the best way to meet with others to swap advice, information, and hardware. Of course today, things are very different. The kind of people who are building their computers just buy the parts online, and everyone else is probably using a $200 laptop from Walmart that isn’t worth spending the time or money on to upgrade.

Small sampling of the talks at TCF 2019

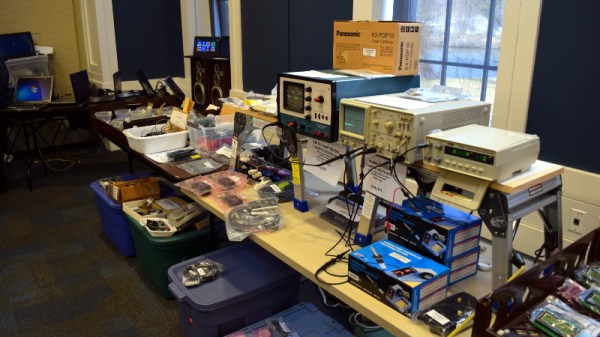
So while the Trenton Computer Festival (TCF) may have started in 1976 as a way for people to buy early computers like the Altair 8800, over the years it has morphed into something much closer to the modern idea of a “con”. Those who visit the 44th TCF on March 23rd at the College of New Jersey will likely spend most of their time at the festival attending the 40+ talks and workshops that will be happening in a span of just six hours. But anyone who’s got some cash to burn can still head over to the flea market area where they’ll be able to buy both modern and vintage hardware.

Talks run the gamut from Arduino to quantum computing, and if you don’t see something that piques your interest in this year’s program, one might wonder how you found yourself reading Hackaday in the first place. If you manage to find some spare time between all the talks, the New Jersey chapter of the The Open Organisation Of Lockpickers (TOOOL) will be there giving a hands-on lock picking class, and if you don’t mind taking the crash course, you can even get your ham radio license. All for the princely sum of just $20 at the door.

In fact, there’s so much going on at TCF that it can be somewhat overwhelming. As I found out during my visit last year, the number of simultaneous events means you’ll almost certainly have some difficult decisions to make. I’ll be making the trip out to the College of New Jersey campus again this year for TCF, and will have plenty of Hackaday stickers and buttons to give out to anyone who manages to stop me while I dash between talks.

A Classy USB Knob For The Discerning Computerist

The keyboard and mouse are great, we’re big fans. But for some tasks, such as seeking around in audio and video files, a rotary encoder is a more intuitive way to get the job done. [VincentMakes] liked the idea of having a knob he could turn to adjust his system volume or move forward and backwards through a stream in VLC, but he also wanted to be able to repeatedly enter keyboard commands with it; something commercial offerings apparently weren’t able to do.

So he decided to build his own USB knob that not only looks fantastic, but offers the features he couldn’t find anywhere else. It’s another project which proves that DIY projects don’t have to look DIY. In fact, they can often give their commercial counterparts a run for their money. But this “Infinity USB Knob” isn’t just a pretty face, it allows the user to do some very interesting things such as quickly undo and redo changes to see how they compare.

As you might imagine, the electronics for this project aren’t terribly complex. The main components are the Adafruit Trinket M0 microcontroller and the EC11 rotary encoder itself. To provide nice visual feedback he added in a NeoPixel ring, but that’s not strictly necessary if you’re trying to rig this up yourself. Though we have to say the lighting effects are a big part of what makes this build look so good.

Though certainly not the only part. The aluminum enclosure, combined with the home theater style knob on the encoder, really give the finished product a professional look. We especially like his method of drilling out the top of the case and filling in the holes with epoxy to create easy and durable LED diffusers. Something to keep in mind for your next control panel build, perhaps.

[VincentMakes] has done an excellent job of documenting the hardware and software sides of this build on Hackaday.io, and gives the reader enough information that replicating this project should be pretty straightforward for anyone who’s interested. While we’ve seen several rotary encoder peripherals for the computer in the past, we have to admit this is one of the most compelling yet from a visual and usability standpoint. If this build doesn’t make you consider adding a USB knob to your arsenal, nothing will.

Continue reading “A Classy USB Knob For The Discerning Computerist”

DIY Six Channel Arduino RC Transmitter

It’s wasn’t so long ago that RC transmitters, at least ones worth owning, were expensive pieces of gear. Even more recently than that, the idea of an RC transmitter running an open source firmware would have been considered a pipe dream. Yet today buying cheap imported transmitters and flashing a community developed firmware (if it didn’t come with it pre-installed to begin with) is common place. It’s not much of a stretch to say we’re currently in the “Golden Age” of hobby RC transmitters.

But what if even cheap hardware running customizable software isn’t enough? What if you want to take it to the next level? In that case, [Electronoobs] has an Arduino powered RC transmitter with your name on it. But this is no scrap of protoboard with a couple of cheap joysticks on it, though he has made one of those too. The goal of this build was for it to look and perform as professional as possible while remaining within the hobbyist’s capabilities. The final product probably won’t be winning any design awards, but it’s still an impressive demonstration of what the individual hacker and maker can pull off today with the incredible technology we have access to.

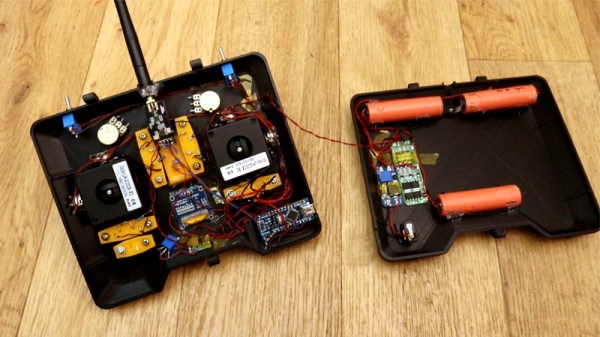
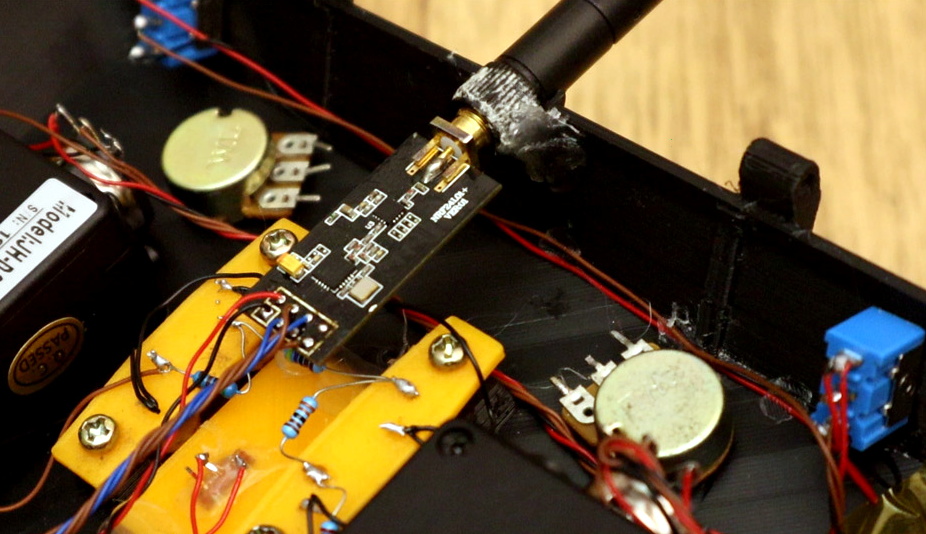
So what goes into this homebrew radio control system? Inside the back panel [Electronoobs] mounted the batteries, charging module, and the voltage regulator which steps the battery voltage down to the 3.3 V required to drive the rest of the transmitter’s electronics. On the flip side there’s an Arduino Nano, an NRF24 module, and an OLED display. Finally we have an assortment of switches, buttons, potentiometers, and two very nice looking JH-D202X-R2 joysticks for user input.

As you might have guessed, building your own transmitter means building your own receiver as well. Unfortunately you won’t be able to bind your existing RC vehicles to this radio, but since the receiver side is no more complicated than another Arduino Nano and NRF24 module, it shouldn’t be hard to adapt them if you were so inclined.

Low-cost consumer RC transmitters can be something of a mixed bag. There are some surprisingly decent options out there, but it’s not a huge surprise that hackers are interested in just spinning up their own versions either.
Continue reading “DIY Six Channel Arduino RC Transmitter”