LED “Candle” Gets The 555 Treatment

Regular readers may recall we recently covered a neat Arduino trick that allowed you to “blow out” an LED as if it was a candle. The idea was that the LED itself could be used as a rudimentary temperature sensor, and the Arduino code would turn the LED on and off when a change was detected in its forward voltage drop. You need to oversample the Arduino’s ADC to detect the few millivolt change reliably, but overall it’s pretty simple once you understand the principle.

But [Andrzej Laczewski], like many of our beloved readers, feels the Arduino and other microcontrollers can be a crutch if used exclusively. So he set out to replicate this hack with that most cherished of ICs, the 555 timer. In the video after the break, he demonstrates his “old-school” LED candle for anyone who thinks the only way to control an LED is with digitalWrite.

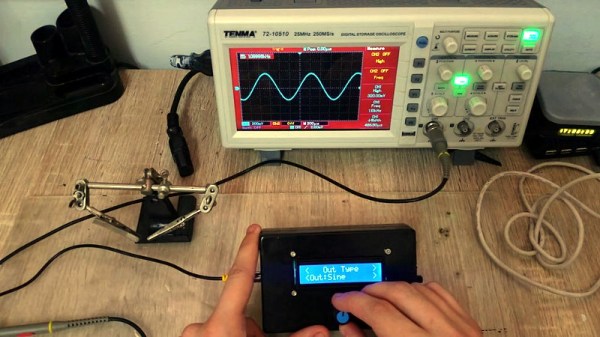
Not to say it’s easy to replicate the original Arduino project with a 555, or that it’s even practical. [Andrzej] simply wanted to show it was possible, which is something we always respect around these parts. He goes into great detail on how he developed and tested the circuit, even including oscilloscope screenshots showing how the different components work together in real-time. But the short version is that a MOSFET is used to turn the LED on and off, a comparator detects change in the LED’s voltage drop, and the 555 is used to control how long the LED stays off for.

Ever the traditionalist, [Andrzej] wrapped up this build by etching his own PCB using a variation of the classic laser toner transfer method. If this all looks a bit too much like Black Magic to you, there’s no shame in sticking with the Arduino version. At 1/20th of the parts count, and with no calibration required, who’s to say which version is “simpler”.

Continue reading “LED “Candle” Gets The 555 Treatment”

GPS Overlays Give Real Life Racing A Video Game Feel

Racing is certainly exciting for the person rocketing around the track fast enough to get the speedometer into the triple digits, and tends to be a decent thrill for the spectators if they’ve got good seats. But if you’re just watching raw race videos on YouTube from the comfort of your office chair it can be a bit difficult to appreciate. There’s a lack of context for the viewer, and it can be hard to get the same sense of speed and position that you’d have if you saw the event first hand.

In an effort to give his father’s racing videos a bit more punch, [DusteD] came up with a clever way of adding video game style overlays to the recordings. The system provides real-time speed, lap times, and even a miniature representation of the track complete with a marker to show where the action is taking place. The end result is that recordings of Dad’s exploits on the track could pass as gameplay footage from Gran Turismo (we know GT doesn’t have motorcycles, but you get the idea).

The first part of the system is the tracker itself, which consists of a GPS receiver, an Arduino Pro Micro, and an SD card module. [DusteD] powers the device with two 18650 cells in parallel, and a DC-DC boost converter to step it up to 5V. Everything is contained in a 3D printed enclosure that he designed in OpenSCAD, with the only external elements being a toggle switch, a momentary switch, and most critically, a set of LEDs.

These LEDs play into the second part of the system, the software. The blinking LEDs are positioned so they’ll get picked up by the camera, which is then used to help synchronize the data stored on the SD card with the video. [DusteD] came up with some software that will take the speed and position information from the card, and turn it into PNG files with transparent backgrounds. These are then placed on top of the video with the help of FFmpeg. It takes a little adjustment to get everything lined up properly, but as the video after the break shows the end result is very impressive.

This build reminds us of the Raspberry Pi powered GPS helmet camera we featured a few years back, and it’s interesting to see how the two projects achieved what’s essentially the same goal in different ways.

Continue reading “GPS Overlays Give Real Life Racing A Video Game Feel”

Printed It: Logitech C270 Conversion

One of the most practical applications for a home 3D printer is the ability to produce replacement parts; why wait a week for somebody to ship you a little plastic widget when you’ve got a machine that can manufacture a facsimile of it in a couple of hours? But what if your skills and passion for the smell of melting PLA push you even farther? You might move on from printing replacement parts to designing and building whole new devices and assemblies. Arguably this could be considered “peak” 3D printing: using a printer to create new devices which would otherwise be difficult or impractical for an individual to manufacture by more traditional means.

A perfect example is this fantastic total conversion for the Logitech C270 webcam designed by [Luc Eeckelaert]. Officially he calls it a “tripod”, and perhaps that’s how the design started, but the final product is clearly much more than that. It puts the normally monitor-mounted Logitech camera onto an articulated arm, greatly improving the device’s usability. The conversion even includes the ability to manually adjust the focus, a feature the original hardware doesn’t have. It turns the affordable and widely available Logitech C270 into an excellent camera to have on the workbench for documenting projects, or pointing at the bed of your 3D printer.

Continue reading “Printed It: Logitech C270 Conversion”

FOSSCON 2018: Developing The FreedomBox

The modern Internet can be a dangerous place, especially for those who might not have the technical wherewithal to navigate its pitfalls. Whether it’s malware delivered to your browser through a “drive-by” or online services selling your data to the highest bidder, its gotten a lot harder over the last decade or so to use the Internet as an effective means of communication and information gathering without putting yourself at risk.

But those are just the passive threats that we all have to contend with. What if you’re being actively targeted? Perhaps your government has shut down access to the Internet, or the authorities are looking to prevent you from organizing peaceful protests. What if you’re personal information is worth enough to some entity that they’ll subpoena it from your service providers?

It’s precisely for these sort of situations that the FreedomBox was developed. As demonstrated by Danny Haidar at FOSSCON 2018 in Philadelphia, the FreedomBox promises to help anyone deploy a secure and anonymous Internet access point in minutes with minimal user interaction.

It’s a concept privacy advocates have been talking about for years, but with the relatively recent advent of low-cost ARM Linux boards, may finally be practical enough to go mainstream. While there’s still work to be done, the project is already being used to provide Internet gateways in rural India.

Continue reading “FOSSCON 2018: Developing The FreedomBox”

Arduino Powered Portable Function Generator

It’s probably not much of a stretch to say that many of us have taken on a project or two that were little more than thinly veiled excuses to add a new tool or piece of gear to our arsenal. There’s something to be said for a bench full of button-festooned test equipment blinking away, it’s like bling for nerds. But just like getting your name written out in diamonds, it can get expensive quick.

Luckily, the hacker has enough technology at their disposal these days that DIY test equipment can help fill your bench without emptying your wallet. [Faransky] has created a very impressive Arduino function generator that doesn’t skimp on the features. Capable of generating sine, triangle, and square waves up to 10MHz with its all-digital circuitry, it’s a piece of gear that’s well worth the $30 USD or so it should cost to build your own version.

For those worrying that [Faransky] is relying on the PWM functionality of the Arduino Nano to generate waveforms, have no fear. At the heart of the device is a AD9833 waveform generator; with the Arduino, rotary encoder, and 16×2 LCD providing an interface to control it over SPI.

Unfortunately, the AD9833 doesn’t have a way to control amplitude, something which is pretty important in a function generator. So [Faransky] uses a X9C104P 100KOhm 8-bit digital potentiometer as a voltage divider on the chip’s output.

To wrap up the build, he added a 2000mAh 3.7V Li-Ion battery and TP4056 charger, with a DC-DC boost converter to get 5V for the Arduino. Though if you wanted to create a benchtop version of this device, you could delete those components in favor of a 5V AC/DC adapter.

We’ve seen our fair share of DIY function generators, ranging from minimalist builds to hardware that could pass for a commercial offering. We’ve even seen some cheap turn-key function generators, though the usual warnings about getting what you pay for apply.

Continue reading “Arduino Powered Portable Function Generator”

Talking Garbage Can Keeps Eye On Playground

Getting young kids excited about technology and engineering can be a challenge, and getting them interested in the environment isn’t exactly a walk in the park either. So any project that can get them simultaneously engaged in both is a considerable achievement, especially when they can do the work themselves and see how creating something can have a positive impact on their little corner of the world.

[Robert Hart] writes in to tell us about a project that challenged elementary school students to help make sure their peers put trash in its place. The kids came up with some predictably imaginative ideas like a robot to chase down litterers, but as us grown up hackers know all too well, budget and practicality often end up dictating the project’s final form. In the end, they came up with a talking trash can that gives words of encouragement to passerby.

The heart of the system is an Adafruit Audio FX sound board, which has been loaded up with audio clips recorded by the students. The buttons on the front of the can trigger different messages about why it’s important to make sure trash is disposed of properly, and an internal switch allows the can to thank the user for their deposit when the lid has been opened.

A PIR sensor on the front of the can detects when somebody gets close, and plays a message reminding them to make use of the trash cans provided on the playground. It’s not everyday that a child has a garbage can talk to them, so we think this is a fantastic idea for getting a kid’s attention. In keeping with the ecological friendly theme, the whole system is powered by a small solar panel which charges an internal 3.7V LiPo battery with the help of an Adafruit PowerBoost 500.

We’ve seen plenty of unusual projects here at Hackaday, but even for us, a talking garbage can is something of a rarity. Ironically though, we have seen a garbage can which can follow you around, so maybe the kids weren’t so far off with their original idea after all…

Continue reading “Talking Garbage Can Keeps Eye On Playground”

Knock-Off AirPods Merged Into Bluetooth Receiver

Whether or not you personally like the concept of the AirPod Bluetooth headphones is irrelevant, as an Apple product one thing is certain: all the cool kids want them. That also means that plenty of overseas manufacturers are pumping out janky clones for a fraction of the price for those who are more about the Apple look than the Apple price tag. Are they any good? No, of course not. But that doesn’t mean you can’t do something interesting with them.

[Igor Kromin] took apart a pair of fake AirPods and was predictably underwhelmed. So much so that he didn’t even bother putting the things back together. Instead, he took the two poor Bluetooth audio receivers and combined them into one slightly less poor Bluetooth audio receiver. It probably doesn’t meet the classical definition of a “good” use of time and/or money, but at least he got some entertainment out of a product that was otherwise destined for the trash.

As you might imagine, the left and right “AirPod” each has its own battery, Bluetooth receiver, and speaker. It has to, as they have no physical connection to each other. That also means that each receiver is only playing one channel, making them useless individually. What [Igor] realized was that he could put together a little PCB that combines the two audio channels back into a regular stereo 3.5 mm audio jack.

While he was at it, he also wired the individual buttons on each headphone to a center button on the PCB which would allow him to physically synchronize them. Even still, [Igor] mentions that occasionally they don’t come on at the same time. But what do you expect for something that’s nearly a 20th the price of the original?

The last time we saw a hack related to the Apple AirPod, it was when somebody threw them out the window, so one might presume most hackers prefer their iDevice tethered.