Desperately Trying To Find A Use For The ChugPlug

[AkBKukU] writes in to tell us of his experiments with the rather vile-sounding “ChugPlug”, an odd portable AC power bank designed for the express purpose of powering MacBook chargers. It would seem more efficient to simply build a DC power bank with a MagSafe connector to cut out the charger all together, but presumably there is some market for this particular niche device. Especially at the $15 they are currently selling for on Amazon.

Unfortunately, the ChugPlug that [AkBKukU] bought doesn’t seem to work. After some experimenting he found that it appears to only be outputting 80 VAC, obviously too low for many devices to function. But he reasoned that some things, like switch mode power supplies or restive loads, might still work. He just needed to come up with a way to plug them into the ChugPlug.

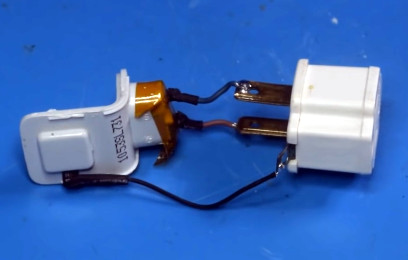
If his testing setup gives you a case of sweaty palms, you aren’t alone. He breaks open a dead MacBook charger to recover the female AC connector, and then solders that directly to an AC grounding adapter. The resulting pigtail lets [AkBKukU] plug in various AC loads while allowing him to probe the wires with his multimeter and oscilloscope.

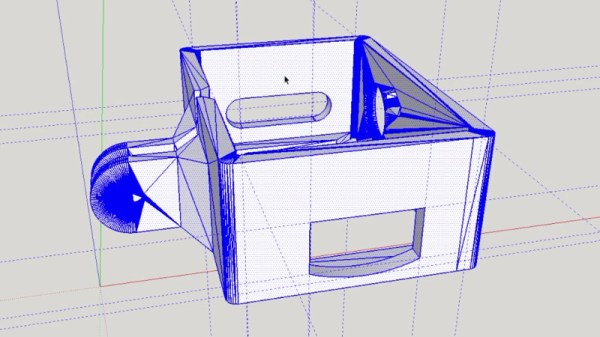
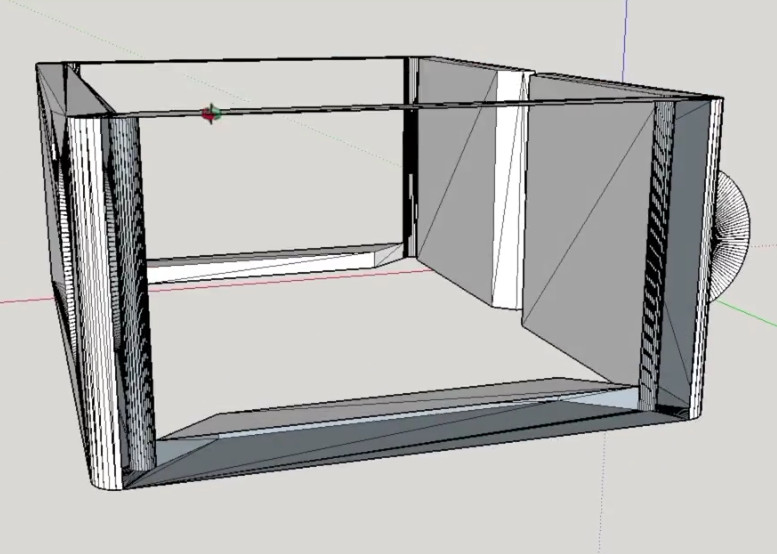
Once he’s satisfied his hack works conceptually, that is, he’s able to plug arbitrary AC loads into this purpose-built battery pack, he follows up with a less dangerous looking adapter. Making use of the shell of the dead MacBook charger and what some might describe as a salacious amount of hot glue, he produces a compact and relatively safe looking device that will let him use his handicapped ChugPlug as a general purpose source of AC power.

It’s not the most elaborate portable power supply we’ve ever seen, and certainly wouldn’t be our first choice in an emergency, but at least [AkBKukU] managed to wring some use out of the thing in the end.

Continue reading “Desperately Trying To Find A Use For The ChugPlug”

Customizing STLs For Off-Brand Devices

[Rob Clarke] needed a mount for his off-brand action camera, but it’s not exactly the kind of thing with a bustling accessory market. To make matters worse, it turns out the camera is so low-key that he couldn’t find a 3D printable mount for it either. Luckily, a check with his calipers confirmed his camera is just about the same size as an old GoPro Hero 3, so all he had to do was modify an existing design to fit his needs.

As anyone who’s worked with STL files will tell you, they are a pain to modify. An STL is essentially a completed solid model, and not really meant to be fiddled around with. It’s a bit like trying to take an edited image and get back to the layers that were used to create it in Photoshop or GIMP. The final output has been “flattened”, so that granular control is lost.

That being said, [Rob] got rather lucky in this case. He found a GoPro mount that was about 90% there, he just needed to adjust the depth and change the positioning of the holes on the side. He loaded the STL into SketchUp, deleted the two sides, and replaced them with new surfaces. This gave him a clean slate to add the appropriate openings for his camera’s USB port and microSD card. To adjust the depth of the mount, he simply stretched the model out on the Z axis.

[Rob] event went ahead and released his modified STLs as a remix of the original case he found on Thingiverse for anyone else that has the same camera. That’s what we love to see.

If you’re interested in learning more about using SketchUp for designing 3D printed parts, check out this excellent guide by our very own [Brian Benchoff].

Continue reading “Customizing STLs For Off-Brand Devices”

Evolution Of The Worlds Oldest Computer Festival

The Trenton Computer Festival (TCF) doesn’t have the name recognition of big technology conferences like DEF CON or HOPE. It’s not even as well known as smaller more localized conferences like DerbyCon, ShmooCon, or the Hackaday Superconference. In fact, there’s a good chance that most readers have never even heard of TCF. But despite not holding a place in the hacker lexicon, TCF has plenty to boast about. Its played host to technology luminaries from Bill Gates to Richard Stallman, and now in its 43rd year, holds the title as the longest continually running technology festival in the world.

Bill Gates giving the keynote at TCF in 1989

When originally conceived in 1976, the show was devoted to the dawning age of the personal computer, but since then has evolved into a celebration of technology as a whole. When TCF kicks off on March 17th, there won’t be a media blitz or huge corporate sponsorship. There won’t be a simultaneous online stream of the event, and the only badges worn by speakers or attendees will be of the paper variety.

What you will find at TCF is a full schedule of talks given by people who are passionate about technology in its varied forms. These run the gamut from quantum computing to lock picking, from Arduino to Space Shuttle avionics.

At the heart of TCF is co-founder and current Chair Dr Allen Katz. I recently had the opportunity to speak with Dr Katz about the challenges of running a conference of this type, and the secret to keeping relevant in a wildly changing technology landscape.

Continue reading “Evolution Of The Worlds Oldest Computer Festival”

Hot Air Surgery Revives A Cheap Windows Tablet

[Jason Gin] recently wrote in to tell us about his adventures replacing the eMMC storage chip on a cheap Windows tablet, and we have to say, it’s an impressive amount of work for a device which apparently only cost him $15. Surely much better pieces of hardware have been tossed in the trash for less serious failures than what ailed his DigiLand DL801W tablet. We’d love to see the lengths this guy would go to restore something a bit higher up the food chain.

As any good hacker knows, you can’t fix the problem until you understand it. So the first step [Jason] took was to conduct some troubleshooting. The tablet would only boot to the EFI shell, which didn’t do him much good since there was no on-screen keyboard to interact with it. But he had the idea of trying to connect a USB keyboard via an OTG adapter, and sure enough that got him in. Once he was able to enter commands into the EFI shell, he attempted to read from a few different sectors of the eMMC drive, only to get the same nonsense repeating data. So far, not looking good.

But before he fully committed to replacing the eMMC drive, he wanted a second opinion. Using the same USB OTG adapter, he was able to boot the tablet into a Windows 10 environment, and from there got access to some drive diagnostic tools. The software reported that not only was the drive reporting to be half the appropriate size, but that writing to the chip was impossible.

With the fate of the tablet’s Foresee NCEMBS99-16G eMMC chip now confirmed, [Jason] decided it was time to operate. After pulling the tablet apart and masking off the PCB with Kapton tape to protect it from the heat, he slowly went in with his hot air rework station to remove the failed chip. But rather than put another low-end chip in its place, he used this opportunity to replace it with a Samsung KLMBG4GEND-B031. Not only does this chip have twice the capacity of the original, it should be noticeably faster.

With the new Samsung eMMC chip installed, [Jason] put the tablet back together and was able to successfully install Windows 10 onto it. Another piece of tech saved from the big landfill in the sky.

If the casual confidence of this particular repair wasn’t enough of a clue, this isn’t the first time he’s showed some unruly eMMC chips who’s boss.

Love Open Source But Hate People? Get OpenKobold

[Tadas Ustinavičius] writes in to tell us of his latest project, which combines his two great loves of open source and annoying people: OpenKobold. Named after the German mythical spirit that haunts people’s homes, this tiny device is fully open source (hardware and software) and ready to torment your friends and family for up to a year on a CR1220 battery.

The design of the OpenKobold is quite simple, and the open source nature of the project makes this an excellent case study for turning an idea into a fully functional physical object.

Beyond the battery and the buzzer module, the OpenKobold utilizes a PIC12F675, a transistor, and a few passive components. This spartan design allows for a PCB that measures only 25 x 20 mm, making it very easy to hide but fiendishly difficult to try to track down later on.

But the real magic is in the software. The firmware that [Tadas] has written for the PIC not only randomizes how often the buzzer goes off, but how long it will sound for. This makes predicting the OpenKobold with any sort of accuracy very difficult, confounding the poor soul who’s searching their home or office for this maddening little device.

Hackers have a long and storied history of creating elaborate pranks, putting the OpenKobold in very good company. From randomly replaying signals from a remote control to building robotic cardboard burglars, we’ve seen our fair share of elaborate pranks from the community.

One Man’s Quest For A Desktop Spherical Display

[Nirav Patel] is a man on a mission. Since 2011 he has been obsessed with owning a spherical display, the kind of thing you see in museums and science centers, but on a desktop scale. Unfortunately for him, there hasn’t been much commercial interest in this sort of thing as of yet. Up to this point, he’s been forced to hack up his own versions of his dream display.

That is until he heard about the Gakken Worldeye from Japan. This device promised to be exactly what he’s been looking for all these years, and he quickly snapped up two of them: one to use, and one to tear apart. We like this guy’s style. But as is often the case with cheap overseas imports, the device didn’t quite live up to his expectations. Undaunted by the out of the box performance of the Worldeye, [Nirav] has started documenting his attempts to improve on the product.

These displays work by projecting an image on the inside of a frosted glass or plastic sphere, and [Nirav] notes that the projection sphere on the Worldeye is actually pretty decent. The problem is the electronics, namely the anemic VGA resolution projector that’s further cropped down to a 480 pixel circle by the optics. Combined with the low-quality downsampling that squashes down the HDMI input, the final image on the Worldeye is underwhelming to say the least.

[Nirav] decided to rip the original projector out of the Worldeye and replace it with a Sony MP-CL1 model capable of a much more respectable 1280×720. He came up with a 3D printed bracket to hold the MP-CL1 in place, and has put the files up on Thingiverse for anyone who might want to play along at home. The results are better, but unfortunately still not great. [Nirav] thinks the sphere is physically too small to support the higher resolution of the MP-CL1, plus the optics aren’t exactly of the highest quality to begin with. But he’s just glad he didn’t have to build this one from scratch.

Going back to our first coverage of his DIY spherical display in 2012, we have to say his earliest attempts are still very impressive. It looks like this is a case of the commercial market struggling to keep up with the work of independent hackers.

Controlling OctoPrint On The Go

Not too long ago I took the plunge into the world of OctoPrint by shoehorning a Raspberry Pi Zero into a PrintrBot Play, and I have to say, the results were quite impressive. OctoPrint allows you to run your 3D printer untethered from your computer, but without all the downsides of printing off of an SD card. Generally running off of a Raspberry Pi, OctoPrint serves up a very capable web interface that gives you full control over slicing and printing from essentially any device with a modern browser.

That’s all well and good if you’ve got your laptop with you, or you’re sitting at your desktop. But what if you’re out of the house? Or maybe out in the garage where you don’t have a computer setup? OctoPrint is still happily serving up status information and a control interface, you just don’t have a computer to access it. Luckily, there are options for just that scenario.

In this post we’re going to take a look at a couple of options for controlling and monitoring OctoPrint from your mobile device, which can help truly realize its potential. Personally I have an incredible amount of anxiety when leaving a 3D printer running a long job, and in the past I’ve found myself checking every 10 minutes or so to see if it was done. Now that I can just glance at my phone and see an ETA along with status information about the machine, it’s given me the confidence to run increasingly longer and complex prints. Continue reading “Controlling OctoPrint On The Go”