The modern consumer is not overly concerned with their phone conversations being monitored. For one thing, Google and Amazon have done a tremendous job of conditioning them to believe that electronic gadgets listening to their every word isn’t just acceptable, but a near necessity in the 21st century. After all, if there was a better way to turn on the kitchen light than having a recording of your voice uploaded to Amazon so they can run it through their speech analysis software, somebody would have surely thought of it by now.
But perhaps more importantly, there’s a general understanding that the nature of telephony has changed to the point that few outside of three letter agencies can realistically intercept a phone call. Sure we’ve seen the occasional spoofed GSM network pop up at hacker cons, and there’s a troubling number of StingRays floating around out there, but it’s still a far cry from how things were back when folks still used phones that plugged into the wall. In those days, the neighborhood creep needed little more than a pair of wire strippers to listen in on your every word.
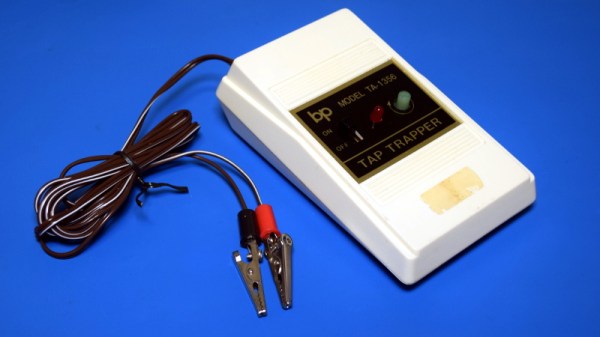
Which is precisely why products like the TA-1356 Tap Trapper were made. It was advertised as being able to scan your home’s phone line to alert you when somebody else might be listening in, whether it was a tape recorder spliced in on the pole or somebody in another room lifting the handset. You just had to clip it onto the phone distribution panel and feed it a fresh battery once and awhile.
If the red light came on, you’d know something had changed since the Tap Trapper was installed and calibrated. But how did this futuristic defender of communications privacy work? Let’s open it up and take a look.
Continue reading “Teardown: Tap Trapper” →