Pulling off a flashy project that gets the viral-media hug of widespread approval feels great. Getting there is no easy path to walk and often times the craft that went into a finished project doesn’t even take the back seat but gets no mention at all. Often I find I’m more impressed by — or a least my attention is more strongly captured by — the skills put on display as prominently as the finished build.
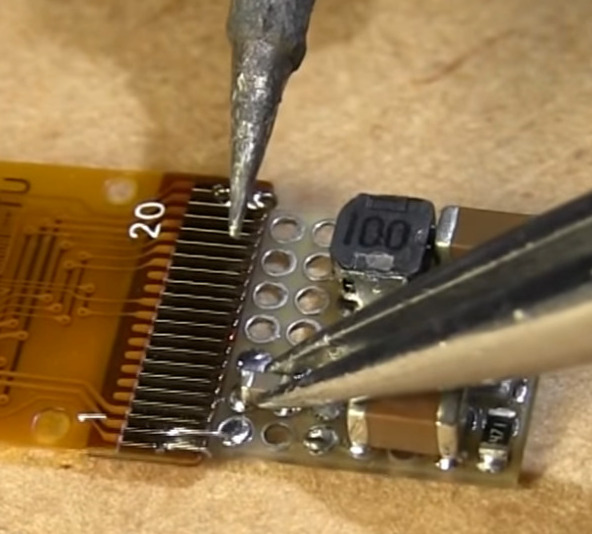 Case-in-point this week comes from the model railroad work of [Diorama111]. Seeing an OLED screen in the nose of an HO scale locomotive just like the real-life version is impressive, but how many people missed the one-off soldering masterpiece that went into this one? You’ll marvel at the SMD techniques used with through-hole protoboard on this one.
Occasionally we do get to look over the shoulder of the master as decades of skills are shared for the purpose of passing them on. So was the case back in May when we watched as [Leo] walked through his tips and tricks for prototyping at the electronics bench. This included a lot of non-obvious but clever stuff; tips on working with copper tape for solder buses, using Teflon tubing with bare wire instead of stripping PVC-insulated wire, and a deep dive into copper clad prototyping.
So remember all of us hardware geeks when you look to tell the story of your project. We want to know how it was done at least as much as what was done. There was a time when electronic designers were a separate work group from electronic technicians (and wow, those technicians were in a league of their own). These days we all have that technician hat hanging on our workbenches and I’m always interested in packing in yet another unlearnt skill. Throw us a bone!