Using An Old Smartphone In Place Of A Raspberry Pi

The Raspberry Pi was a fairly revolutionary computing device when it came on the scene around a decade ago. Enough processing power to run a full Linux desktop and plenty of GPIO meant almost certain success. In the past year, though, they’ve run into some issues with their chip supplier and it’s been difficult to find new Pis, which has led to some looking for alternatives to these handy devices. [David] was hoping to build a music streaming server and built it on an old smartphone instead of the ubiquitous single-board computer.

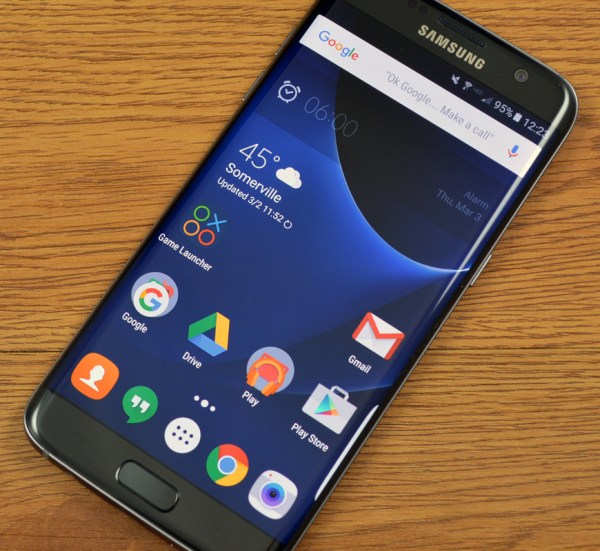
Most smartphones are single-board computers though, and at least the Android devices are fully capable of running Linux just like the Pi. The only problem tends to be getting around the carrier or manufacturer restrictions like a locked bootloader or lack of root access. For [David]’s first try getting this to work, he tried to install Navidrome on a Samsung phone but had difficulties with the lack of memory and had to build the software somewhere else and then load it on the phone. It did work, but the stock operating system kept killing the process for consuming too much memory.

Without root access, [David] decided to try LineageOS, a version of Android which, among other benefits, is typically much more configurable than the stock version of Android that is shipped with smartphones. This allowed him to disable or uninstall anything not needed for his music server to free up enough memory. After some issues with transcoding the actual music files he planned on streaming, his music server was successfully up and running on a phone that would have otherwise been relegated to the junk drawer. The specific steps he took to get this working can be found on his GitHub page as well.

[David] also mentioned looking at PostmarketOS for this job which is certainly a viable option for some, but the Linux distribution for phones is only supported on a few devices. Another viable alternative for a project like this if no Raspberry Pis are available might be any of a number of Pine64 devices that might also be sitting around gathering dust, like the versatile Linux-based Pinephone.

Raspberry Pi Camera Conversion Leads To Philosophical Question

The Raspberry Pi HQ camera module may not quite reach the giddy heights of a DSLR, but it has given experimenters access to a camera system which can equal the output of some surprisingly high-quality manufactured cameras. As an example we have a video from [Malcolm-Jay] showing his Raspberry Pi conversion of a Yashica film camera.

Coming from the viewpoint of a photographer rather than a hardware person, the video is particularly valuable for his discussion of the many lens options beyond a Chinese CCTV lens which can be used with the platform. It uses only the body from the Yashica, but makes a really cool camera that we’d love to own ourselves. If you’re interested in the Pi HQ camera give it a watch below the break, and try to follow some of his lens suggestions.

The broken camera he converted is slightly interesting, and raises an important philosophical question for retro technology geeks. It’s a Yashica Electro 35, a mid-1960s rangefinder camera for 35 mm film whose claim to fame at the time was its electronically controlled shutter timing depending on its built-in light meter. The philosophical question is this: desecration of a characterful classic camera which might have been repaired, or awesome resto-mod? In that sense it’s not just about this project, but a question with application across many other retro tech fields.

A working Electro 35 is a fun toy for an enthusiast wanting to dabble in rangefinder photography, but it’s hardly a valuable artifact and when broken is little more than scrap.  One day we’d love to see a Pi conversion with a built-in focal length converter allowing the use of the original rangefinder mechanism, but we’ll take this one any day!

How about you? Would you have converted this Yashica, repaired it somehow, or just hung onto it because you might get round to fixing it one day? Tell us in the comments!

Continue reading “Raspberry Pi Camera Conversion Leads To Philosophical Question”

A picture of the bottom of the Pi 4 PCB, showing the three points you need to use to tap into the Pi 4 I2C bus going to the PMIC

Dead Raspberry Pi Boards, PMICs, And New Hope

Since the Raspberry Pi 3B+ release, the Pi boards we all know and love gained one more weakpoint – the PMIC chip, responsible for generating all the power rails a Pi needs. Specifically, the new PMIC was way more vulnerable to shorting 5V and 3.3V power rails together – something that’s trivial to do on a Raspberry Pi, and would leave you with a bricked board. Just replacing the PMIC chip, the MxL7704, wouldn’t help since the Raspberry Pi version of this chip is customized – but now, on Raspberry Pi forums, [Nefarious19] has reportedly managed to replace it and revive their Pi.

First off, you get a replacement PMIC and reflow it – and that’s where, to our knowledge, people have stopped so far. The next step proposed by [Nefarious19] is writing proper values into the I2C registers of the PMIC. For that, you’d want a currently-alive Pi – useful as both I2C controller for writing the values in, and as a source of known-good values. That said, if you go with the values that have been posted online, just having something like a Pi Pico for the I2C part ought to be enough.

[Nefarious19] reports a revived Pi, and this is way more hopeful than the “PMIC failures are unfixable” conclusion we’ve reached before. The instructions are not quite clear – someone else in the thread reports an unsuccessful attempt doing the same, and it might be that there’s a crucial step missing in making the values persist. However, such an advancement is notable, and we trust our readers to take the lead.

A week ago, [Mangy_Dog] on Hackaday Discord brought up fixing Raspberry Pi boards – given that the Raspberry Pi shortages are still an issue, digging up your broken Pi and repairing it starts making sense budget-wise. It’s no longer the ages where you could buy broken Pi boards by the hundred, and we imagine our readers have been getting creative. What are your experiences with fixing Raspberry Pi boards?

Raspberry Pi Adds Second Laptop Monitor

If you have a cheap laptop and you realize you can’t connect a second monitor to it, what do you do? Well, if you are [Pierre Couy], you grab a Raspberry Pi and put together a virtual screen solution.

Like all good projects, this one started with some goals and requirements:

  • Low latency
  • Redable text
  • At least 10 frames per second
  • Fast catch up if the remote screen falls behind
  • Low-bitrate encoding; no hardware acceleration
  • A DHCP server on the Pi to manage the network
  • Power control for the attached monitor

Continue reading “Raspberry Pi Adds Second Laptop Monitor”

New Raspberry Pi Camera With Global Shutter

Raspberry Pi has just introduced a new camera module in the high-quality camera format. For the same $50 price you would shell out for the HQ camera, you get roughly eight times fewer pixels. But this is a global shutter camera, and if you need a global shutter, there’s just no substitute. That’s a big deal for the Raspberry Pi ecosystem.

Global vs Rolling

Most cameras out there today use CMOS sensors in rolling shutter mode. That means that the sensor starts in the upper left corner and rasters along, reading out exposure values from each row before moving down to the next row, and then starting up at the top again. The benefit is simpler CMOS design, but the downside is that none of the pixels are exposed or read at the same instant.

Continue reading “New Raspberry Pi Camera With Global Shutter”

Testing The Raspberry Pi Debug Probe

We mentioned the Raspberry Pi Debug Probe when it was launched, a little RP2040-based board that provides both a USB-to-UART and an ARM SWD debug interface. [Jeff Geerling] was lucky enough to snag one, and he’s put it through its paces in a handy blog post.

The first question he poses is: why buy the Pi offering when cheaper boards can be found on AliExpress and the like? It’s easily answered by pointing to the ease of setting up, good documentation and support, as well as the device’s reasonable price compared to other commercial probes. It also answered a personal question here as he hooked it up to a Pico, why it has three jumpers and not the more usual multi-way header we’ve seen on other ARM platforms. We should have looked at a Pico more closely of course, because it matched neatly to the Pi product. On the Pico they’re at the edge, while on the Pico W they’re in the center.

No doubt if the latest addition to the Pi stable has any further revelations we’ll bring them to you. But it’s worth a quick look at this piece to see a real experience with their latest. Meanwhile, take a quick look at our launch coverage.

New Product: The Raspberry Pi Debug Probe

It’s fair to say that among the new product launches we see all the time, anything new from the folks at Raspberry Pi claims our attention. It’s not that their signature Linux single-board computers (SBCs) are necessarily the best or the fastest hardware on paper, but that they’re the ones with meaningful decade-plus support. Add to that their RP2040 microcontroller and its associated Pico boards, and they’re the one to watch.

Today we’ve got news of a new Pi, not a general purpose computer, but useful nevertheless. The Raspberry Pi Debug Probe is a small RP2040-based board that provides a SWD interface for debugging any ARM microcontroller as well as a more generic USB to UART interface.

The article sums up nicely what this board does — it’s for bare metal ARM coders, and it uses ARM’s built-in debugging infrastructure. It’s something that away from Hackaday we’ve seen friends using the 2040 for as one of the few readily available chips in the shortage, and it’s thus extremely convenient to have readily available as a product.

So if you’re a high level programmer it’s not essential, but if you’re really getting down to the nuts-and-bolts of an ARM microcontroller then you’ll want one of these. Of course, it’s by no means the first SWD interface we’ve seen, here’s one using an ESP32.