In Disney’s 1991 film Beauty and the Beast, an enchantress curses the young (10 or 11-year-old) prince to beast-hood for spurning her based solely on her appearance. She gives him a special rose that she says will bloom until his 21st birthday, at which time he’ll be turned back into a prince, provided that he learned to love by then. If not, he’ll be a beast for eternity. As the years go by, the rose drops the occasional petal and begins to wilt under the bell jar where he keeps it.
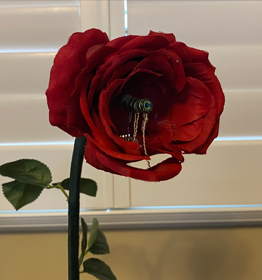 [Gord Payne] was tasked with building such a rose of enchantment for a high school production and knocked it out of the park. With no budget provided, [Gord] used what he had lying about the house, like nylon trimmer line. In fact, that’s probably the most important part of this build. A piece of trimmer line runs up through the stem made of tubing and out the silk rose head, which connects with a custom 3-D printed part.
Each loose petal hangs from the tubing using a short length of wire. Down at the base, the trimmer line is attached to a servo horn, which is connected to an Adafruit Circuit Playground. When the button is pressed on the remote, the servo retracts the trimmer line a little bit, dropping a petal. Be sure to check out the demo after the break.
Dropping petals is an interesting problem to solve. Most of the flower hacks we see around here involve blooming, which presents its own set of troubles.
Continue reading “Robotic Rose Of Enchantment Drops Petals On Command”