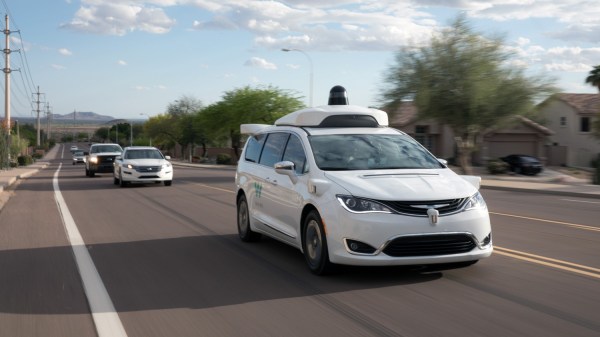
Yesterday’s Drill Press Packed With Tomorrow’s Upgrades

Those who hibernate in their workshops have a habit of re-imagining their relationship to tools. And [Marius Hornberger] is no exception, but the nine upgrades he’s added to his grandfather’s old drill press puts this machine on a whole other level.

In proper storytime fashion, [Marius] steps us through each upgrade, the rationale, and the time and effort that went into crafting the solution. Some of these upgrades, like a digital readout (DRO), add modern features to an old-school device. Others, like an oil mist cooling system and a compressed air chip blower, borrow from other machines with similar setups. Some, like the chip guard, are nice personal touches. And a few, like the motorized table with automatic clamp, transform the entire operator experience. On the whole, these upgrades follow a gentle theme of personalizing the machine to [Marius’] tastes, giving him a delightful, more personal operator experience that’s tuned through his everyday use. Amid the sheer volume of tweaks though, we’re convinced that you’ll find something that tickles your tinkering fancy.

It’s worth mentioning that the pneumatic table clamp alone (at 4:28) makes the entire video worth the watch. If you’ve ever had the mishap of pinching your finger or struggling to hold the table steady while clamping it in place, this little upgrade takes all of that away, replacing the swivel handle with a homebrew pneumatic cylinder made in the shop. With a single button press, a swoosh of compressed air either clamps or releases the table. Best of all, the setup still sports a hand clamp if [Marius] is operating without a compressed air source.

It’s also worth mentioning that a couple of [Marius’] upgrades completely skip the CAD step altogether. Instead, [Marius] creates templates directly off the drill press with tracing paper and then immediately transfers them onto stock materials. It’s a nice reminder that not every small project needs to start with a 3D model.

If all these upgrades are getting you ready to modify your machine, look no further than the video description where he’s courteously posted inks to key components behind these upgrades.

The story of many-a-workshop often involves reinventing your machine tools. If you’re looking for more tales of tool upgrades, have a look at resurrecting a machine from literal ashes or a machine that improves itself.

Continue reading “Yesterday’s Drill Press Packed With Tomorrow’s Upgrades”

Showing a RAM chip being removed from a Pi 4 board, hot air gun in the shot. Area around the chip is covered with kapton tape.

Upgrade RAM On Your Pi 4, The Fun Way

The Raspberry Pi shortage has been a meme in hacker circles for what feels like an eternity now, and the Pi 4 seems to be most affected – though, maybe it’s just its popularity. Nevertheless, if you’re looking for a Pi 4, you would need to look far and wide – and things are way worse if you need the 8 GB version specifically. Or so we thought – [MadEDoctor] shows us that refreshing online store pages isn’t the only way, having successfully upgraded the RAM chip on the Pi 4 from 1 GB to 8 GB with help of a hot air gun.

These chips are BGA, and those might feel intimidating if you’re just starting out with hot air – however, we recommend you watch this video, as [MadEDoctor]’s approach is of the kind that brings BGA replacement to hobbyist level. First off, you get a compatible RAM chip somewhere like Aliexpress – lucky for us, those come equipped with a set of balls from the factory. The default balls are made of lead-free solder, and [MadEDoctor] reballed the RAM chip with leaded solder balls to lower the melting point, but it’s by no means a requirement that you do the same.

In fact, you only need a hot air gun, flux, a soldering iron and some solder wick to perform the replacement – no reballing equipment. Put some kapton or metal tape on the board for heat shielding, get the old chip off with hot air, use an iron with wick to clean the pads, add some flux, align the chip, then use hot air to solder a new chip onto the board. Replacing this chip can get your Pi 4 to the highly-sought-after 8 GB target – as an aside, we’re surprised that there was no configuration needed, as the Pi 4 booted right up and successfully recognized the extra RAM added.

We’d personally recommend preheating for such an upgrade – that said, this sure went without a hitch, and such a RAM swap method doesn’t require any stencils, solder paste or solder ball applications. Drop by the video description for compatible RAM chip part numbers, make sure you have your tacky flux and solder wick in order, and let [MadEDoctor] walk you through upgrading your Pi 4 the hacker way. Is this hack to your liking? Take it up a notch with this laptop soldered-in RAM upgrade journey, or that one RAM upgrade for an old GPU to comply to Apple’s whims.

No Wheels, No Mercy

We always like when a designer does something different. After all, it is easy just to do what everyone else is doing. But to see things a different way is always interesting to us. When you think of a battle bot, you probably think of a robot with wheels or tracks, attacking other robots in an arena. But [Shea Waffles Johns] created Big Cookie, a combat bot with no wheels. Instead, it is a spinning wheel of death that moves relatively slowly. The robot makes up for that by having a mini-robot helper that brings Big Cookie its prey.

With no wheels and motors for locomotion, the robot can focus on armor and weapon force. It certainly looks dangerous spinning on the floor.

Continue reading “No Wheels, No Mercy”

Tiny Tapeout 3

Tiny Tapeout 3: Get Your Own Chip Design To A Fab

Custom semiconductor chips are generally big projects made by big companies with big budgets. Thanks to Tiny Tapeout, students, hobbyists, or anyone else can quickly get their designs onto an actual fabricated chip. [Matt Venn] has announced the opening of a third round of the Tiny Tapeout project for March 2023.

In 2022, Tiny Tapeout 1 piloted fabrication of user designs onto custom chips referred to as application-specific integrated circuits or ASICs. Following success of the pilot round, Tiny Tapeout 2 became the first paid version delivering guaranteed silicon. For Tiny Tapeout 2, there were 165 submissions. Most submissions were designed using a hardware description language such as Verilog or Amaranth, but ASICs can also be designed in the visual schematic capture tool Wokwi.

Each submitted design must fit within 150 by 170 microns. That footprint can accommodate around one thousand standard cells, which is certainly enough to explore a digital system of real interest.  Examples from Tiny Tapeout 2 include digital neurons, FPGAs, and RISC-V processor cores.

Once the 250 designs are submitted, they’ll be combined into a large grid along with a controller. The controller will receive input signals and pump the inputs via a scan chain through the entire grid to each design. The results from each design continue through the scan chain to be output from the grid. Since all 250 designs will be combined on to one chip, each designer will receive everybody else’s design along with their own. This shared process opens a huge opportunity for experimentation.

To get started on your own ASIC design right away, visit Tiny Tapeout. Also check out the talk [Matt] gave at Supercon 2022: Bringing Chip Design to the Masses along with his Zero to ASIC videos. And we’re not saying anything official, but he’ll probably be giving a workshop at Hackaday Berlin.

Continue reading “Tiny Tapeout 3: Get Your Own Chip Design To A Fab”

A CRT Audio Visualiser For When LEDs Just Won’t Do

It has been a recurring feature of consumer audio gear since the first magic eye tube blinked into life, to have some kind of visualization of the sound being played. Most recently this has meant an LED array or an OLED screen, but [Thomas] has gone one better than this with a CRT television converted to perform as a rudimentary oscilloscope.

The last generation of commonly available monochrome televisions were small 5″ CRT models made in China. They never received digital tuners, so as digital TV has become the norm they are now useless to most people. Thus they can often be found for pennies on the second-hand market.

[Thomas]’s hack involves gutting such a TV and retaining its circuitry, but disconnecting the line driver from the deflection yoke. This would normally leave a vertical line on the screen as it would then be moved only by the frame driver at 50 Hz for PAL or 60 Hz for NTSC. By connecting an audio loudspeaker amplifier to the line deflection yoke he gets that low quality oscilloscope. It would be of limited use as an instrument, but few others will have such a cool audio visualizer. He’s viewing the screen in a portrait orientation, we’d be tempted to rotate the yoke for a landscape view.

It’s worth pointing out as always that CRT TVs contain high voltages, so we’d suggest reading up on how to treat them with respect.

Continue reading “A CRT Audio Visualiser For When LEDs Just Won’t Do”

Screenshot from the presentation, showing the datalogger product image next to the datalogger specs stated. The specs are suspiciously similar to those of a Raspberry Pi 3.

Reclaiming A Pi-Based Solar Datalogger

There’s quite a few devices on the market that contain a Raspberry Pi as their core, and after becoming a proud owner of a solar roof, [Paolo Bonzini] has found himself with an Entrade ENR-DTLA04DN datalogger which – let’s just say, it had some of the signs, and at FOSDEM 2023, he told us all about it. Installed under the promise of local-only logging, the datalogger gave away its nature with a Raspberry Pi logo-emblazoned power brick, a spec sheet identical to that of a Pi 3, and a MAC address belonging to the Raspberry Pi Foundation. That spec sheet also mentioned a MicroSD card – which eventually died, prompting [Paolo] to take the cover off. He dumped the faulty SD card, then replaced it – and put his own SSH keys on the device while at it.

At this point, Entrade no longer offered devices with local logging, only the option of cloud logging – free, but only for five years, clearly not an option if you like your home cloud-free; the local logging was not flawless either, and thus, the device was worth exploring. A quick peek at the filesystem netted him two large statically-compiled binaries, and strace gave him a way to snoop on RS485 communications between the datalogger and the solar roof-paired inverter. Next, he dug into the binaries, collecting information on how this device did its work. Previously, he found that the device provided an undocumented API over HTTP while connected to his network, and comparing the API’s workings to the data inside the binary netted him some good results – but not enough.

The main binary was identified to be Go code, and [Paolo] shows us a walkthrough on how to reverse-engineer such binaries in radare2, with a small collection of tricks to boot – for instance, grepping the output of strings for GitHub URLs in order to find out the libraries being used. In the end, having reverse-engineered the protocol, he fully rewrote the software, without the annoying bugs of the previous one, and integrated it into his home MQTT network powered by HomeAssistant. As a bonus, he also shows us the datalogger’s main PCB, which turned out to be a peculiar creation – not to spoil the surprise!

We imagine this research isn’t just useful for when you face a similar datalogger’s death, but is also quite handy for those who find themselves at the mercy of the pseudo-free cloud logging plan and would like to opt out. Solar tech seems to be an area where Raspberry Pi boards and proprietary interfaces aren’t uncommon, which is why we see hackers reverse-engineer solar power-related devices – for instance, check out this exploration of a solar inverter’s proprietary protocol to get data out of it, or reverse-engineering an end-of-life decommissioned but perfectly healthy solar inverter’s software to get the service menu password.

Assessing The Micromirror Device From A DLP Printer For Maskless Lithography Duty

Inspired by the idea of creating a maskless lithography system using a digital micromirror device (DMD), [Nemo Andrea] tore into an Anycubic Photon Ultra, DLP & resin-based 3D printer to take a look at its projector system. Here Anycubic isn’t the maker of what is called the ‘optical engine’, which would be eViewTek’s D2 projector and its siblings. This projector assembly itself is based around the Ti DLP300s, which we covered a while back when it was brand new. Since that time Anycubic has released the Photon Ultra and Photon D2 3D printers based around these optical engines.

Using DMD for lithography isn’t a new thing, as [Nemo] points out, referencing the μMLA system by Heidelberg Systems. What would be new is using a freely available and rather affordable DMD (even if it requires sacrificing a 3D printer) to obtain its optical engine in order to create an open and more affordable lithography platform than commercial ‘contact us for a quote’ option.

No doubt it’s a challenging project, but perhaps the nice side effect of having affordable DLP 3D printers out and about is that their DMDs are now also significantly more accessible than they were previously.  We wish [Nemo] all the best in this endeavor, as a maskless lithography machine would be just that addition to any hobbyist’s toolset that we are no doubt waiting for.

(Thanks to Jerry for the tip)