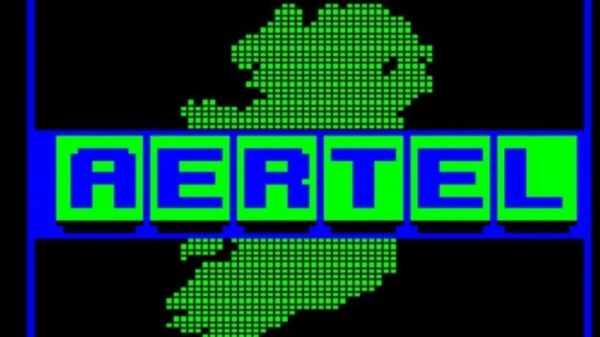
Despite the popular adage about everything on the internet being there forever, every day pages of information and sometimes entire websites are lost to the sands of time. With the imminent shutdown of the DPReview website, nearly 25 years of reviews and specifications of cameras and related content are at risk of vanishing. Also lost will be the content of forum posts, which can still be requested from DPReview staff until April 6th. All because the owner of the site, Amazon, is looking to cut costs.
As announced on r/photography, the Archive.org team is busy trying to download as much of the site as possible, but due to bottlenecks may not finish in time. One way around these bottlenecks is what is called the Archive Team Warrior, which involves either a virtual machine or Docker image that runs on distributed systems. In early April an archiving run using these distributed systems is planned, in a last-ditch attempt to retain as much of the decades of content.
The thus archived content will be made available in the WARC (Web ARChive) format, in order to retain as much information as possible, including meta data and different versions of content.
Modern microcontrollers often have specs comparable with or exceeding early gaming consoles. However, where they tend to fall short is in the video department, due to their lack of dedicated graphics hardware. With some nifty coding, though, great things can be achieved — as demonstrated by [TEC_IST]’s project that gets the RP2040 outputting 1080p video over HDMI.
The project builds on earlier work that saw the RP2040 outputting digital video over DVI. [TEC_IST] realized that earlier methods already used up 30% of the chip’s processing power just to reach 320×240 output. To get to 1080p resolution would require a different tack. The idea involved using the 32-bit architecture of the RP2040 to output a greater data rate to suit the higher resolution. The RP2040 can do a 32-bit move instruction in a single clock cycle, which, with 30 GPIO pins, would be capable of a data rate of 3.99 Gbits/second at the normal 133 MHz clock speed. That’s more than enough for 1080p at 60 Hz with a 24-bit color depth.
Due to the limitations of the chip, though, some extra hardware would be required. [TEC_IST] has drawn up a design that uses external RAM as a framebuffer, while using shift registers and other supporting logic to handle dumping out signals over HDMI. This would just leave the RP2040 to handle drawing new content, without having to redraw existing content every frame.
[TEC_IST] has shared the design for a potential 1080p HDMI output board for the RP2040 on GitHub and is inviting comment from the broader community. They’re yet to be built and tested, so it’s all theoretical at this stage. Obviously, a lot of heavy lifting is being done off-board the microcontroller here, but it’s still fun to think of such a humble chip doing such heavy-duty video output. Continue reading “Could 1080p Video Output From The RP2040 Be Possible?”→
If you’ve done any amount of electronic design work, you’ll be familiar with the need for decoupling capacitors. Sometimes a chip’s datasheet will tell you exactly what kind of caps to place where, but quite often you’ll have to rely on experience and rules of thumb. For example, you might have heard that you should put 100 µF across the power supply pins and 100 nF close to each chip. But how close is “close”? And can that bigger cap really sit anywhere? [James Wilson] has been doing research to get some firm answers to those questions, and wrote down his findings in a fascinating blog post.
The test board has two-layer and four-layer sections. The inter-layer capacitance greatly affects the PDN’s performance in each case.
[James] designed a set of circuit boards that enabled him to place different types of capacitors at various distances along a set of PCB traces. By measuring the impedance of such a power distribution network (PDN) across frequency, he could then calculate its performance under different circumstances.
The ideal tool for those measurements would have been a vector network analyzer (VNA), but because [James] didn’t have such an instrument, he made a slightly simpler setup using a spectrum analyzer with a tracking generator. This can only measure the impedance’s magnitude, without any phase information, but that should be good enough for basic PDN characterization.
The results of [James]’s tests are pretty interesting, if not too surprising. For example, those 100 nF capacitors really ought to be placed within 10 mm of your chip if it’s operating at 100 MHz, but you can get away with even 10 cm if no signals go much above 1 MHz. A bulk 100 µF cap can be placed at 10 cm without much penalty in either case. Combining several capacitors of increasing size to get a low impedance across frequency is a good idea in principle, but you need to design the network carefully to avoid resonances between the various components. This is where a not-too-low equivalent series resistance (ESR) is actually a good thing, because it helps to dampen those resonances.
Overall, [James]’s blog post is a good primer on the topic, and gives a bit of much-needed context to those rules of thumb. If you want to dive deeper into the details of PDN design or the inductance of PCB traces, our own [Bil Herd] has made some excellent videos on those topics.
[Christiaan Huygens] was a pretty decent mathematician and scientist by the standards of the 17th century. However, the telescopes he built were considered to be relatively poor in quality for the period. Now, as reported by Science News, we may know why. The well-known Huygens may have needed corrective glasses all along.
Much of Huygens’ astronomical work concerned Saturn.
Huygens is known for, among other things, his contribution to astronomy. He discovered Titan, the largest moon of Saturn, and also studied the planet’s rings. He achieved this despite telescopes that were described at the time as fuzzy or blurrier than they otherwise should have been.
Huygens built two-lens telescopes, and would keep a table of which lenses to combine for different magnification levels. However, his calculations don’t align well with today’s understanding of optics. As it turns out, Huygens may have been nearsighted, which would account for why his telescopes were blurry. To his vision, they may indeed have been sharp, due to the nature of his own eyes. Supporting this are contemporary accounts that suggest Huygens father was nearsighted, with the condition perhaps running in the family. According to calculations by astronomer Alexander Pietrow, Huygens may have had 20/70 vision, in which he could only read at 20 feet what a person with “normal” vision could read from 70 feet away.
It’s a theory that answers a mildly-interesting mystery from many hundreds of years ago. These days, our troubles with telescopes are altogether more complex. If only a simple pair of glasses could solve NASA’s problems!
Typically, when you’re putting electronics in a robot, you install the various controller PCBs into the robot’s chassis. But what if the PCB itself was the chassis? [Carl Bugeja’s] latest design explores just that idea.
Yes, [Carl] decided to build a tiny robotic rover out of a foldable PCB. This choice was made as using a flexible foldable PCB would allow for the creation of a 3D chassis without the need for bulky connectors joining several boards together. A key part of the design was allowing the structure to unfold easily for serviceability’s sake. To that end, the structure is held together by the bolts that also act as the axles for the rover’s wheels. Even more brilliantly, the wheels are turned by motors built into the very PCB itself. Control is via a PlayStation controller, connected wirelessly to command the robot.
The little bot is surprisingly capable, especially when juiced up with a twin-cell lithium battery. It’s tiny, with minimal ground clearance, so it’s not the best at driving on rough surfaces. Having all-wheel-drive helps, though.
[Carl] specifically credits Altium Designer for making the design possible, thanks to its advanced 3D visualization tools that support foldable PCBs. Video after the break.
When [Jay Bowles] demoed his first-generation ion thruster on Plasma Channel, the resulting video picked up millions of views and got hobbyists and professionals alike talking. While ionic lifters are nothing new, this robust multi-stage thruster looked (and sounded) more like a miniature jet engine than anything that had come before it. Optimizations would need to be made if there was even a chance to put the high-voltage powerplant to use, but [Jay] was clearly onto something.
Fast forward six months, and he’s back with his Mark II thruster. It operates under the same core principles as the earlier build, but swaps out the open-frame design and acrylic construction for a rigid 3D printed structure designed to more effectively channel incoming air. The end result is a thruster that’s smaller and has a lower mass, while at the same time boasting nearly double the exhaust velocity of its predecessor. Continue reading “Upgraded Plasma Thruster Is Smaller, More Powerful”→
The TA-1042 is the most badass looking telephone you’ll ever see. It’s a digital military telephone from the 1980s, but sadly non-functional unless it’s hooked up to the military phone switches it was designed to work with. These days, they’re really only useful as a heavy object to throw at somebody… that is, unless you had the suitable supporting hardware. As it turns out, [Nick] and [Rob] were able to whip up exactly that.
Their project involved implementing the TA-1042’s proprietary switching protocol on a Raspberry Pi Pico. The microcontroller’s unique Programmable I/O subsystem proved perfect for the task. With a little programming and a hat for the Pico to interface with the hardware, they were able to get the TA-1042 working as intended. It involved learning how to encode and decode the Manchester encoded data used by the Digital Non-secure Voice Terminal equipment. Notably, the TA-1042 isn’t the only phone you can use with this setup. You can also hook up other US military DNVT phones, like the TA-954 or TA-1035.
If you want this hardware for yourself, you can simply buy one of [Nick] and [Rob]’s DNVT switches from Tindie. Alternatively, you can roll your own with the source code provided on GitHub.