Enter The Space Tunnel

What’s better than 1 string of LED lights? 96. That’s how many. Each string of the 96 has 60 ws2812b LEDs, for a total of 5760 individually addressable RGB LEDs.  That’s not the cool part of [jaymeekae]’s Space Tunnel installation, the cool part is that they’re interactive.

Starting out with some PVC piping, dark cloth was used as a backdrop and the LED strips were attached to it. Several power supplies are used to supply the voltage necessary and each strip controlled by FadeCandy chips which connect to, in this case, a Windows PC via USB. Initially, computer power supplies were used, but they couldn’t supply the current necessary. [jaymeekae] used them for the first installation, but switched to better power supplies for further installations.

Once the lights were up and powered, [jaymeekae] started work on the interface to control them. Starting with a used bureau, [jaymeekae] cut out a section for the touchscreen, and installed the controlling computer in the bottom half. Processing is used to interface with the FadeCandy controllers and HTML is used for a user interface. Each mode runs a different Processing program for different effects, including audio visualization, a space tunnel mode (hence the name) and a cool drawing app where the user draws on the touchscreen and sees the results in the lights overhead.

Over several iterations, the Space Tunnel has evolved, with better power supplies and a better interface. It’s a great art installation and [jaymeekae] takes it to festivals, including one in Spain and one in the UK. There are some other LED string projects at Hack-a-Day, including this one with ping-pong balls, and this one that involves drinking a lot of beer first.

[via Reddit]

Continue reading “Enter The Space Tunnel”

Orbs Light To Billie Jean On This Huge Sequencer

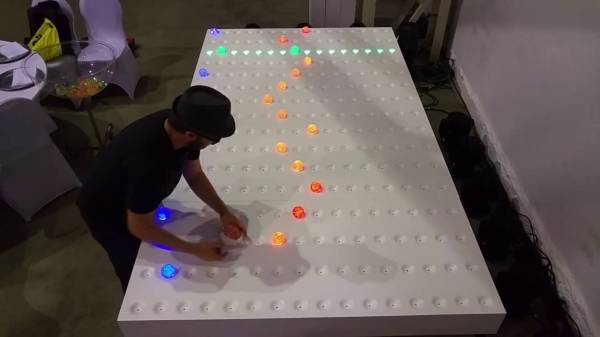
Sequencers allow you to compose a melody just by drawing the notes onto a 2D grid, virtually turning anyone with a moderate feel for pitch and rhythm into an electronic music producer. For  [Yuvi Gerstein’s] large-scale grid MIDI sequencer GRIDI makes music making even more accessible.

Instead of buttons, GRIDI uses balls to set the notes. Once they’re placed in one of the dents in the large board, they will play a note the next time the cursor bar passes by. 256 RGB LEDs in the 16 x 16 ball grid array illuminate the balls in a certain color depending on the instrument assigned to them: Drum sounds are blue, bass is orange and melodies are purple.

Underneath the 2.80 x 1.65 meters (9.2 x 4.5 foot) CNC machined, sanded and color coated surface of the GRIDI, an Arduino Uno controls all the WS2812 LEDs and reads back the switches that are used to detect the balls. A host computer running Max/MSP synthesizes the ensemble. The result is the impressive, interactive, musical art installation you’re about to see in the following video. What better tune to try out first than that of Billie Jean whose lighted sidewalk made such an impression on the original music video.

Continue reading “Orbs Light To Billie Jean On This Huge Sequencer”

Tools Of The Trade – Inspection

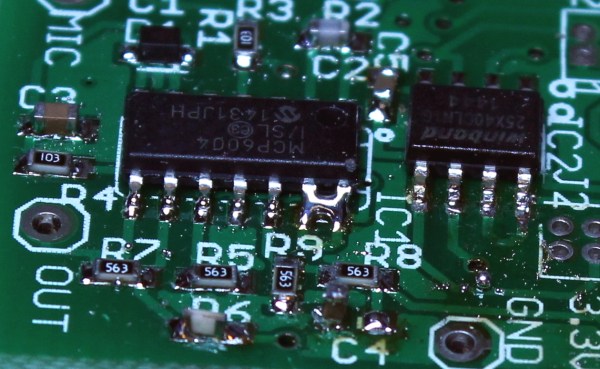
In the last episode, we put our circuit boards through the reflow process. Unfortunately, it’s not 100% accurate, and there are often problems that can occur that need to be detected and fixed. That’s what the inspection step is for. One could insert an inspection step after paste, after placement, and after reflow, but the first two are icing on the cake — the phase where most mistakes can be caught is after reflow.

There are a number of problems typical with a surface mount reflow process: Continue reading “Tools Of The Trade – Inspection”

Minimal MQTT: Control And Clients

So you’ve built a central server and filled your house with WiFi-connected nodes all speaking to each other using the MQTT protocol. In short, you’ve got the machine-to-machine side of things entirely squared away. Now it’s time to bring the humans into the loop! We’re going to explore a couple graphical user interfaces.

You could build a physical knob and/or LED display for every little aspect of your entire system, but honestly, this is where GUIs really shine. In this installment of Minimal MQTT, we’re going to look at human-friendly ways of consuming and producing data to interact with your connected sensors, switches, and displays. There are a ton of frameworks out there that use MQTT to build something like this, but we’re going to cut out the middle-man and go straight for some GUI MQTT clients.

Continue reading “Minimal MQTT: Control And Clients”

Save A Spaceship With Spacehack!

York Hackspace needed a demonstration piece to grace their stand at Maker Faires and similar events. Their solution was Spacehack, a multi-player control console based starship emergency simulator game. Each Spacehack player has console with a selection of displays, switches, dials, and levers. Players must operate their controls in response to a series of sometimes confusing commands the game supplies them from their fellow crew members. Each wrong move brings the disaster-prone ship closer to destruction, and the aim is to keep it spaceworthy for as long as possible. The result is an engaging and addictive draw for the hackspace.

Behind the brilliantly designed consoles, silver ducting and pyramidal hub box the game relies on a Raspberry Pi acting as a server and a Beaglebone Black for each player. All resources can be found on York Hackspace’s GitHub repository. The hackspace has a selection of videos on the Spacehack website, the one below the break shows the game as well as a montage of its construction. Continue reading “Save A Spaceship With Spacehack!”

Building An Interactive LED Lamp To Annoy Yourself

[Norwegian Creations] makes things as a business model. Tired of the mundane lamp above their heads, they decided to put their skills to use. The basic idea was simple, plot out a cool 3D function, put some RGB LEDs behind it, make it an awesome mathematical rainbow light display, hang it right above their desks, and then ignore it for their monitors while they worked.

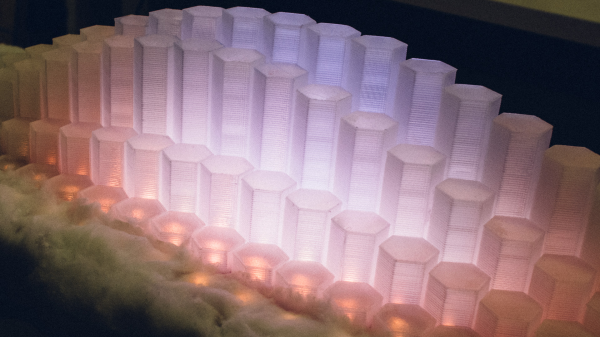
The brains of the project is a Raspberry Pi B+, WS2812 LED strips, and a Fadecandy controller from Adafruit. They 3D printed hexagonal towers out of clear plastic and labeled each carefully. Then they attached the strips to the board, glued on the hexagons, and covered the remaining surface in cotton balls to give it a cloud-like appearance.

The lamp normally plays patterns or maintains a steady light. As the day turns to night it reflects the world outside. However, if someone likes their Facebook page the light has a little one robot strobe party, which we imagine can get annoying over time. Video after the break.

Continue reading “Building An Interactive LED Lamp To Annoy Yourself”

Halloween Doorbell Prop In Rube-Goldberg Overdrive

[Conor] wired up his 3D-printed coffin doorbell to an array of RGB LEDs, a screaming speaker, and a spinning skull on a cordless screw driver to make a “quick” Halloween scare. Along the way, he included half of the Adafruit module catalog, a relay circuit board, and ESP8266 WiFi module, a Banana Pi, and more Arduinos of varying shapes and sizes than you could shake a stick at.

Our head spins, not unlike [Conor]’s screaming skull, just reading through this Rube Goldbergy arrangement. (We’re sure that’s half the fun for the builder!) Smoke ’em if ya got ’em!

Start with the RGB LEDs; rather than control them directly, [Conor] connected them to a WiFi-enabled strip controller. Great, now he can control the strip over the airwaves. But the control protocol was closed, so he spent a week learning Wireshark to sniff the network data, and then wrote a Bash script to send the relevant UDP packets to turn on the lights. But that was not fancy-schmancy enough, so [Conor] re-wrote the script in Go.

Yes, that’s right — a Go routine on a Banana Pi sends out custom UDP packets over WiFi to a WiFi-to-LED-driver bridge. To make lights blink. Wait until you see the skull.

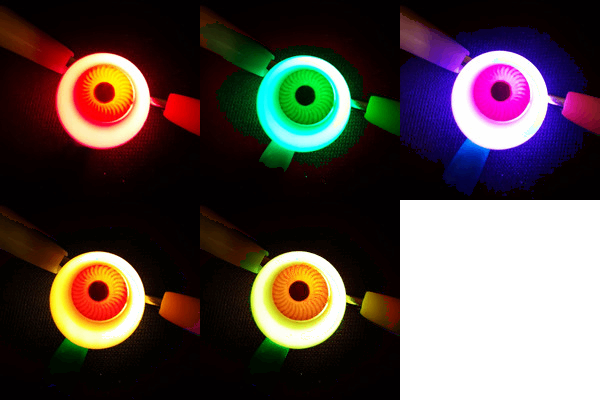
spooky_eye_animThe plastic skull has Neopixels in each ping-pong ball eye, controlled by an Arduino Nano and battery taped to the skull’s head. The skull is cemented to a driver bit that’s chucked in a cordless drill. A relay board and another Arduino make it trigger for 10 seconds at a time when the doorbell rings. Finally (wait for it!) an Arduino connected to the doorbell gives the signal, and sets a wire high that all the other Arduini and the Banana Pi are connected to.

Gentle Hackaday reader, now is not the time for “I could do that with a 555 and some chewing gum.” Now is the time to revel in the sheer hackery of it all. Because Halloween’s over, and we’re sure that [Conor] has unplugged all of the breadboards and Arduini and put them to use in his next project. And now he knows a thing or two about sniffing UDP packets.

Continue reading “Halloween Doorbell Prop In Rube-Goldberg Overdrive”