Sailing On A Sea Of Seven-Segment Displays

The amount of information the humble seven-segment display can convey is surprising. There are the ten numerals, dead-ringers or reasonable approximations for about half the alphabet, and even a few not-quite-canonical symbols. But when you put 12,288 segments to work, you get all that and much more.

Behold Sea of Segments, an art piece by [Will Gallia] that really pushes what’s possible with seven-segment displays. The piece, which looks about the size of a decent flat-panel TV, is composed of an 8×6 array of PCBs, each of which holds an 8×4 array of white LED seven-segment displays; each board also holds two TLC5920 LED drivers. [Will] designed the PCBs to tile horizontally and vertically, making it possible to take data either from the top or right side and output to the bottom or left. Power is distributed to the modules through a series of steel bus bars, which also provide structural support for the display. The whole thing lives in an enclosure with a smoked acrylic front panel, and hangs from a pair of steel cables that also provide power.

Under the hood, a PocketBeagle does all the heavy lifting of talking to the display and translating images onto the display. [Will] came up with an encoding scheme that gives about five bits of grayscale, and built a program to figure out which segments should be lit to create an image. The result is a smooth and convincing reproduction of videos of waves on a beach, which is where the project gets its name. Check out the results in the video below.

[Will] says he drew inspiration for this build from the DigitGrid by [Skot9000]. That was a great project too, but Sea of Segments takes the concept to another level.

Continue reading “Sailing On A Sea Of Seven-Segment Displays”

Original Controller Ports In Custom Case Means Retro Gaming In Style

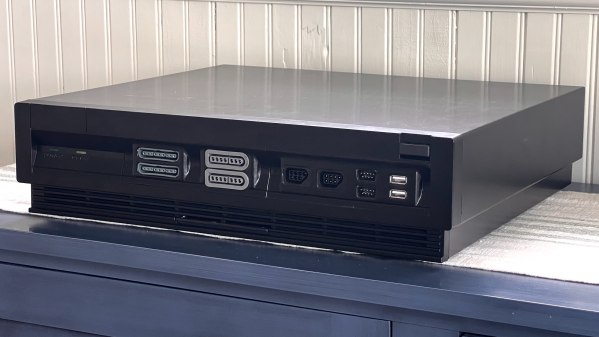
Some careful measuring and a little extra effort can be all that separates what looks like a hack job from a slick end product, and that is apparent in [Eric Sorensen]’s classy retrogaming rig, complete with ports for original console controllers.

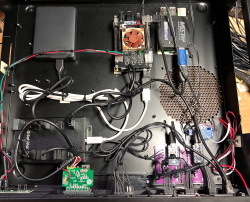
Neatly housing these components in a case makes all the difference.

[Eric] likes his vintage gaming, and was terrifically pleased with MiSTer, an open-source project that recreates various classic computers, game consoles and arcade machines using modern FPGA-based hardware. Of course, what makes retro gaming even better is using a platform’s genuine original controllers, which just takes a little extra hardware and wiring.

But [Eric] found that all the required accessories and peripherals started to look awfully cluttered. He solved this issue by packing everything carefully into a specialty PC case called the Checkmate A1500 Plus, which gives off a strong 80s design vibe. As a bonus, the front panels are all removable and that’s where [Eric] decided to house the custom controller ports.

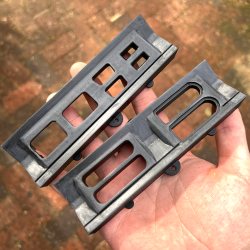
First [Eric] carefully measured each controller connector to create CAD models, then designed matching front panels to house the connectors and 3D printed them. Once that was done, post-processing the panels was a long process of apply Bondo, sand, paint, and repeat as needed. The results looks fantastic, and this project is a prime example of how aesthetics and finish can matter.

Find yourself in a similar situation? [Tom Nardi] has shown us all that 3D prints don’t have to look 3D-printed, and careful application of paint and primer can really put the ‘pro’ in prototyping.

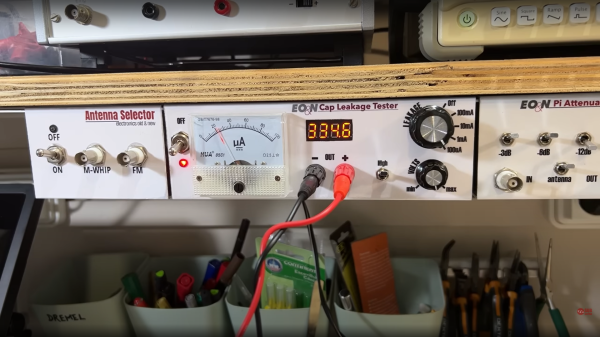
DIY capacitor leakage tester nestled among neighbours all mounted underneath a shelf

DIY Capacitor Leakage Tester With A Professional Finish

[Manuel Caldeira] has built a nice electronics work area that would be the envy of many, complete with an under-shelf rail of custom-built instruments that are specific to the needs of areas of electronics that [Manuel] is involved with. The highlighted project here is a capacitor leakage tester, which is very handy for sorting through piles of old parts looking for anything still within spec, or just verifying a part on a board is the culprit you suspect it is.

The thing is, certain types of capacitors have a limited life both in operation and in storage. Usually, we’re talking about electrolytics here, where the electrolyte solution can leak out or dry out, but also the passive oxide layer on the anode plate can deteriorate if the device is left unpowered for long periods — the oxide disintegrates, and the capacitor will start to leak current. Eventually, the breakdown can be bad enough for the capacitor to conduct so well that it overheats and the result can be a surprisingly violent experience. So, if you deal with capacitors a lot, especially electrolytics, then a leakage tester is a very good instrument to own.

We like [Manuel]’s construction method here, with custom PCBs nestled inside a simple bent aluminium enclosure. No need for a top or sides, as these, are intended to bolt underneath a shelf, and butt up against their neighbor. The front panel graphics are done in a simple but very effective manner, using printable sticker sheets, with a clear adhesive over-sheet. They certainly have a professional finish, and this is definitely a construction method worth considering.

For those a little unfamiliar with this important component, why not leap into some theory with this handy dive into the simple parallel plate capacitor? Next, may we suggest a little overview of the different capacitor types and how to best make use of them?

Continue reading “DIY Capacitor Leakage Tester With A Professional Finish”

Microsoft Returns To The Altair

The Altair 8800 arguably launched Microsoft. Now [Dave Glover] from Microsoft offers an emulated and potentially cloud-based Altair emulation with CP/M and Microsoft Basic. You can see a video of the project below. One thing that makes it a bit odd compared to other Altair clones we’ve seen is that the emulator runs in a Docker environment and is fully cloud-enabled. You can interact with it via a PCB front panel, or a terminal running in a web browser.

The core emulator is MIT-licensed and seems like it would run nearly everywhere. We were a little surprised there wasn’t an instance in the Azure cloud that you could spin up to test drive. Surely a few hundred Altairs running at once wouldn’t even make a dent in a modern CPU.

Continue reading “Microsoft Returns To The Altair”

A homebrew computer built inside plexiglass cases with lots of LEDs

The Coleman Z80 Is A Modern Take On A 1970s Computer

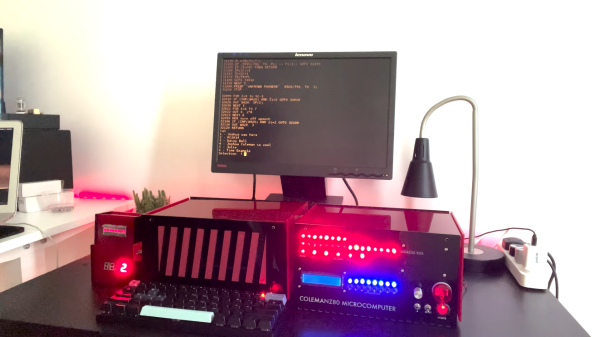
[Joshua Coleman] likes to design his own computers. Sometimes, that means drawing up bus architectures,  memory maps and I/O port pinouts. Other times, he can focus his efforts more on the general aesthetics, as well as on building a great set of peripherals, as he shows in his latest ColemanZ80 project. Thanks to the RC2014 architecture defining most of the essential features of a classic Z80 computing platform, [Joshua] was able to design a modern retrocomputer that’s not only genuinely useful, but also looks as if it came off a production line yesterday.

The external design is a sight to behold: bright red laser-cut acrylic pieces form a neat, semi-transparent case with ventilation slots on the sides and lots of blinkenlights on the front. Inspired by 1970s classics like the Altair 8800, the front panel gives the user a direct view of the machine’s internal state and allows simple command inputs through a series of tumbler switches. The CPU, RAM and other basic devices are housed in one case, with all the expansion modules in a second one, linked to the mainboard through a 40-wire flatcable.

A hand-built Z80 computer's mainboard
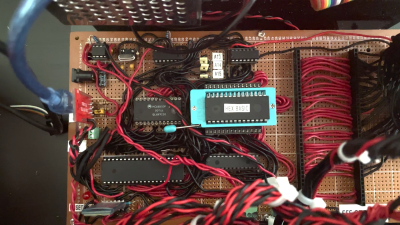
Lots of classic chips, but also loads of hand-routed wires grace the ColemanZ80’s mainboard.

Although the mainboard closely follows the RC2014 design, [Joshua] went through a lot of effort to tune the system to his specific needs. The expansion boards he built include an NS16550 UART to replace the default 68B50, a battery-backed real-time clock, a YM2149-based sound card and even a speech synthesizer module built around the classic SP0256 chip, of Speak & Spell fame. An even more unusual feature is the presence of an AM9511, one of the earliest math coprocessors ever made, to speed up floating-point calculations. All of these modules were built entirely by hand on prototype boards: we can barely imagine how much time this must have taken.

Output devices include a VGA adapter courtesy of a Raspberry Pi Pico as well as a regular 4-digit 7-segment LED display and a set of classic HP “bubble” LEDs. [Joshua] runs several demos in his video (embedded below), ranging from computing the Mandelbrot set to playing chiptunes on the YM2149. There’s plenty of scope for further expansion, too: [Joshua] plans to build more peripherals including a floppy drive interface and a module to operate a robotic car.

This is not the first Coleman Z80 computer: the previous version ran on an architecture [Joshua] designed all by himself. We’ve seen several other impressive RC2014 derivatives, like a tiny micro version and this Altair-inspired case.

Continue reading “The Coleman Z80 Is A Modern Take On A 1970s Computer”

A clock based on magnetic viewing film

Magnet Clock Makes Field Lines Visible

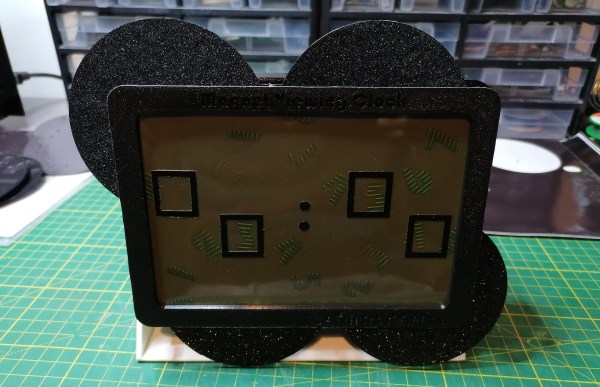
The traditional method for visualizing magnetic fields, which your science teacher probably demonstrated at some point, is to sprinkle some iron filings onto a piece of paper and hold it over a magnet. It’s a bit of a messy process though, and nowadays there’s a more modern method available in the form of magnetic viewing films. These work thanks to tiny nickel particles suspended in an oily medium, and come in very handy if you want to examine, say, the magnetic field pattern of a DC electric motor. [Moritz v. Sivers] had another idea for this magic material however, and used it to make a Magnet Viewing Clock.

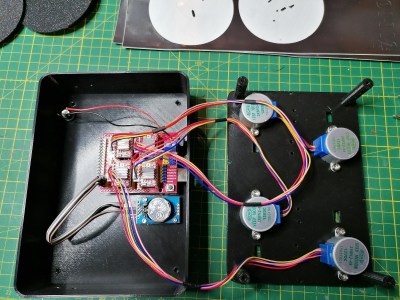
A DIY clock, opened upThe clock’s front panel looks very similar to a large monochrome LCD, but is actually a big slab of magnetic viewing film. Four disks are mounted behind it, each carrying number-shaped magnetic stickers that are cleverly hidden from view. An Arduino Uno keeps track of time through a real-time clock and operates four stepper motors that rotate the number wheels. When they move into position, their magnetic stickers become visible through the film and you can read the time.

The clock’s mechanical parts are 3D printed, while the digits were cut from a sheet of sticky magnetic foil using a vinyl cutter. If you’d like to try making something similar you’re in luck: [Moritz] made the design files and the Arduino sketch available on his GitHub page. Magnetic viewing films are pretty neat things to play with anyway, and can even be used to read hidden messages.

Continue reading “Magnet Clock Makes Field Lines Visible”

Audio Amp Puts VFDs To Work In An Unusual Way

It’s safe to say that most projects that feature a VFD emphasize the “D” aspect more than anything. Vacuum fluorescent displays are solid performers, after all, with their cool blue-green glow that’s just the right look for lots of retro and not-so-retro builds. But that doesn’t mean there aren’t applications that leverage the “V” aspect, such as this nifty audio preamp using VFDs as active components.

The inspiration behind [JGJMatt]’s build came from the Korg Nutube line of VFD-based low-voltage dual-triode vacuum tubes. Finding these particular components a little on the expensive side, [JGJMatt] turned to the old standby DM160 VFD indicator tube, which is basically just a triode, to see how it would fare as an amp. The circuit takes advantage of the low current and voltage requirements of the VFDs — the whole thing runs from a USB boost converter — by wedging them between a 2N3904 input stage and a 2N2007 MOSFET output. There’s a mix of SMD and through-hole components on the custom-etched PCB, with a separate riser card to show off the VFDs a little bit through the front panel of the 3D printed case.

All in all, we find this little amp pretty cool, and we love the way it puts a twist on the venerable VFD. We’ve seen similar VFD amps before, but this one’s fit and finish really pays off.