Emulating An Altair 8800 On An Apple II

The Altair 8800 was, to its creators, a surprise hit. Despite looking nothing like what we would today consider to be a computer, it sold thousands of units almost immediately upon its launch, way back in 1975. A few years later, the Apple II burst onto the scene, and the home computer revolution began in earnest.

Emulating older machines on newer hardware has always been a thing, and [option8] has coded an Altair 8800 emulator for the Apple II. Of course, if you don’t have one lying around, you can run this emulator on an Apple II emulator right in your browser. Honestly, it’s emulators all the way down.

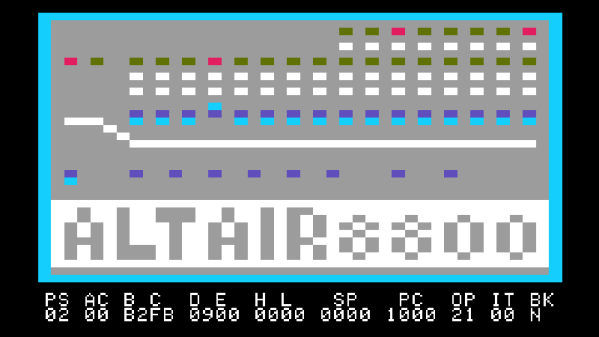
As far as emulators go, this is a particularly charming one, with the Altair’s front panel displayed in glorious color on the Apple’s 40 column screen. Replete with a full set of switches and blinking LEDs, it’s a tidy low-resolution replica of the real thing. Instructions to drive it are available, along with those for another similar emulator known as Apple80.

If that still hasn’t quenched your thirst, check out this Game Boy emulator that lives inside emacs.

FPGA Brings Arduboy To The Game Boy Advance

Hackaday readers are perhaps familiar with the Arduboy, an open source handheld gaming system that aims to combine the ease of Arduino development with the seething nostalgia the Internet has towards the original Nintendo Game Boy. While not quite the same as getting one of your games published for a “real” system, the open source nature of the Arduboy platform allows an individual to develop a game playable on a commercially manufactured device.
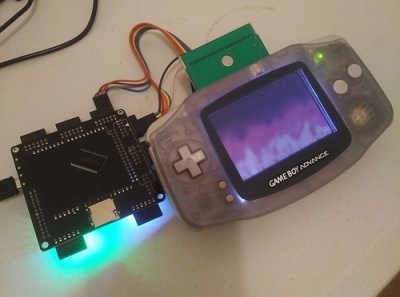
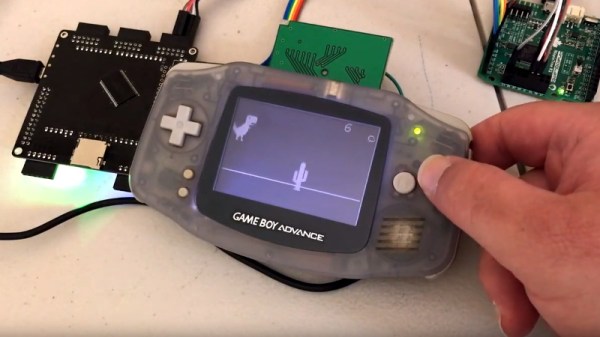
While the Arduboy hardware itself is actually quite slick, that hasn’t stopped people from trying to bring its games to other pieces of hardware. Now thanks to the efforts of [uXe], the Game Boy Advance is well on its way to becoming Arduboy compatible, in a way bringing the whole project full circle. Assuming this gadget becomes a commercial device (it sounds like that’s still up in the air), Arduboy developers will be able to proudly play their creations on the final and objectively best entry into the Game Boy line.

Getting to this point has been something of an adventure, as documented in a thread from the Arduboy forums. Members of the community wondered what it would take to get Arduboy games running on a real Game Boy, but pretty quickly it was decided that the original beige brick model wasn’t quite up to the task. Eventually its far more capable successor the Game Boy Advance became the development target, and different approaches were considered for getting existing games running on the platform.

While there were some interesting ideas, such as using the GBA’s link port to “feed” the system games over SPI, in the end [uXe] decided to look into creating an FPGA cartridge that would actually run the Arduboy games. In this scenario, the GBA itself is basically just being used as an interface between the FPGA and the human player. In addition to these low-level hardware considerations, there was considerable discussion about the more practical aspects of bringing the games to the new hardware, such as how to best scale the Arduboy’s 128 x 64 output to the GBA’s 240 × 160 screen.

As demonstrated in the videos after the break, [uXe] now as all the elements for playing Arduboy games on the GBA in place, including the ability to disable full screen scaling by using the shoulder buttons. Now he just needs to shrink the hardware down to the point it will fit inside of a standard GBA cartridge. Beyond that, who knows? Perhaps the appeal of being able to run Arduboy games on a real Game Boy is enough to warrant turning this hack into a new commercial product.

Thanks to a hardware swap we’ve seen Arduboy games played on the Dreamcast VMU, and [uXe] himself previously grafted Arduboy-compatible hardware into an original Game Boy, but being able to play these games on an unmodified Game Boy Advance obviously has its own appeal. At the very least, it will be a bit more ergonomic than using a hacked classroom gadget.

Continue reading “FPGA Brings Arduboy To The Game Boy Advance”

Raspberry Pi’s Latest Upgrade: The Compute Module 3+

We’ve become so used to the Raspberry Pi line of boards that have appeared in ever-increasing power capabilities since that leap-year morning in 2012 when the inexpensive and now ubiquitous single board computer was announced and oversold its initial production run. The consumer boards have amply fulfilled their mission in providing kids with a pocket-money computer, and even though they are not the most powerful in the class of small Linux boards they remain the one to beat.

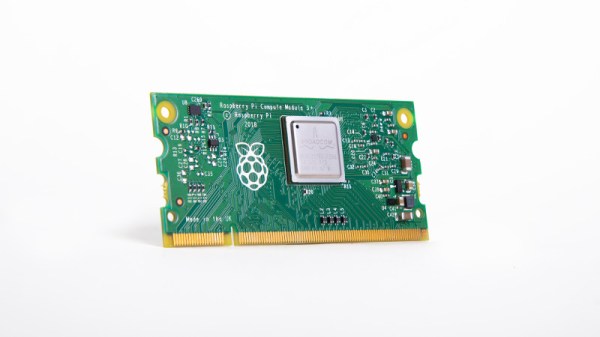
The other side of the Pi coin comes with the industrial siblings of the familiar boards, the Compute Module. This is a version of the Pi meant to be built into other products, utilizing a SODIMM connector as the hardware interface. Today brings news of a fresh addition to that range: the Compute Module 3+.

As you might expect from the nomenclature this brings the Broadcom BCM2837B0 processor from the Raspberry Pi 3B+ to the barebones SODIMM-style Pi, but unexpectedly they have also made it available with a range of different size eMMC devices installed. In place of the 4 GB capacity of previous offerings are 8, 16, and 32 GB devices, with an intriguing new “lite” variant that has no onboard storage at all.

Perhaps the saddest thing from a Hackaday reader’s perspective is that as the Pi blog post notes due to commercial sensitivities they have little idea what products many of the Compute Modules they sell end up in — a mystery we’d really like to solve. No doubt there are some fascinating applications just waiting do be discovered by hardware hackers in a decade’s time as units enter the surplus market, but for now we’ll have to be content with community offerings. This stereoscopic camera is a recent one, or perhaps one of several handheld game consoles.

This Computer Mouse Houses A Mouse Computer

Everyone has heard of a computer mouse before, but what about a mouse computer?

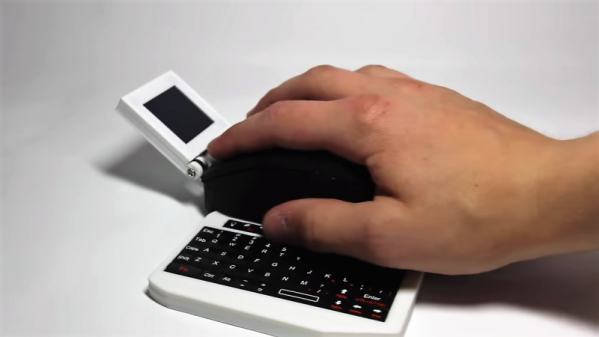
Granted, [Electronic Grenade]’s all-in-one computer in an oversized mouse-shaped case is almost without practical value. But that’s hardly the point, which was just to do something cool. Inspiration came from keyboards stuffed with a Raspberry Pi to make a mostly-all-in-one machine; this Rodent of Unusual Size is the next logical step. With a Pi Zero W and a LiPo battery alongside a mouse mechanism inside the 3D-printed case – alas, no real mouse currently on the market would house everything – the computer sports not only a tiny and nearly-usable LCD display, but also a slide-out Bluetooth keyboard. The ergonomics of a keyboard at right angles to the display gives us pause, but again, usability is not the point. And don’t expect much in the performance department – the rig barfs after a few seconds of playing Minecraft.

Still, for all its limitations, this mouse computer has a certain charm. We always enjoy “just because I can” projects, whether they be a Gameboy ukelele or a fire-breathing animatronic duck. Such projects are often valuable not for what they produce, but for pushing into areas where no one has gone before.

Continue reading “This Computer Mouse Houses A Mouse Computer”

Use Your Game Boy As A Wireless Controller

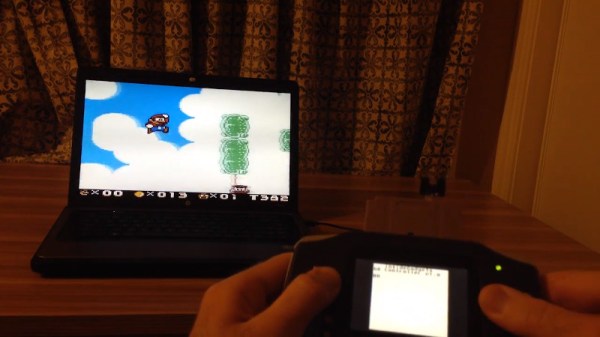
Like many retro favourites, the Game Boy is in no way dead — development continues apace through its many fans.But what about the hardware side? This is a particularly interesting one: [Alex] wondered if a Game Boy could be readily used as a wireless controller. Set out to make it happen, the final product is a game cartridge that makes the classic handheld a wireless controller.

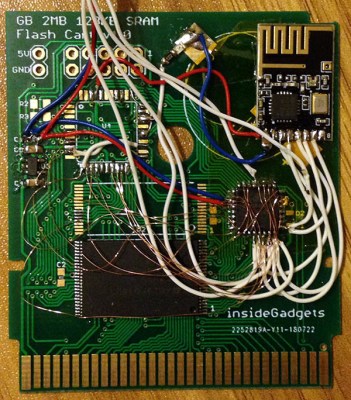
It’s achieved quite elegantly, with a custom cartridge used to turn the Game Boy into a controller while requiring no modification to the handheld. The cartridge contains a flash chip to store the ROM, along with an ATmega48PA microcontroller and an NRF24L01 to do the talking. Upon powerup, the Game Boy runs code from the ROM, and the microcontroller is in charge of reading button states and sending them to the NRF24L01 for transmission. The program stored on the ROM also allows configuration changes to be made from the Game Boy itself, such as choosing the appropriate wireless channel.

The cartridge transmitter can be used with a variety of receivers. [Andy] has developed a USB HID joystick emulator to allow the Game Boy to be used with PCs, as well as a receiver for the GameCube, too. Yes, that’s right — you can now play Super Smash Bros. with a weirder controller than all your friends. A Super Nintendo version is also in the works. Perhaps the coolest feature, however, is that the cart can use its radio link to communicate with another Game Boy running the same cartridge. [Andy] demonstrates this with a basic game of Pong being played between two Game Boy Advances.

Working on retro hardware can be great fun — things are well documented, parts are cheap, and there’ll be plenty of fans cheering you on, too. [Andy] has even made the hardware available for purchase on Tindie and his website if you’re not quite comfortable rolling your own.

The Game Boy platform remains ripe for hacking – you can even take screenshots with a logic analyzer these days. Video after the break.

Continue reading “Use Your Game Boy As A Wireless Controller”

Add-On Board Brings Xbox 360 Controllers To N64

Many of the games released on the Nintendo 64 have aged remarkably well, in fact a number of them are still considered must-play experiences to this day. But the years have not been so kind to the system’s signature controller. While the N64 arguably defined the console first person shooter (FPS) genre with games like “Goldeneye” and “Perfect Dark”, a modern gamer trying to play these classics with the preposterous combination of analog and digital inputs offered by the N64 controller is unlikely to get very far.

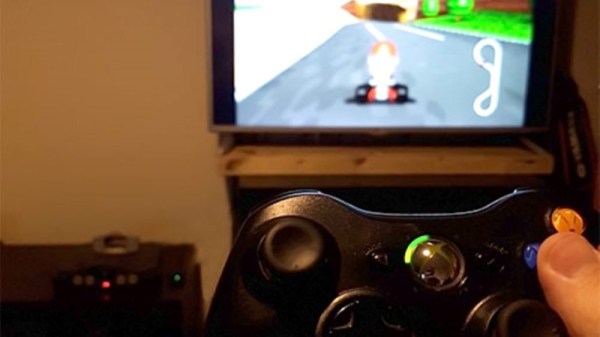
Of course, you could play N64 games in an emulator and use whatever controller you wish. But where’s the challenge in taking the easy way out? [Ryzee119] would much rather take the insanely complex route, and has recently completed work on an add-on board that let’s you use Xbox 360 wireless controllers on Nintendo’s 1996 console. He’s currently prepping schematics and firmware for public release, with the hope that support for additional USB controllers can be added by the community.

Nintendo historians may recall that the N64’s controllers had an expansion port on the bottom where you would connect such accessories as the “Rumble Pak” and “Controller Pak”. The former being an optional force feedback device, and the latter a rather oddly named memory card for early N64 games which didn’t feature cartridge saves. Only “90’s Kids” will recall the struggle of using the “Rumble Pak” when a game required the “Controller Pak” to save progress.

Thankfully [Ryzee119] has solved that problem by adding battery backed storage to his adapter along with some clever code which emulates the “Controller Pak”. Similarly, the “Rumble Pak” is emulated by the Xbox 360 controller’s built-in force feedback and a bit of software trickery. Specific button combinations allow for enabling and disabling the various virtual accessories on the fly.

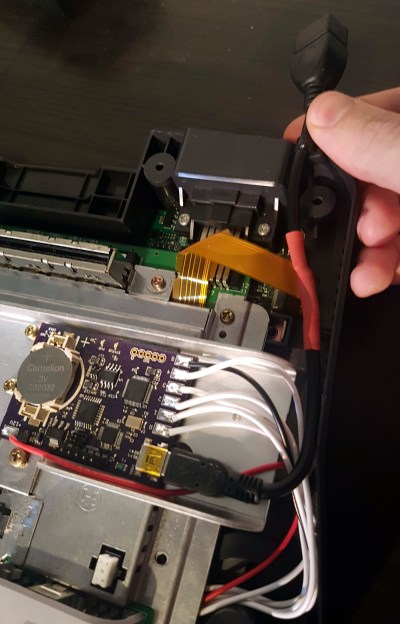
But the best part of this modification might be how unobtrusive the whole thing is. Not only does it allow you to still use the original controllers and accessories if you wish, but it only requires soldering a handful of wires to the console’s motherboard. Thanks to the surprising amount of dead space inside the system’s case, it’s not even a challenge to fit the board inside. You do need to use the official USB Xbox 360 controller receiver, but even here [Ryzee119] opted to put a USB port on the board so you could just plug the thing in rather than having to cut the connector off and trying to solder it to the board yourself.

It probably won’t come as a surprise that this isn’t the first time [Ryzee119] has fiddled with the internals of a classic Nintendo system. We’ve previously covered his fantastic custom PCB to fit a Raspberry Pi Zero into a GameBoy Advance.

[Thanks to Gartral for the tip.]

Game Boy Camera mounted to Canon Lens using EF Mount

A Canon Lens Adapter For The Game Boy Camera

Released in 1998, the Game Boy camera was a bit ahead of its time. This specialized Game Boy cartridge featured a 128×128 pixel CMOS sensor and took 4-color greyscale photos. The camera even rotated, allowing for selfies years before that word existed.

The fixed lens on this camera meant no zoom was possible. [Bastiaan] decided to address this shortcoming by building a Canon EF Lens Mount. The resulting build looks hilarious, but actually takes some interesting photos.

[Bastiaan] designed the mount using Rhino 3D, and printed it out on a Monoprice 3D printer. After some light disassembly, the mount can be screwed onto the Game Boy Camera. With the massive 70-200 f4 lens and 1.4x extender shown here, the camera gets a max focal distance of just over 3000 mm.

One issue with the Game Boy Camera was the limited options for doing anything with the photos. They could be transferred to other Game Boy Camera cartridges, or printed using the Game Boy Printer. Fortunately, [Brian Khuu] has a modern day solution that emulates the Game Boy Printer using an Arduino. This lets you get PNG files out of the device.