You might not think that it would be possible to have a favorite optimization algorithm, but I do. And if you’re well-versed in the mathematical art of hill climbing, you might be surprised that my choice doesn’t even involve taking any derivatives. That’s not to say that I don’t love Newton’s method, because I do, but it’s just not as widely applicable as the good old binary search. And this is definitely a tool you should have in your toolbox, too.
Those of you out there who slept through calculus class probably already have drooping eyelids, so I’ll give you a real-world binary search example. Suppose you’re cropping an image for publication on Hackaday. To find the best width for the particular image, you start off with a crop that’s too thin and one that’s too wide. Start with an initial guess that’s halfway between the edges. If this first guess is too wide, you split the difference again between the current guess and the thinnest width. Updated to this new guess, you split the differences again.
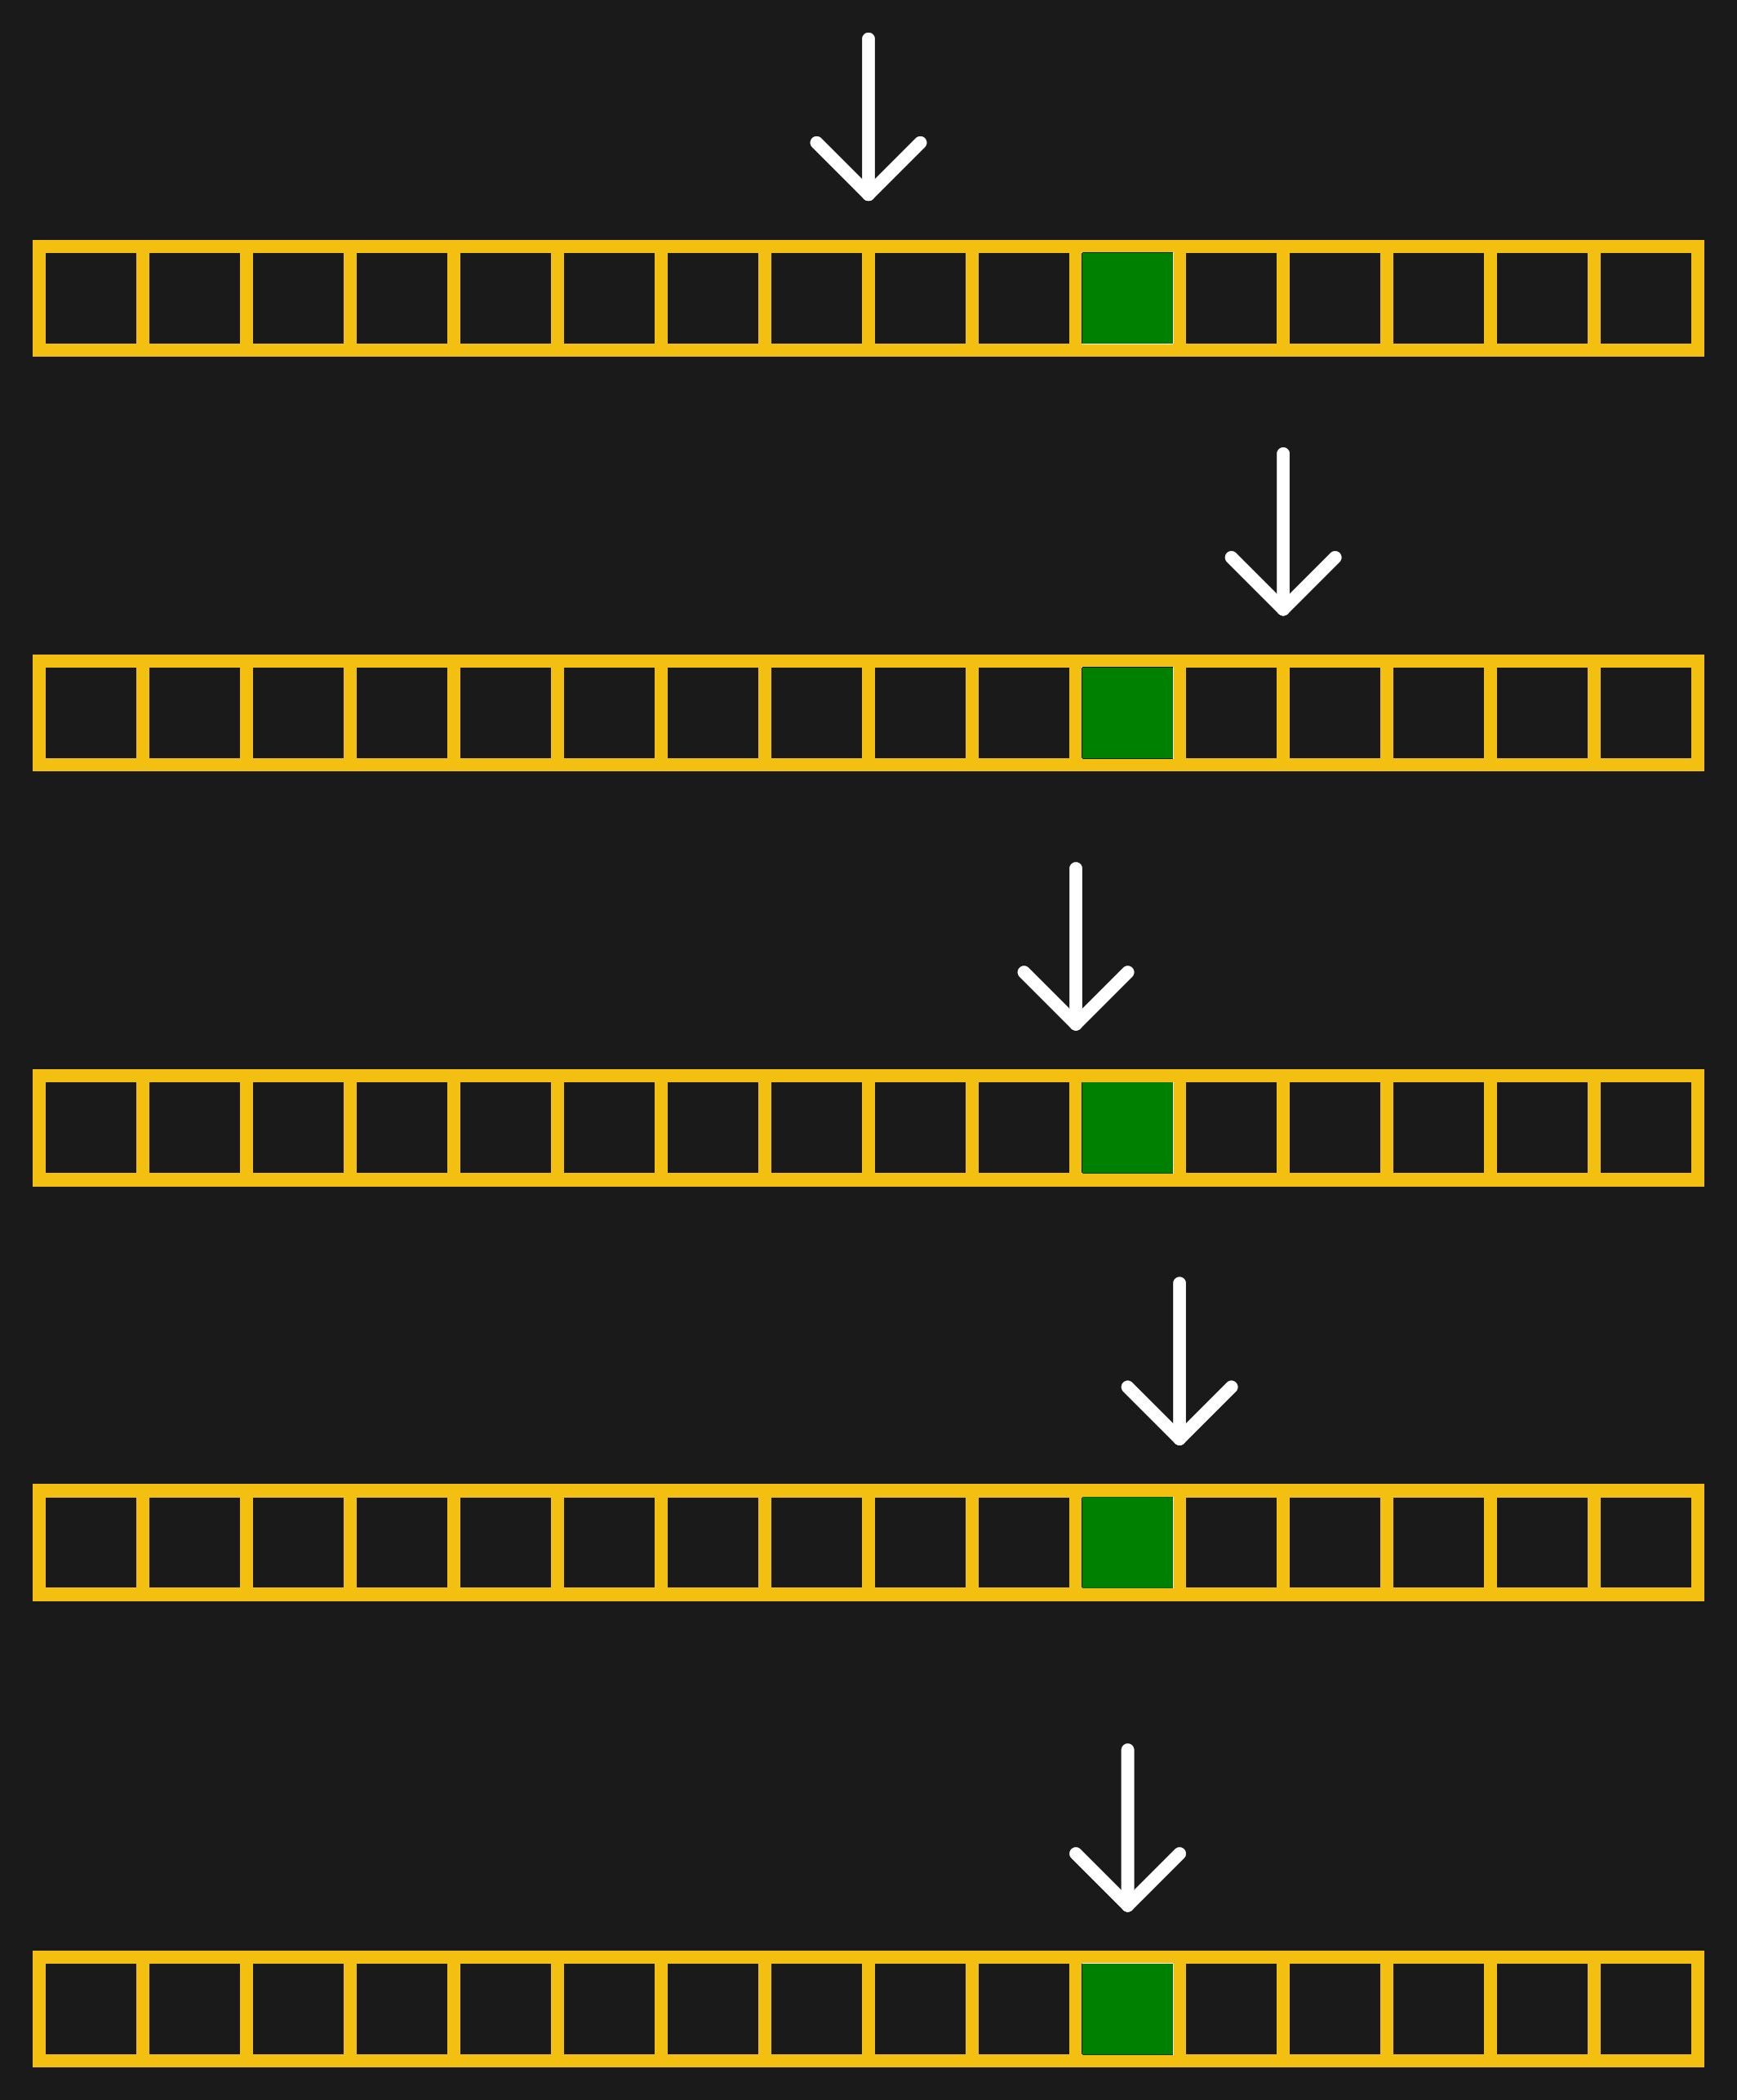
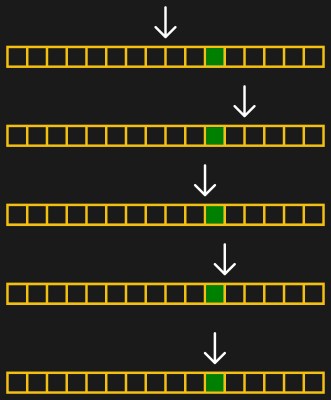 But let’s make this even more concrete: an image that’s 1200 pixels wide. It can’t get wider than 1200 or thinner than 0. So our first guess is 600. That’s too thin, so we guess 900 — halfway between 600 and the upper limit of 1200. That ends up too wide, so we next guess 750, halfway between 600 and 900. A couple more iterations get us to 675, then 638, and then finally 619. In this case, we got down to the pixel level pretty darn fast, and we’re done. In general, you can stop when you’re happy, or have reached any precision goal.
[Ed note: I messed up the math when writing this, which is silly. But also brought out the point that I usually round the 50% mark when doing the math in my head, and as long as you’re close, it’s good enough.]
What’s fantastic about binary search is how little it demands of you. Unlike fancier optimization methods, you don’t need any derivatives. Heck, you don’t even really need to evaluate the function any more precisely than “too little, too much”, and that’s really helpful for the kind of Goldilocks-y photograph cropping example above, but it’s also extremely useful in the digital world as well. Comparators make exactly these kinds of decisions in the analog voltage world, and you’ve probably noticed the word “binary” in binary search. But binary search isn’t just useful inside silicon. Continue reading “Our Favorite Things: Binary Search” →