The ESP32-P4 is the new hotness on the microcontroller market. With RISC-V architecture and two cores running 400 MHz, to ears of a certain vintage it sounds more like the heart of a Unix workstation than a traditional MCU. Time’s a funny thing like that. [DynaMight] was looking for an excuse to play with this powerful new system on a chip, so put together what he calls the GB300-P4: a commercial handheld game console with an Expressif brain transplant.
 Older ESP32 chips weren’t quite up to 16-bit emulation, but that hadn’t stopped people trying; the RetroGo project by [ducalex] already has an SNES and Genesis/Mega Drive emulation mode, along with all the 8-bit you could ask for. But the higher-tech consoles can run a bit slow in emulation on other ESP32 chips. [DynaMight] wanted to see if the P4 performed better, and to no ones surprise, it did.
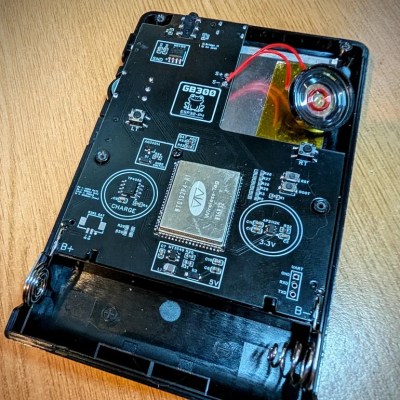
If the build quality on this handheld looks suspiciously professional, that’s because it is: [DynaMight] started with a GB300, a commercial emulator platform. Since the ESP32-P4 is replacing a MIPS chip clocked at 914 MHz in the original — which sounds even more like the heart of a Unix workstation, come to think of it — the machine probably doesn’t have better performance than it did from factory unless its code was terribly un-optimized. In this case, performance was not the point. The point was to have a handheld running RetroGo on this specific chip, which the project has evidently accomplished with flying colours. If you’ve got a GB300 you’d rather put an “Expressif Inside” sticker on, the project is on github. Otherwise you can check out the demo video below. (DOOM starts at 1:29, because of course it runs DOOM.)
The last P4 project we featured was a Quadra emulator; we expect to see a lot of projects with this chip in the new year, and they’re not all going to be retrocomputer-related, we’re sure. If you’re cooking up something using the new ESP32, or know someone who is, you know what to do.
Continue reading “ESP32-P4 Powers Retro Handheld After A Transplant” →


