Ping-pong balls have many uses: apart from playing table tennis, they have been used for countless art projects, science experiments, and even to raise ships from the bottom of the ocean. As it turns out, they also come in handy as diffusers for LED pixels, allowing the construction of large-size displays without requiring large individual LEDs.
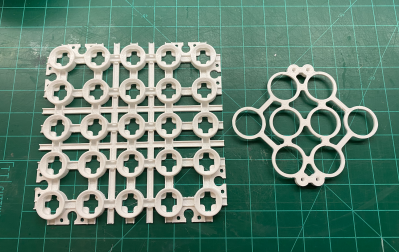
[david] designed an LED ping-pong ball display using 3D printed components, which allows for the construction of arbitrarily-large LED displays thanks to a strictly modular design. The basic unit is a small piece that holds a single LED module and has a cup-like structure for attaching a standard table tennis ball. Twenty-five of these basic units combine together into a panel that also contains wiring ducts. Finally, any number of these panels can be combined into a display, thanks to clips that give the structure rigidity in the out-of-plane direction.
Of course, simply mounting LED modules is not enough to create a display: the LEDs also need to be connected to power and data lines. [david] didn’t relish the thought of having to cut and strip 1,800 pieces of wire, and therefore devised a clever way of automating this process: he put a bunch of wires onto a piece of card stock and used a laser cutter to burn off the insulation at regular intervals. Then it was simply a matter of soldering these wires onto the LEDs and snipping off pieces along the data bus.
The finished panel is driven by a combination of a Teensy 3.2 to generate the data signals and a Raspberry Pi to process the images. You can see the rather impressive result in the video embedded below; if this inspires you to build your own, you’ll be happy to hear that the STL files and all code are available on [david]’s project page.
Massive LED displays are always fun to watch, and although this is not the first one to use ping-pong balls as diffusers, its modularity and open-source design makes this one perhaps the easiest to replicate. Assuming you have a good supplier of ping-pong balls, of course.
Continue reading “Modular Design Enables Huge Ping-Pong Ball LED Displays”